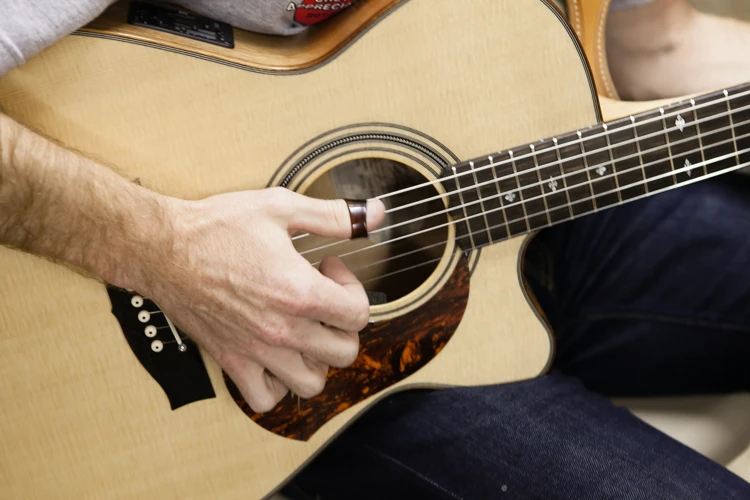
Country music has a rich history filled with talented musicians who have left their mark on the genre through their unique playing styles. One of the most distinctive techniques in country guitar playing is fingerpicking, a method that involves plucking the strings with the fingertips rather than using a pick. This technique creates a melodic and intricate sound that has become synonymous with country music. In this article, we will explore the fingerpicking secrets of some of the most famous country guitarists and learn how they achieved their signature sounds.
Merle Travis: The Father of Travis Picking
Merle Travis is often credited as the pioneer of a fingerpicking style known as Travis picking. This technique involves alternating the bass notes with the melody, creating a rolling and syncopated sound. Travis picking is characterized by its fast-paced finger movements and intricate patterns that give the guitar a full and rich sound. Merle Travis’s influence can be heard in the playing of countless country guitarists who have adopted his style and incorporated it into their own music.
Secret #1: Thumb Independence
One of the key secrets to mastering Travis picking is developing thumb independence. In Travis picking, the thumb is responsible for playing the bass notes while the fingers handle the melody. This requires precise coordination and control to maintain a steady rhythm while simultaneously playing intricate melodies. To improve thumb independence, practice playing simple bass patterns with your thumb while plucking the melody with your fingers. Gradually increase the complexity of the patterns to challenge yourself and improve your coordination.
Secret #2: Chord Inversions
Another secret to achieving the Merle Travis sound is utilizing chord inversions. Travis often used inverted chord shapes to create unique and interesting voicings that added depth to his playing. Experiment with different chord shapes and inversions to find new ways to harmonize your melodies and create a more dynamic sound. By incorporating chord inversions into your fingerpicking patterns, you can emulate the rich and complex sound that defined Merle Travis’s playing style.
Chet Atkins: The Country Gentleman
Chet Atkins is another legendary country guitarist known for his impeccable fingerpicking technique. Atkins was a master of creating lush and intricate arrangements using fingerstyle guitar playing. His smooth and precise execution of melodies and harmonies set a high standard for aspiring country guitarists to emulate. Atkins’s playing style incorporated elements of jazz and classical music, giving his music a sophisticated and polished sound that set him apart from his contemporaries.
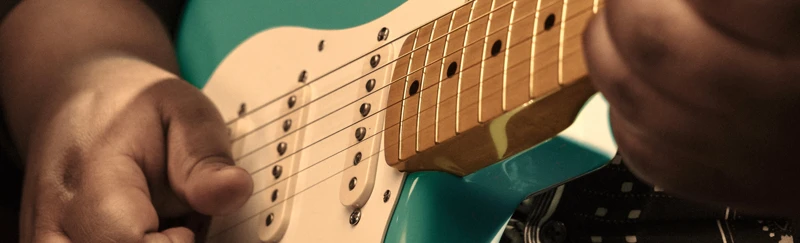
Secret #3: Hybrid Picking
One of Chet Atkins’s fingerpicking secrets was his use of hybrid picking, a technique that combines fingerpicking with the use of a pick. By holding a pick between his thumb and index finger and using his remaining fingers to pluck the strings, Atkins was able to achieve a versatile and dynamic sound that blended the warmth of fingerstyle playing with the precision of a pick. Experiment with hybrid picking to add a new dimension to your fingerstyle playing and create a more varied and expressive sound.
Secret #4: Fingerstyle Patterns
Atkins’s fingerstyle patterns were another key element of his signature sound. By developing a repertoire of intricate fingerpicking patterns, Atkins was able to create complex and engaging arrangements that showcased his technical prowess and musical creativity. Practice different fingerstyle patterns, such as arpeggios, alternating bass notes, and syncopated rhythms, to expand your fingerpicking vocabulary and enhance your playing style. By mastering a variety of fingerstyle patterns, you can create captivating and dynamic guitar arrangements that capture the essence of Chet Atkins’s legendary playing.
Jerry Reed: The Guitar Man
Jerry Reed was a multi-talented musician known for his virtuosic guitar playing and distinctive fingerpicking style. Reed’s playing combined elements of country, jazz, and rockabilly music to create a sound that was uniquely his own. His fast-paced and energetic fingerpicking patterns showcased his technical skill and musical versatility, making him a revered figure in the world of country music.
Secret #5: Percussive Techniques
One of Jerry Reed’s fingerpicking secrets was his use of percussive techniques to add rhythmic interest to his playing. By incorporating percussive elements, such as slaps, taps, and muted strings, Reed was able to create a dynamic and rhythmic groove that enhanced his guitar arrangements. Experiment with percussive techniques to add a new dimension to your fingerpicking style and create a more engaging and lively sound. By incorporating percussive elements into your playing, you can emulate Jerry Reed’s energetic and rhythmic guitar style.
Secret #6: Double Stops and Harmonics
Reed often used double stops and harmonics to embellish his melodies and add texture to his playing. Double stops involve playing two notes simultaneously, creating a harmonized sound that adds depth to the music. Harmonics, on the other hand, produce a bell-like tone when the strings are lightly touched at specific points. By incorporating double stops and harmonics into your fingerpicking patterns, you can create a more nuanced and expressive sound that captures the essence of Jerry Reed’s playing style.
Looking to uncover the fingerpicking secrets of famous country guitarists? Explore articles on classic country fingerpicking patterns, famous country guitarists who use hollow-body guitars, the history of fingerpicking in country music, famous country guitarists known for tapping techniques, and fingerpicking techniques in country songs for a deeper understanding of this unique musical style!
Conclusion
In conclusion, the fingerpicking secrets of famous country guitarists reveal the depth and complexity of the technique. From Merle Travis’s innovative Travis picking to Chet Atkins’s sophisticated hybrid picking and Jerry Reed’s energetic percussive techniques, each guitarist brought their unique style and creativity to the art of fingerpicking. By studying and incorporating these fingerpicking secrets into your own playing, you can expand your musical vocabulary, enhance your technical skills, and create captivating guitar arrangements that pay homage to the rich tradition of country music. Embrace the secrets of these legendary country guitarists and let their fingerpicking techniques inspire your musical journey.