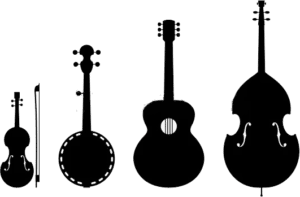
The banjo is a unique and important instrument in the history of American music. While it is often overshadowed by the guitar, the banjo has a sound all its own and is an essential part of the bluegrass and old-time music scenes.
One of the most important things about playing the banjo is getting the sound right. This is done by micing the banjo correctly. There are a few things to consider when you want to answer the question “How to mic a banjo?”.
Micing a Banjo Guide
The banjo is a very loud instrument, and it can be difficult to hear the banjo player if the instrument is not miced. Micing the banjo allows the player to be heard more clearly. It also allows the player to control his or her sound.
Features of Banjo Sound Amplification with a Microphone
The main features of banjo sound amplification with a microphone are volume control, tone control, and reverb. You can use these features to adjust the sound of your banjo to your liking. Volume control allows you to adjust the overall loudness of the banjo. Tone control allows you to adjust the treble and bass levels to create different sound effects. Reverb adds an echo effect to the banjo sound.
Features of Banjo Recording
Banjo recording is the process of converting the sound of a banjo into a digital file. This can be done using a microphone or by connecting the banjo to a digital recorder. The process of banjo recording is relatively simple and can be done by anyone with a basic understanding of recording equipment.
Guide on how to mic a banjo recording
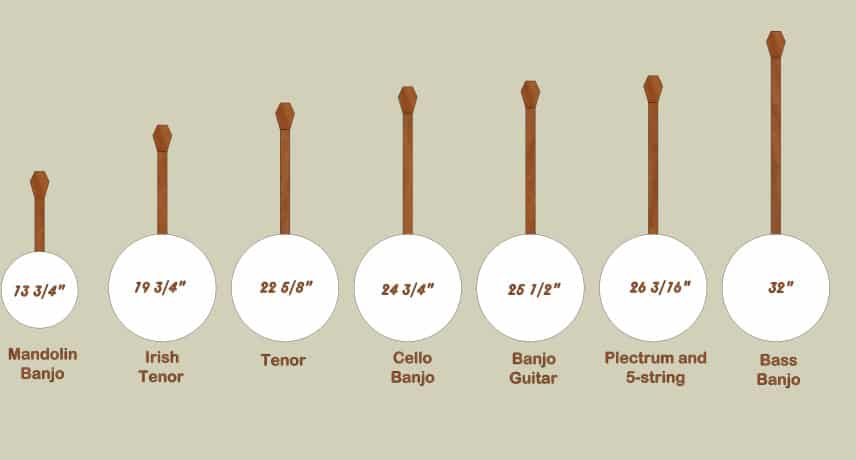
1. Choose the type of banjo you wish to record
There are several main types of banjo:
 Mandolin banjo
- Irish tenor
- Tenor
- Cello banjo
- Banjo guitar
- Plectrum and 5-string
- Bass banjo
 Mandolin banjo
Each type of banjo has a unique sound that can be captured through recording.
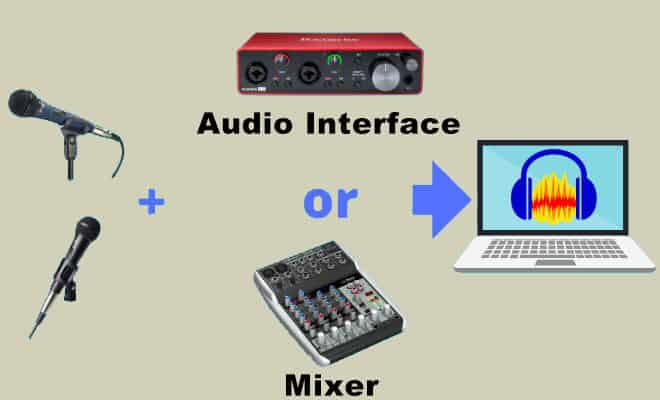
2. Connect your banjo to the recording device
This can be done using a microphone or by connecting the banjo directly to the recorder.
3. Place the microphone or recorder in the desired position
This will depend on the type of sound you wish to capture.

4. Start recording
Once you have everything in place, you can begin recording the banjo. Be sure to pay attention to the sound quality and make sure the recording is clear.This will depend on the type of sound you wish to capture.
4. Stop recording
When you are finished recording, be sure to save the file in a format that can be easily accessed and edited.
Microphone Placement Techniques
Let’s have a look at the best ways to mic a banjo.
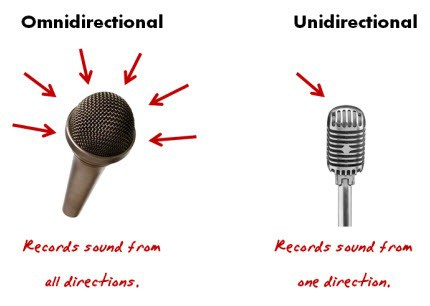
Omnidirectional Technique
This technique is used when you want to capture sound from all directions. To do this, you will need to place the microphone in the center of the room.
Unidirectional Technique
This technique is used when you want to capture sound from one direction. To do this, you will need to place the microphone in front of the sound source.
Bidirectional Technique
This technique is used when you want to capture sound from two directions. To do this, you will need to place the microphone in front of the sound source and another microphone behind the sound source.
Shotgun Technique
This technique is used when you want to capture sound from a specific direction. To do this, you will need to place the microphone in front of the sound source and aim it at the sound source.
What Types of Microphones Will Fit?
Micing the banjo can be done with a variety of microphones. The type of microphone that you use will depend on the sound that you are trying to achieve.
If you are looking for a bright, twangy sound, then a dynamic microphone is a good choice. Dynamic microphones are designed to handle high levels of sound, and they can handle the sound of the banjo without distortion.
If you are looking for a warmer sound, then a condenser microphone is a good choice. Condenser microphones are sensitive to the sound of the banjo, and they can capture the nuances of the sound.
Whatever type of microphone you choose, make sure that you position the microphone properly. The microphone should be placed close to the banjo, but not so close that it picks up the sound of the player’s fingers on the strings.
Micing a Banjo FAQ
Where Do You Put the Mic on Banjo?
There are a few things to consider when placing a microphone on a banjo. The type of microphone, the size and shape of the banjo, and the playing style all play a role in deciding where to place the mic.
How Do You Mic a Banjo for Live Performance?
1. Get a mic with a good frequency response.
2. Find a good spot for the mic.
3. Try to get the mic as close as possible to the banjo and get at an angle that will capture the sound of the banjo without picking up too much of the sound of the banjo’s surface.
Conclusion
Finally, banjos are often played in small groups or as solo instruments. In order to capture the sound of the banjo, it is important to use a microphone. A microphone will pick up the sound of the banjo and amplify it so that it can be heard by the audience.
There are a few reasons why micing a banjo is important. First, it allows the instrument to be heard more clearly. Second, it can help the banjo player to control his or her sound. Third, micing can help to reduce feedback.
Also read: