Picture this: you’re on stage performing your best country music, strumming your trusty guitar, and suddenly, a string snaps in the middle of your set. Your performance is ruined, and the embarrassment is real. But, what if we told you that this could have been easily avoided by regularly changing your guitar strings? It’s true, changing your guitar strings is a crucial part of maintaining the quality of your sound, preventing accidents, and ensuring consistency. In this article, we’ll explore the benefits of changing your guitar strings, when to change them, how to choose the right ones, tools required in the process, and a step-by-step guide to changing them. Let’s dive in and give your country music the sound it deserves.
The Benefits of Changing Your Guitar Strings

If you’re a country music enthusiast, you know the importance of good guitar strings. Changing your guitar strings regularly is one of the most important tasks you can do to maintain the quality of your sound. Not only does it improve your tone, but it can also help prevent breaks and ensure consistency in sound. In this section, we’ll explore the benefits of changing your strings, so you can be sure that you’re getting the most out of your guitar. To learn more about the best strings for acoustic guitar in country music, check out our guide here.
Improving Your Tone
Regularly changing your guitar strings can greatly improve the tone of your playing. Over time, strings become dull and lose their brightness and clarity, resulting in a muddy and unbalanced sound. By changing your strings, you can restore that crisp and lively tone that is essential for country music.
It is important to note that the type of strings you choose can also affect the tone of your guitar. Whether you prefer coated or uncoated strings, alternative materials, or a specific brand, selecting the right strings can help you achieve the desired sound for your playing style. For more information on choosing the right strings for country music, check out our article on top brands and features of acoustic guitar strings for country music and our article on coated vs. uncoated strings for country music.
Below is a table summarizing the benefits of changing your guitar strings regularly for improving tone:
| Benefits of Changing Strings for Tone |
|---|
| Restores brightness and clarity to your sound |
| Eliminates dullness and muddiness |
| Helps achieve a desired sound with the right string selection |
| Improves harmonics and sustain |
| Enhances the overall quality of your playing |
In addition to improving your tone, regularly changing your guitar strings can also prevent breaks and snaps. Let’s explore this benefit further in the next section.
Preventing Breaks and Snaps
Regularly changing your guitar strings can have a huge impact on preventing breaks and snaps during your country music performances. When you use old, worn-out strings, they are more likely to break unexpectedly, which can create a frustrating and unwanted interruption in your performance. To avoid this situation, consider the following benefits of changing your guitar strings regularly:
- Reduced wear and tear: Over time, guitar strings accumulate wear and tear from playing, which can create small cracks and weak spots in the strings. These areas are more prone to snapping, and if left unattended, can cause damage to your guitar’s bridge or other parts. By regularly changing your strings, you can ensure that they remain strong and reliable, reducing the risk of breaks and snaps.
- Improved tension: As you play your guitar, the tension on the strings gradually changes. This is especially true if you play with a lot of force or bend the strings frequently during solos or other parts of your songs. When the tension becomes uneven across the length of the string, it can lead to breaks and snaps. Changing your guitar strings regularly helps maintain the proper amount of tension, reducing the risk of sudden breaks or snaps.
- Enhanced performance: When guitar strings become worn and dirty, they can have a negative impact on your guitar’s overall sound quality. The sound may become dull or muffled, and the strings may lose their ability to sustain notes or provide clear harmonics. By changing your guitar strings regularly, you can ensure that your guitar sounds its best during every performance.
In addition to preventing breaks and snaps, changing your guitar strings also has a host of other benefits, including improving your tone, ensuring consistency in sound, and allowing you to experiment with different string gauges and materials. By taking these steps, you can keep your country music performances sounding great and avoid any unwanted interruptions caused by broken or snapped strings.
To learn more about the importance of changing guitar strings regularly, check out our guide on acoustic guitar strings longevity. You can also explore some of the top brands and features of acoustic guitar strings for country music, as well as alternative string materials that may be of interest to you depending on your playing style and preferences.
Ensuring Consistency in Sound
Regularly changing your guitar strings is crucial to ensure consistency in sound. As we play our guitar over time, the strings accumulate dirt, oil, and sweat from our hands that cause them to deteriorate. The buildup of these substances can change the tension and weight of the strings, causing an alteration in tone, volume, and sustain. This inconsistency can make it more difficult to play, and create frustration when trying to achieve a particular sound.
Consistency in sound is essential for creating a steady and dependable country sound. By changing your strings regularly, you can rely on your guitar to produce the same tone, volume, and sustain time after time. Along with a high-quality guitar, this consistency will help you elevate your country music game and make you stand out.
To ensure that your guitar strings produce a consistent sound, it’s important to change them at the right time and with the right materials. Choosing the right strings includes considering the material and thickness, which can greatly affect the tone and playability of your instrument. To learn more, check out alternative string materials for country music
The quality of the strings is another factor that can affect consistency. While many brand options exist, some top brands of acoustic guitar strings have developed a reputation for being the most reliable, durable, and offering the most high-quality sound for country music. To find out which brands and features to consider, check out our article on top brands acoustic guitar strings for country music features.
Every guitarist should focus on maintaining a consistent sound, and this means checking and changing your strings regularly. Not only will you be able to rely on your guitar to produce a consistent sound, but consistent sound production will improve your playing style and the musicians you play with. So what are you waiting for? Start changing your strings and notice the difference in your sound!
When to Change Your Guitar Strings

As a guitarist, you may be wondering how often you should change your guitar strings. The truth is, it depends on several factors, including how frequently you play, how hard you play, and the type of strings you use. It can be difficult to know exactly when to change your guitar strings, but there are some signs to look out for that indicate it’s time for a change. In this section, we’ll explore the frequency of string changes and some common signs that your strings may need to be replaced. So, how do you know when it’s time to swap out your old strings? Let’s find out.
Frequency
Finding the right frequency for changing your guitar strings
Changing guitar strings may seem like a tedious task, but it is one that should not be underestimated. The frequency at which you change your guitar strings can significantly affect the quality of your guitar’s sound. However, determining how often you need to change your guitar strings can be a bit confusing. Here are some factors to consider when deciding how often you should change your guitar strings:
- Playing frequency: The more often you play, the more wear and tear your guitar strings will endure. If you play every day, you will need to change your strings more frequently than if you only play once a week.
- Sweat: Sweat from your fingers can corrode the strings and cause them to break down faster. If you tend to sweat a lot when playing, you may need to change your strings more often.
- Environmental factors: If you live in a humid area, your guitar strings may rust and degrade more quickly. Similarly, extreme temperatures can cause your guitar strings to expand and contract, causing them to break or lose their tone.
- Personal preference: At the end of the day, how often you change your guitar strings is a matter of personal preference. Some guitarists enjoy the bright, crisp sound of new strings and prefer to change them after every gig, while others prefer the mellower sound of older strings and may not change them for weeks or even months.
Keep in mind that even if your guitar strings look fine, they may still be due for a change. Over time, strings lose their brightness and become dull, affecting the overall sound. As a general rule of thumb, you should change your guitar strings every three to four months if you play regularly. However, if you notice any of the signs discussed in the next section, it may be time for a string change even sooner.
Signs Your Strings Need Changing
As a country musician, it’s essential to keep an ear out for the signs that your guitar strings need changing. Here are some common indicators that it’s time to swap out your old strings for new ones:
- Lack of tone: If your guitar sounds dull or muted, even when played loudly, it’s likely that your strings have lost their brilliance and need replacing.
- Difficulty staying in tune: When your strings are old, they may have stretched or widened, making it difficult for your guitar to maintain its tuning. If you find yourself constantly tuning your guitar during practices or performances, it’s a sure sign that your strings need changing.
- Lack of sustain: If your guitar notes are dying off prematurely, it may be due to worn-out strings that can no longer hold tension and resonance.
- Visual clues: Sometimes the best way to know when to change your strings is to simply inspect them. Look for signs of rust, discoloration, or fraying. If any of these are present, it’s time to invest in a new set of strings.
- Breaks and snaps: As a country musician, the last thing you want is a broken string in the middle of a performance! If you find yourself experiencing frequent string breaks or snaps, it’s likely because your strings are old and worn out.
By paying attention to these warning signs, you can ensure that your guitar always sounds its best and that you’re always ready to impress your audience. Remember, changing your guitar strings is a simple and affordable way to maintain consistency in your tone and prevent unnecessary equipment damage. So before your next gig, be sure to give your guitar a thorough inspection and invest in a fresh set of strings if needed.
Choosing the Right Strings for You
Selecting the perfect guitar strings can be a daunting task, especially for beginners. With so many options available in the market, it’s normal to feel perplexed. You want to find strings that not only match well with your playing style but are also comfortable on your fingers. In this section, we will discuss the different types of strings and gauges available and provide you with insights on how to choose the right ones for you. So, let’s dive in and explore the world of guitar strings!
Types of Strings
Guitar strings come in a range of materials, with each material producing a unique sound. Below is a table outlining the different types of strings, their characteristics, and the sound they produce:
| Type of String | Material | Description | Sound |
|---|---|---|---|
| Steel Strings | Steel | Most commonly used type of string, durable and bright | Crisp, bright sound with a longer sustain |
| Phosphor Bronze Strings | Bronze with Phosphor added | Warmer and fuller sound | Rich, warm sound with a shorter sustain |
| Nickel Strings | Nickel-plated steel | Softer feel and less bright than steel strings | Warmer sound with less sustain |
| Silk and Steel Strings | Silk and steel | Soft and easy on the fingers | Mellow, subdued sound with less volume and sustain |
| Flatwound Strings | Flat-wound steel | Smooth feel and less finger noise | Mellow, jazz-like tone with low sustain and volume |
Choosing the right type of string is a personal preference and can vary based on the style of music you’re playing. If you’re looking for a bright and crisp sound, steel strings are a good choice. If you prefer a warmer and more mellow sound, phosphor bronze strings are a great option. Nickel strings are a good middle ground between steel and phosphor bronze, and silk and steel strings are ideal for those who want a softer feel. Flatwound strings are most commonly used in jazz music due to their mellow tone. Regardless of the type of string you choose, make sure to select the appropriate gauge for your guitar to ensure optimal sound quality and prevent damage to your instrument.
Gauge
Gauge refers to the thickness of the guitar string. It is an important factor to consider when choosing the right strings for your country music guitar. The gauge of string that you choose can significantly impact the sound and playability of your guitar.
The most common gauges of strings recommended for country music are .010, .011, and .012. Lighter gauge strings, such as .009, are generally preferred by those who play fast and intricate solos. While heavier gauge strings provide a thicker and richer tone, they may be harder to play and can cause fatigue in your fingers.
Below is a table that breaks down the different gauges and their respective benefits:
| Gauge | Benefits |
|---|---|
| .009 | Easy to play and ideal for solos |
| .010 | A balance between playability and tone |
| .011 | A thicker and richer tone, good for rhythm guitar |
| .012 | The thickest and richest tone, ideal for slide guitar |
When selecting a string gauge, consider what type of playing you do most often and what type of tone you are looking to achieve. It may also be helpful to experiment with different gauges to find the one that best suits your playing style and preferences.
Tools Required for Changing Guitar Strings
Changing your guitar strings may seem like a daunting task, but it’s essential to ensure that your country music sounds its best. You’ll need a few tools to get started, and it’s important to have them all on hand before you begin the process. With so many options on the market, it can be confusing to determine which tools are necessary for the job. Fear not, we have compiled a list of the essential tools you’ll need to successfully change your guitar strings and keep your instrument sounding fantastic.
String Winder
One of the most essential tools for changing guitar strings is the string winder. This tool is used to make the whole process faster and more efficient. A string winder is especially useful if you have multiple guitars or if you change your strings frequently.
A string winder is designed to fit over the tuning pegs of your guitar. It has a handle that you can turn to rotate the pegs and wind the strings. Using a string winder will not only save you time but also reduce the risk of damaging your fingers or the guitar.
When choosing a string winder, there are several factors to consider. First, ensure that it fits comfortably in your hand. You don’t want a string winder that hurts your hands or is difficult to grip. Secondly, make sure it is durable and made of high-quality materials. A cheap plastic string winder may not last long and can easily break.
Here is a table summarizing the key features to consider when choosing a string winder:
| Feature | Description |
| Comfort | Choose a string winder that fits comfortably in your hand. |
| Durability | Look for a string winder made of high-quality materials that will last. |
| Compatibility | Make sure your string winder fits the tuning pegs of your guitar. |
| Additional Features | Some string winders come with additional features such as a built-in wire cutter or a bridge pin remover. |
It’s important to note that while a string winder is a useful tool, it is not essential. You can still change your guitar strings without one, but it may take longer and be more challenging.
A string winder is a valuable tool to have in your guitar maintenance toolkit. When choosing one, consider factors such as comfort, durability, and compatibility with your guitar’s tuning pegs. With the help of a string winder, changing your guitar strings will be faster and more efficient.
Wire Cutter
One of the tools you’ll need to change your guitar strings is a wire cutter. This tool is essential for cutting the excess string after you’ve wound it around the guitar’s tuning peg. You don’t want to leave excess string hanging off the end of the guitar, as it can get in the way of playing and can even cause injury if it’s sharp enough.
Features of a Good Wire Cutter
When choosing a wire cutter, make sure to look for one that has a sharp cutting edge. This will help ensure that you can cleanly cut through the string without leaving any frayed edges behind. A wire cutter with a spring-loaded handle can also be helpful, as it will make it easier to cut through thicker strings without straining your hand.
| Feature | Explanation |
|---|---|
| Sharp Cutting Edge | A sharp cutting edge will cleanly cut through the string without leaving frayed edges behind. |
| Spring-Loaded Handle | A spring-loaded handle can help you cut through thicker strings without straining your hand. |
Using a Wire Cutter
To use a wire cutter to change your guitar strings, first make sure that the cutting edge is clean and sharp. Position the cutter on the string where you want to make the cut, then apply pressure to the handle to snip the string. Take care not to cut too close to the tuning peg, as this can cause the string to slip and go out of tune.
Changing your guitar strings can seem like a daunting task, but having the right tools can help make the process much smoother. With a good wire cutter in your toolkit, you’ll be able to cleanly cut through your strings with ease, helping you get back to playing your favorite country tunes in no time.
Tuner
When it comes to changing your guitar strings, having a reliable tuner is an essential tool. A tuner helps to ensure that your guitar produces accurate and consistent sound both during and after the string-changing process. Here are some details that will help you choose the right tuner for your guitar.
| Tuner Type | Features |
|---|---|
| Clip-On Tuner |
|
| Pedal Tuner |
|
| Smartphone App Tuner |
|
Choosing a tuner that suits your personal playing style and needs is important in maintaining the quality of your sound. Whether you opt for a clip-on tuner, pedal tuner, or smartphone app tuner, be sure to select one that is easy to use, reliable, and accurate.
Step-by-Step Guide to Changing Your Guitar Strings
Are you ready to change your guitar strings but not sure where to start? Don’t worry, it’s a task that can be easily accomplished with a little bit of guidance. Grab your string winder, wire cutter and tuner, and let’s get started with this step-by-step guide to replacing your guitar strings. By following these simple steps, you’ll have fresh strings on your guitar in no time and notice a significant improvement in the tone and sound of your playing.
Removing the Old String
Before adding new strings to your guitar, you must first remove the old ones. This is an important step in ensuring the quality of your sound.
Step 1: Loosen the String
Using a string winder, loosen the string by turning the tuning key counterclockwise. Keep turning the key until the tension on the string is fully released.
Step 2: Remove the String
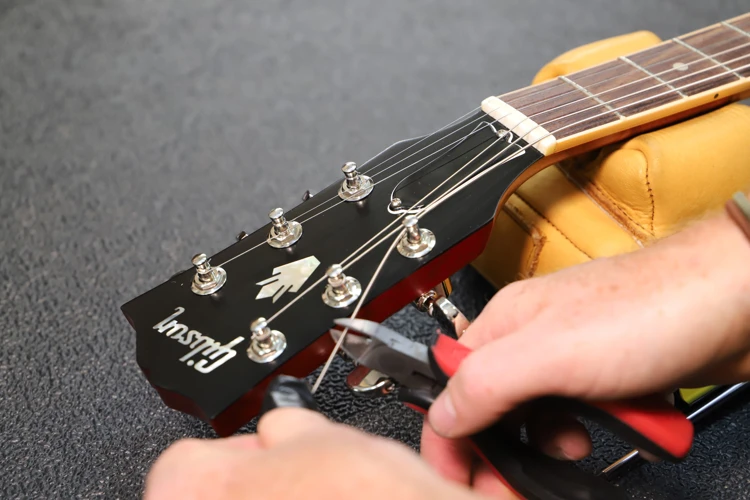
Once you have loosened the string, it is time to remove it. Use a wire cutter to cut the string near the bridge of the guitar. Then, unwind the string from the tuning peg at the top of the guitar. Be careful not to let the loose string hit your guitar as it can cause scratches or dents.
Step 3: Repeat for Each String
Repeat these steps for each string, one at a time. It’s important not to remove all the strings at once, as this can cause unnecessary stress on the guitar’s neck.
By removing one string at a time, you will keep the tension evenly distributed across the neck of the guitar, preventing any damage to the instrument.
Once all the strings have been removed, you can move on to the next step – cleaning your guitar.
Cleaning the Guitar
Before adding the new strings, it’s crucial to clean the guitar properly to ensure the longevity of the new strings. Cleaning your guitar keeps it in sound shape and can even improve your overall tone. Here are the steps to properly clean your guitar:
| Step | Description |
|---|---|
| 1. | Remove any dirt or dust with a dry, soft cloth. Make sure to clean every part of the guitar, including the body, neck and headstock. |
| 2. | For stubborn dirt or grime, use a guitar cleaner specifically designed for your guitar’s finish. Do not use any household cleaners as they can ruin your guitar’s finish. |
| 3. | Pay attention to the fretboard, as this is where dirt and grime can build up the most. Use a specialized fretboard cleaner and a soft cloth to clean it thoroughly. |
| 4. | Clean the bridge and hardware with a cloth and a small brush to remove any dirt or debris. |
| 5. | After cleaning, use a clean, dry cloth to wipe down the guitar, removing any excess cleaner or moisture that remains. |
Remember to take your time while cleaning your guitar to ensure a thorough clean. This will not only help improve the sound of your guitar, but it will also help it last longer.
Adding the New String
Adding a new string to your guitar may seem intimidating, but with the right tools and technique, it can be done easily. Here’s a step-by-step guide to help you through the process:
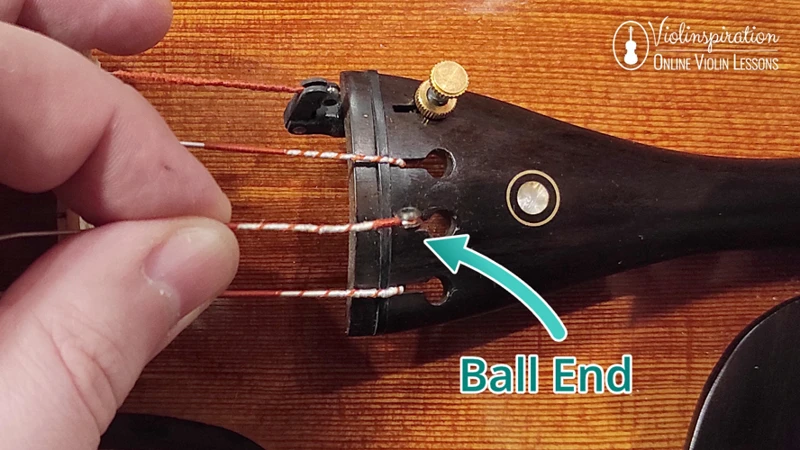
- Attach the string to the bridge: Take the ball end of the string and insert it into the hole in the bridge. Make sure it’s securely fastened before moving on to the next step.
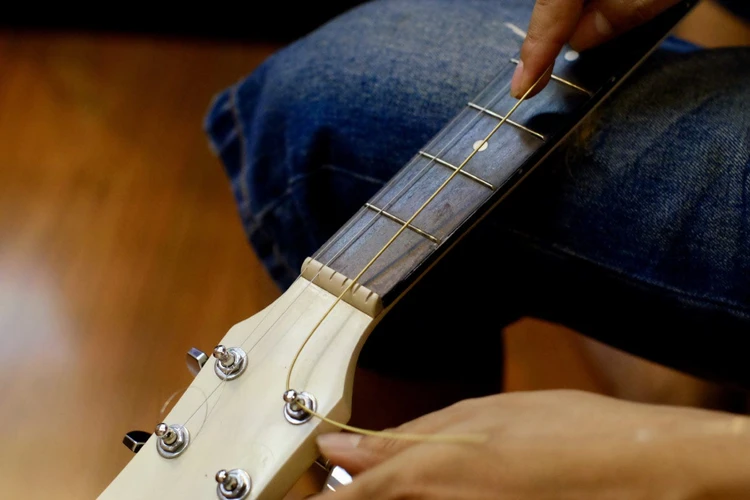
- Thread the string through the tuning peg: Guide the string through the center of the tuning peg and pull it tight. Leave a little slack in the string, but not too much as it can affect the tuning.
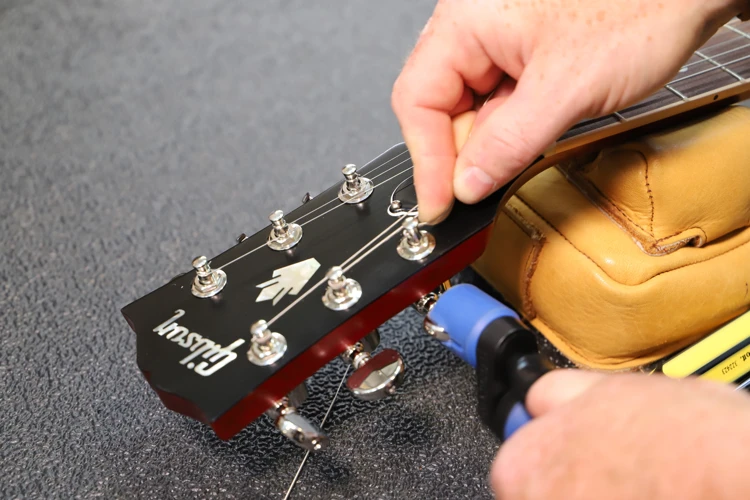
- Wind the string: Grab your string winder and turn the tuning peg until the string begins to wrap around the peg. Make sure the string is wrapping neatly and evenly.
- Check the tension: Use your tuner to check the string’s tension. If it’s too slack or too taut, adjust it by unwinding or winding the string until it’s at the right pitch.
- Repeat: Repeat these steps for the remaining strings. Make sure you’re using the right gauge for each string, as using the wrong gauge can affect the tuning and overall sound of your guitar.
It’s important to take your time and be patient when adding new strings to your guitar. Rushing the process can lead to mistakes and may also cause your strings to break, which can be frustrating and time-consuming to fix. If you’re unsure about any step, refer to your guitar’s manual or consult a professional.
Stretching and Tuning Your New Strings
Congratulations, you have successfully changed your guitar strings! Now comes the crucial step of stretching and tuning your new strings to bring out their best sound. This process can seem intimidating, especially for beginners, but with a few tips and tricks, you’ll be a pro in no time. Keeping your strings properly stretched and tuned not only improves the sound of your guitar but also makes playing easier and more enjoyable. So, let’s dive in and explore the essential steps for stretching and tuning your new strings.
Proper Stretching
Stretching your new guitar strings properly is crucial to getting the best tone and playability out of them. Here are some steps to follow:
- Start by tuning the string to pitch: This will give you an idea of whether the string is too tight or too loose.
- Grab the string at around the twelfth fret: Use your thumb and forefinger to gently stretch the string, pulling it away from the fretboard.
- Stretch in sections: Start by stretching the string in small sections, moving up and down the string.
- Be careful not to overstretch: You don’t want to pull the string so hard that it snaps. Use your ears and fingers to gauge whether the string is getting tighter.
- Re-tune after each stretch: Stretching the string will cause it to go slightly out of tune, so make sure to re-tune each time you stretch.
- Repeat the stretching process: Repeat the stretching process several times until the string holds its pitch without going flat.
By stretching your new guitar strings properly, you’ll ensure that they settle into their proper tension and are less likely to slip out of tune. This will also help prevent any unwanted string breaks due to improper tension. Taking the time to stretch your strings properly is an important step in maintaining the consistency and sound quality of your country guitar.
Tuning Your Guitar
Once you have stretched your new strings and they have settled in, it’s important to tune your guitar correctly. Tuning your guitar not only ensures that your music sounds good, but it also helps prevent unnecessary wear and tear on your strings and guitar. Here are the steps to properly tune your guitar:
1. Get a Tuner
First, you’ll need to have a tuner on hand. You can use a digital tuner, a mobile app or even the tuner built into your amplifier. Place the tuner in front of your guitar where you can easily see the display.
2. Tune the Low E String
Start by tuning the lowest string, the 6th string or the Low E string, to the correct pitch. Pluck the string and look at the tuner. The tuner will display whether the string is too high or too low in pitch. Adjust the tuning pegs on your guitar until the tuner shows that the string is at the correct pitch.
3. Move on to A String
Next, move on to the 5th string or the A string. Pluck the string and adjust the tuning pegs, as needed, until it matches the correct pitch.
4. Tune the D and G Strings
Continue tuning each string in ascending order. The next two strings are the 4th string or the D string, followed by the 3rd string or the G string. Again, pluck the string and adjust the pegs until it is in tune.
5. Tune the B String
The 2nd string or the B string is next. Unlike the other strings, the B string is tuned to a higher pitch than the G string. Pluck the string and adjust the pegs until it matches the correct pitch.
6. Tune the High E String
Finally, move on to the highest string, the 1st string or the High E string. Pluck the string and adjust the tuning pegs until it matches the correct pitch.
7. Check Your Tuning
After you’ve tuned all six strings, play a chord or two to ensure that your guitar is in tune. If you notice any out of tune notes, go back and adjust the specific string until it matches the correct pitch.
Remember to tune your guitar every time you play it to ensure you sound your best. Being in tune also helps prevent unnecessary wear and tear on your strings and guitar.
Store Your Old Strings
After changing your guitar strings, it’s important to store the old ones properly. This is because the old strings can still be useful in some circumstances. For example, if one of your new strings breaks mid-performance, having an old one as a backup could be a lifesaver.
But how should you store your old strings?
Firstly, it’s important to coil them up neatly rather than letting them become a tangled mess. This is not only neater, it also prevents kinks in the metal which can affect the sound quality. If you want to take it a step further, you could use a string winder to coil them up in a more precise manner.
Next, it’s important to keep them somewhere dry. Moisture can cause the metal to rust, which will shorten the lifespan of your old strings and make them sound worse. Consider keeping them in a small plastic bag or airtight container with a packet of silica gel to absorb any moisture.
Labeling your old strings can also be helpful. If you have multiple sets of old strings and want to quickly identify which are which, putting a small label or piece of tape on the coil can make this process easier.
Finally, it’s important to store your old strings somewhere safe. This could be a dedicated storage box for your music equipment or a compartment in your guitar case. Wherever you choose to store them, make sure they won’t get crushed, tangled or lost.
Taking the time to store your old guitar strings properly may seem like a small detail, but it can end up saving you time and money in the long run. Plus, you’ll have peace of mind knowing you have backup strings should anything go wrong with your new set.
Additional Tips for Maintaining a Great Country Sound
As a country musician, it’s important to not only have top-notch equipment and skill, but also to maintain it properly. In this section, we’ll go over some additional tips for keeping your guitar sounding great, even after you’ve changed your strings. These tips include regularly cleaning your guitar and maintaining a consistent playing schedule. By following these tips, your guitar will be ready for any country jam session or performance. Let’s dive in!
Cleaning Your Guitar Regularly
One important aspect of maintaining a great country sound on your guitar is to keep it clean. Over time, dirt and sweat can build up on the strings, fretboard, and body of the guitar, leading to a less-than-perfect sound.
To keep your guitar clean, you should make a habit of wiping it down after every playing session. Use a soft cloth or microfiber towel to gently wipe away any residue on the strings and body of the guitar. This can reduce the buildup of dirt and grime, which can affect the tone and playability of your instrument.
In addition to wiping down the guitar after each use, you should also consider using a guitar cleaner and polish. These products are designed to remove dirt and grime from the guitar’s surface, while also protecting it from scratches and other damage.
Here are some tips for cleaning your guitar regularly:
| Tip | Description |
|---|---|
| Use a soft cloth | Avoid using abrasive materials that can scratch the guitar’s finish. |
| Wipe down after each use | Make it a habit to wipe down the strings and body of the guitar after every playing session. |
| Use a guitar cleaner and polish | Invest in a high-quality guitar cleaner and polish to keep your instrument looking and sounding its best. |
| Don’t forget the fretboard | The fretboard can also collect dirt and grime, so use a specialized fretboard cleaner to keep it clean. |
| Protect your guitar when not in use | Store your guitar in a case or cover when not in use to prevent dust and debris from settling on it. |
By following these tips for cleaning your guitar regularly, you can help to maintain its sound and playability, ensuring that it stays in great shape for years to come. So make cleaning your guitar a regular part of your routine and enjoy the benefits of a consistently great country sound.
Maintaining a Consistent Playing Schedule
Playing your guitar regularly not only keeps your skills sharp but also helps to maintain the quality of your guitar’s sound. Consistency in your practice schedules allows your fingers to adjust to the guitar strings, and your ears to develop your sense of pitch.
Benefits of Consistent Playing Schedules:
| Benefits | Explanation |
|---|---|
| Muscle Memory | Regular playing allows your fingers to develop muscle memory, which helps improve your technique and speed |
| Improved Pitch | Your ear becomes attuned to the sound of your guitar, allowing you to improve your pitch and recognize when your guitar needs tuning |
| Less Breakage | Playing with a consistent touch results in less strain on the strings, reducing the likelihood of breakage or snapage |
It’s important to establish a regular playing schedule and stick to it. Even setting aside 10 to 15 minutes a day to play can help improve your skills and maintain the sound quality of your guitar. Don’t be afraid to challenge yourself with new songs or techniques to help keep your practice sessions fresh and exciting.
Remember, the more you play your instrument, the more you’ll get out of it. So, whether you’re a beginner or an experienced musician, maintaining a consistent playing schedule should be a top priority.
Conclusion
After reading this article, it should be clear that changing your guitar strings on a regular basis is crucial for achieving the best possible sound quality and consistency in your music. Not only does it improve your tone, but it also prevents breakages and ensures a more consistent sound. Knowing when to change your strings and choosing the right type and gauge of strings for your playing style is also important.
To change your strings, you will need a few basic tools including a string winder, wire cutter, and tuner. Following the step-by-step guide provided in this article will make the process of changing your strings quick and easy, allowing you to get back to playing music in no time.
Aside from changing your strings, it’s also important to maintain your guitar by regularly cleaning it and practicing on a consistent basis. Ensuring that your guitar is in good condition will not only improve your sound quality but also increase the longevity of your instrument.
Lastly, don’t forget to store your old strings in case of emergencies. It’s always better to have backup strings in case of a snapped string during a performance.
Overall, changing your guitar strings on a regular basis is a small but important aspect of maintaining a great sounding guitar for country music. By following the tips and techniques outlined in this article, you’ll be well on your way to improving your sound quality and consistency while enjoying your country music.
Frequently Asked Questions
1. How often should I change my guitar strings?
The frequency of changing your guitar strings depends on how often you play and how you want your guitar to sound. Generally, it’s recommended to change them every 3-6 months.
2. Does changing guitar strings affect the sound of my guitar?
Yes, changing your guitar strings can significantly improve the tone of your guitar. Old strings can sound dull and lifeless, while new strings will give your guitar a bright and crisp sound.
3. What signs indicate that my guitar strings need to be changed?
Symptoms of worn out strings include diminished tone and sustain, visible corrosion, discoloration, difficulty staying in tune, and snapping or breaking.
4. What type of strings should I use?
The type of strings you choose will depend on your playing style, guitar type, and personal preference. Popular types include phosphor bronze, 80/20 bronze, and flatwound or roundwound strings.
5. What is string gauge?
String gauge is the thickness of the string, measured in thousandths of an inch. Thicker strings typically have a more robust and full sound, while thinner strings are easier to play.
6. When is the best time to change my guitar strings?
The best time to change your guitar strings is when you have some time to spare for the task, preferably before a gig, recording session or performance.
7. Can I use any wire cutters to cut my strings?
It is best to use a pair of wire cutters specifically designed for guitar strings, as they will provide a clean cut without causing any damage to your guitar.
8. Will changing my guitar strings affect the intonation?
Changing your guitar strings shouldn’t significantly alter the intonation, but it is always a good idea to check and adjust it if necessary after changing your strings.
9. How do I properly clean my guitar strings?
After playing, wipe down your strings thoroughly with a clean cloth to remove any sweat or grime. You can also use a specialized string cleaner solution to keep your strings in top condition.
10. How can I extend the life of my guitar strings?
You can extend the life of your strings by properly storing your guitar, wiping down the strings after playing, and avoiding excessive bending of the strings. Additionally, washing your hands before playing can help prevent build-up of oils that can corrode the strings.