As an acoustic guitar player, you may have heard of a device called a “capo.” A capo is a clamp-like device that shortens the length of the strings on a guitar, effectively raising the pitch of all the strings at once. Capos can be incredibly useful for a variety of reasons, such as changing the key of a song to better suit a singer’s voice, or creating a unique tone. However, in order to get the most out of a capo, it’s important to understand how to place it correctly on the guitar. In this blog post, we’ll explore the ins and outs of capo placement on an acoustic guitar.
What is a Capo and How Does it Work?
A capo is a small, portable device that clamps onto the neck of a guitar, shortening the length of the strings and raising the pitch. Capos come in a variety of shapes and sizes, but they all function in essentially the same way. When a capo is placed on a fret, it raises the pitch of all the strings by a half step for each fret. For example, if you place a capo on the first fret, the open strings will sound as if they are being played at the second fret, one half step higher than normal.
Why Use a Capo?
There are many reasons why a guitarist might choose to use a capo. One common reason is to change the key of a song to better suit a singer’s voice. For example, if a singer has a low voice, they might have difficulty singing a song in the original key. By using a capo, the guitarist can raise the pitch of the open strings, making it easier for the singer to hit the high notes.
Another reason to use a capo is to create a unique tone. Different fret positions on the guitar have different tonal characteristics, and by using a capo, a guitarist can explore these different tonalities without having to learn new chord shapes.
Choosing the Right Capo
There are many different types of capos on the market, and choosing the right one can be overwhelming. Here are a few things to consider when selecting a capo:
Material
Capos are typically made from metal or plastic. Metal capos tend to be more durable, but they can also be heavier and more expensive. Plastic capos are generally lighter and more affordable, but they may not last as long as metal capos.
Design
Capos come in a variety of designs, from simple clamp-style capos to more complex spring-loaded capos. Some capos have adjustable tension, while others do not. Consider what type of design will work best for your playing style and the type of guitar you have.
Ease of Use
Some capos are easier to use than others. Look for a capo that is easy to put on and take off, and that stays in place once it’s been positioned.
Placing the Capo
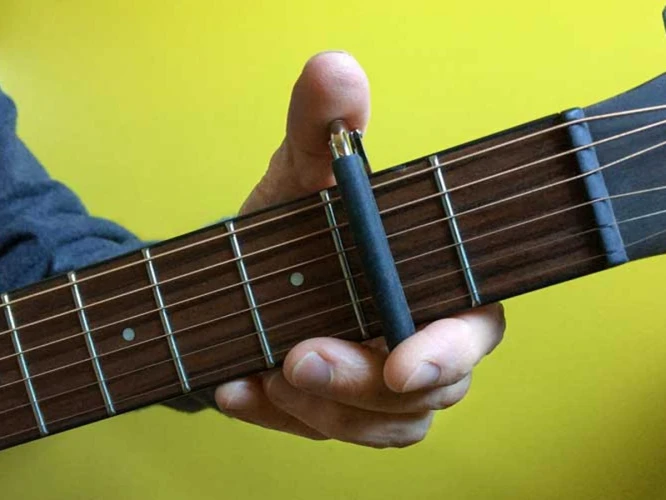
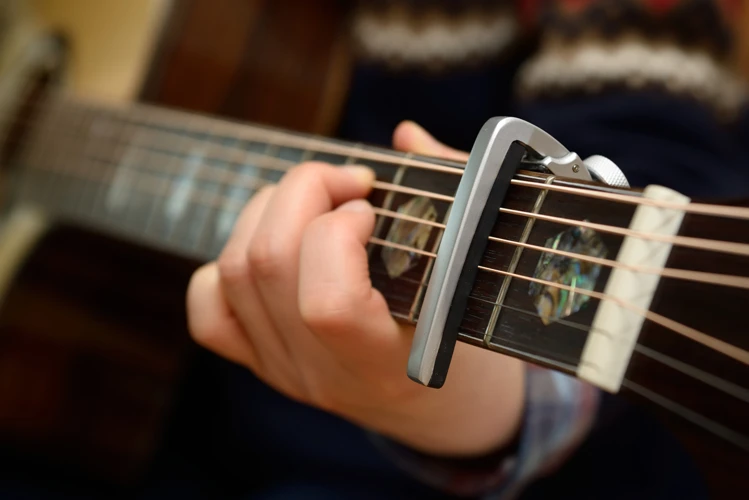
Once you’ve chosen a capo, it’s important to place it correctly on the guitar. Here are the steps to follow:
Step 1: Choose the Fret
Decide which fret you want to place the capo on. Remember that each fret raises the pitch of the open strings by a half step.
Step 2: Position the Capo
Place the capo on the chosen fret, making sure that it is centered on the neck of the guitar. The capo should be positioned so that it is touching all six strings.
Step 3: Adjust the Tension
Adjust the tension of the capo so that it is snug against the strings, but not so tight that it is difficult to press down on the strings.
Step 4: Check the Tuning
After placing the capo, check the tuning of the guitar. Capos can sometimes cause the strings to go out of tune, so it’s important to double-check the tuning before playing.
Common Mistakes to Avoid
Here are a few common mistakes to avoid when using a capo:
Placing the Capo Too High
If the capo is placed too high up on the neck, it can make it difficult to press down on the strings. Make sure the capo is positioned as close to the fret as possible.
Not Adjusting the Tension
If the capo is not tight enough, it can cause the strings to buzz or sound muted. If the capo is too tight, it can cause the strings to go out of tune.
Not Checking the Tuning
Always check the tuning of the guitar after placing the capo. Capos can sometimes cause the strings to go out of tune, so it’s important to double-check the tuning before playing.
Looking to enhance your acoustic guitar playing? Check out our articles on acoustic guitar strings for country music, tips for achieving the best country guitar tone with amplifiers, and prebend techniques for country guitar solos. Want to explore more about capo usage? Dive into our acoustic guitar capo guide for insights on capo placement. Additionally, if you’re interested in electric guitar settings, check out our article on electric guitar volume and tone adjustments for a comprehensive understanding of tone shaping.
Conclusion
Capos can be incredibly useful tools for acoustic guitar players. By understanding how to place a capo correctly on the guitar, you can change the key of a song, create unique tones, and explore different tonalities. When choosing a capo, consider the material, design, and ease of use. And when placing the capo, make sure to choose the right fret, position the capo correctly, adjust the tension, and check the tuning. With these tips in mind, you’ll be able to get the most out of your capo and take your acoustic guitar playing to the next level.