When it comes to playing country guitar, the tone and sound you produce are crucial elements that define the genre. One way to enhance the sound of your country guitar is by installing and adjusting pickups. Pickups are electronic devices that capture the vibrations of the guitar strings and convert them into electrical signals, which are then amplified and projected through the speakers. Properly installing and adjusting pickups can make a significant difference in the tone and playability of your guitar, allowing you to achieve that classic country twang and warmth. In this article, we will explore the process of installing and adjusting pickups for country guitar players.
Choosing the Right Pickups
The first step in the process of installing pickups for your country guitar is choosing the right pickups for your desired sound. There are various types of pickups available in the market, each with its unique characteristics and sonic qualities. Single-coil pickups are commonly used in country music for their bright and twangy sound, while humbuckers offer a warmer and fuller tone. Some country guitarists prefer a combination of both single-coil and humbucker pickups to achieve a versatile sound palette.
Before purchasing pickups, consider the style of country music you play and the sound you want to achieve. Research different brands and models of pickups to find the ones that best suit your playing style and preferences. Consult with experienced guitarists or music store professionals for recommendations and advice on selecting the right pickups for your country guitar.
Tools and Materials Needed
Before you begin the installation process, make sure you have all the necessary tools and materials at hand. Here is a list of essential items you will need to install and adjust pickups for your country guitar:
1. Screwdriver set
2. Soldering iron and solder
3. Wire cutters/strippers
4. Pliers
5. Pickup installation kit (includes mounting screws, springs, and pickup rings)
6. Multimeter (for testing electrical connections)
7. Guitar strings (optional, for restringing after installation)
8. Workbench or stable surface for guitar maintenance
Ensure that you have a clean and well-lit workspace to work on your guitar comfortably. Organize your tools and materials for easy access during the installation process.
Preparing Your Guitar
Before you can install new pickups on your country guitar, you need to prepare the instrument for the modification. Start by loosening the strings and removing the pickguard or backplate to access the electronics cavity. Use a screwdriver to unscrew the mounting screws of the old pickups and carefully detach them from the guitar body.
Inspect the wiring and connections inside the electronics cavity to identify the pickup wires, volume and tone controls, and output jack. Note the color-coding of the pickup wires (usually black, white, and green) and their corresponding terminals on the potentiometers. Take pictures or make a diagram of the existing wiring configuration to reference during the installation of the new pickups.
Clean the electronics cavity and the pickup mounting area to remove any dust, debris, or old solder residue. This will ensure a secure and stable installation of the new pickups and prevent unwanted noise or interference in the signal.
Installing the Pickups
Once you have prepared your guitar and gathered all the necessary tools and materials, you can proceed with installing the new pickups. Follow these steps to install pickups on your country guitar:
1. Align the new pickups with the pickup mounting holes on the guitar body. Place the pickups in the correct position, ensuring that the pickup poles align with the strings for optimal sound capture.
2. Use the mounting screws and springs from the pickup installation kit to secure the pickups to the guitar body. Tighten the screws evenly to prevent any wobbling or instability of the pickups.
3. Solder the pickup wires to the corresponding terminals on the volume and tone controls according to the wiring diagram or color-coding. Use a soldering iron and solder to create secure and reliable connections between the pickups and the guitar electronics.
4. Test the pickups using a multimeter to verify that the connections are properly soldered and the pickups are functioning correctly. Check for any loose connections or short circuits that may affect the sound output of the pickups.
5. Once the pickups are securely installed and wired, reattach the pickguard or backplate to the guitar body. Restring the guitar with new strings if necessary and tune the instrument to your desired pitch.
Adjusting Pickup Height
After installing the pickups on your country guitar, it is essential to adjust the pickup height to achieve the best sound and balance between the strings. The height of the pickups relative to the strings affects the output level, tone, and clarity of the guitar signal. Follow these steps to adjust the pickup height for optimum performance:
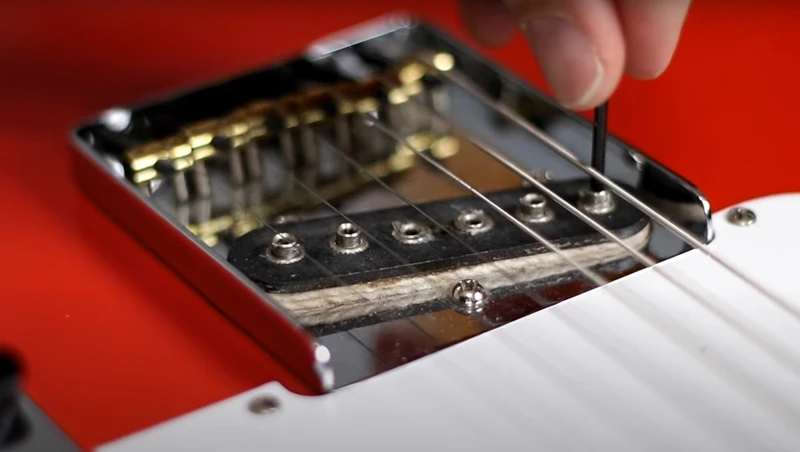
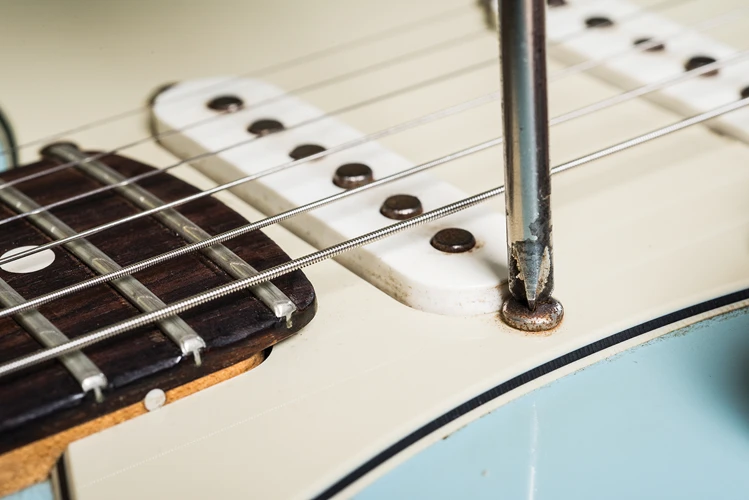
1. Use a screwdriver to adjust the pickup height screws located on either side of the pickups. Turn the screws clockwise to raise the pickups closer to the strings or counterclockwise to lower them away from the strings.
2. Start by setting the pickup height evenly for all pickups to maintain a balanced sound across the strings. Listen to the guitar signal as you make adjustments to the pickup height and note any changes in volume or tone.
3. Fine-tune the pickup height to your preference by adjusting the screws in small increments. Experiment with different pickup heights to find the optimal position that enhances the clarity, sustain, and dynamics of your country guitar sound.
4. Test the guitar’s sound and playability after adjusting the pickup height to ensure that the pickups are functioning correctly and producing the desired tone. Make further adjustments if necessary to achieve the best sound quality for your playing style.
Setting Pickup Pole Pieces
In addition to adjusting the pickup height, setting the pickup pole pieces can further refine the tone and response of your country guitar pickups. The pole pieces are magnetic rods located underneath the pickup coils that interact with the strings to capture the vibrations and produce sound. By adjusting the pole pieces, you can fine-tune the balance and sensitivity of each string for a more consistent and articulate sound.
Follow these steps to set the pickup pole pieces on your country guitar pickups:
1. Use a screwdriver or hex key to adjust the pole pieces individually on each pickup. Turn the pole pieces clockwise to raise them or counterclockwise to lower them, affecting the magnetic field and string interaction.
2. Start by setting the pole pieces at an equal height relative to the strings to ensure a balanced output and response across all strings. Listen to the guitar signal as you adjust the pole pieces and note any changes in clarity or sustain.
3. Fine-tune the pole pieces for each string to optimize the pickup’s response and tone. Adjust the pole pieces based on the string gauge, playing style, and desired sound characteristics to achieve the best performance from your country guitar pickups.
4. Test the guitar’s sound and playability after setting the pickup pole pieces to evaluate the tonal improvements and responsiveness of the pickups. Make adjustments as needed to achieve the desired balance and articulation for your country guitar playing.
Looking to enhance your country guitar sound? Check out our articles on budget pedals for country guitar, hybrid picking exercises for acoustic guitarists, active pickups for country guitarists, volume pedals in country guitar, and why pedal order matters for guitar pedals for valuable insights and tips to take your country guitar playing to the next level!
Conclusion
In conclusion, installing and adjusting pickups for your country guitar can significantly enhance the tone, playability, and versatility of your instrument. By choosing the right pickups, preparing your guitar, and following the installation and adjustment steps outlined in this article, you can achieve a classic country sound with the perfect balance of twang, warmth, and clarity. Experiment with different pickup configurations, heights, and pole piece settings to customize your guitar’s sound to suit your playing style and musical preferences. Remember to take your time, be patient, and seek professional assistance if needed to ensure a successful pickup installation and setup for your country guitar. Enjoy the process of fine-tuning your instrument and exploring the endless possibilities of country guitar tones with well-installed and adjusted pickups.