As guitarists, we all strive for something truly unique in our playing, a sound that sets us apart from the rest. One way to achieve this is by combining bending techniques to create a sound that is distinctly ours. With so many bending techniques out there, it can be overwhelming to figure out where to start. But fear not, because in this article we will provide step-by-step guidance on how to use different bending techniques and blend them together to make your guitar playing stand out. From basic whole-step and half-step bends to more advanced techniques like bending behind the nut, we’ll cover it all. Get ready to take your sound to the next level as we dive into the world of combining bending techniques!
Overview of Bending Techniques
Bending techniques add a unique touch to a guitarist’s playing style. Mastering these techniques can add depth to your solos and improvisations, and make your playing stand out. But where do you begin? The world of bending can be intimidating to the uninitiated. That’s why in this section, we’ll explore some of the most common bending techniques used in country guitar, including whole-step, half-step, unison, pre-bends, release bends, and slow bends. We’ll break down each technique step-by-step, so even beginners can start incorporating these techniques into their playing. By the end of this section, you’ll have a solid understanding of bending basics and be on your way to becoming a bending master. If you need a quick review of bending basics, check out our guide to String Bending Basics for Guitar.
Whole-Step Bends
Whole-step bends are one of the most common bending techniques in guitar playing. As the name suggests, this technique involves bending the string up by two whole steps, which is equivalent to two frets or four half-steps. It is a simple technique that adds a lot of character to a solo or melody.
How to perform whole-step bends?
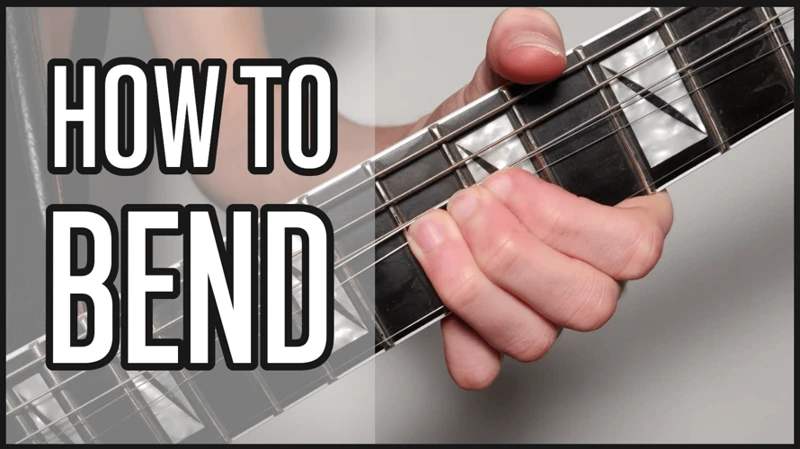
To perform a whole-step bend, you need to press your finger on the string at the fret indicated in the tab or the music sheet. Then, while still holding the note, you push the string upwards towards the ceiling. The string should touch the fret two steps (or two frets) above the fret you’re holding down. The bend should be slow and even, and you should aim to have the bent note match the pitch of the next higher note on the guitar.
Technique | Tab Notation | Example |
---|---|---|
Whole-Step Bend | 15b17 | E|——–15b17——– B|——————— G|——————— D|——————— A|——————— E|——————— |
The importance of intonation
It’s important to note that the pitch of the note being bent up should match the pitch of the next higher note on the guitar. If the pitch is too low, the bend will be flat. If the pitch is too high, the bend will be sharp. This requires good intonation on the guitar, so make sure your guitar is well-tuned before practicing whole-step bends.
Applications of whole-step bends
Whole-step bends are commonly used in blues and rock guitar solos, but they also have a significant presence in country music. For instance, double stop whole-step bends are a staple of Brent Mason’s playing. Whole-step bends can also be used to modify chords, giving them a unique character. To learn more about exploring bending techniques in country music, check out our article on Exploring Bending Techniques in Country Music.
Incorporating whole-step bends in solos requires a balance of taste and technical ability. Too many bends can sound cheesy and overdone, but if used sparingly in the right places, whole-step bends can add a lot of emotion and expression to a solo.
In the next section, we will look at combining different bending techniques to create more complex and unique sounds. But before that, let’s have a look at another bending technique – Half-Step Bends. To learn more about Half-Step Bends, check out our article on Pre-Bend Technique in Country Guitar Solos.
Half-Step Bends
Half-step bends are a common technique used in creating a unique sound on the guitar. This technique involves bending the string up one fret, which raises the pitch by one half-step. Half-step bends are essential in creating blues guitar riffs that sound full of emotion and soul.
To perform a half-step bend, place your finger on the fret indicated in the tablature or sheet music. Then, push the string up towards the ceiling until it reaches the pitch of the next fret. The key to performing half-step bends correctly is to push the string with enough force to make the sound change, but not so much that the string breaks or falls off the fretboard.
Below is an example of half-step bends in tablature form:
|——–12b—-|
|——–12b—-|
|——–12b—-|
|——–12b—-|
|——–12b—-|
|——–12b—-|
In this example, the “b” indicates that you should perform a half-step bend on the 12th fret. Each time you bend the string, pay attention to the pitch of the note. It should reach the same pitch as the note one fret higher.
Half-step bends can be combined with other bending techniques to create interesting and unique sounds. Try experimenting with different combinations of bending techniques to create your own style and sound. By mastering the half-step bend, you’ll be one step closer to becoming a master of the guitar.
Unison Bends
One technique that can add a lot of character to your playing is unison bends. With this technique, you play two notes at once and bend one of the notes up until it matches the pitch of the other note.
To perform an unison bend, you’ll typically use your ring finger or pinky finger to fret the lower note and your index or middle finger to fret the higher note. Then, you’ll bend the lower note up until it matches the pitch of the higher note. This creates a unique, overlapping sound that’s reminiscent of a pedal steel guitar.
Here’s a table outlining the steps for performing unison bends:
Step | Action |
---|---|
1 | Fret the lower note with your ring finger or pinky finger. |
2 | Fret the higher note with your index or middle finger. |
3 | Bend the lower note up towards the higher note. |
4 | Stop bending when the lower note matches the pitch of the higher note. |
Unison bends can be utilized in various genres, from country to blues to rock. They’re also great for adding a bit of flair to your chord progressions – try out an unison bend on the final chord of a progression to create a memorable ending.
Unison bends take some practice to get right, but once you’ve mastered them, they can be a powerful tool for creating a unique sound on your guitar. Combine them with other bending techniques in your playing to create your own personal style.
Pre-Bends
Pre-bends are an advanced bending technique that can be used to add a unique flavor to your guitar playing. With pre-bends, you bend the string to the desired pitch before you strike it. This can be a challenging technique to master, but with practice, you’ll be able to create expressive and emotive sounds with your guitar.
Here are some tips for practicing pre-bending:
- Start with half-step pre-bends: Begin by pre-bending the string a half-step up before striking it. This will help you develop the strength and control needed for full-step pre-bends.
- Use your ear: Pre-bending requires a good sense of pitch. Use your ear to make sure you’re bending the string to the exact pitch you want.
- Combine pre-bends with other techniques: Pre-bends can be combined with other bending techniques for even more creativity. For example, try combining a pre-bend with a release bend for a unique sound.
- Practice with a metronome: It can be helpful to practice pre-bends with a metronome to ensure that you’re bending in time with the rhythm.
- Experiment with different fingerings: You may find that different fingerings work better for pre-bends. Experiment to find what’s most comfortable for you.
Keep in mind that pre-bending can be a challenging technique, but it’s worth the effort. With practice, you’ll be able to add a new dimension to your playing and create a unique sound that sets you apart from other guitarists.
Release Bends
One of the most expressive bending techniques out there are release bends. This technique is a little tricky to pull off, but once you get the hang of it, it adds a lot of personality to your playing.
The idea behind a release bend is to start by bending a note up to pitch, and then releasing the bend and sustaining the note at the bent pitch. This creates a subtle but unique sound that can bring a lot of emotion to your playing.
To execute a release bend, you need to follow these steps:
Step | Instructions |
---|---|
Step 1 | Play the note you want to bend. |
Step 2 | Keeping your finger on the string, bend the note up to the desired pitch. |
Step 3 | While the note is still bent, pick the string once again to hear the bent pitch. |
Step 4 | Release the bend but keep your finger on the string, allowing the pitch to drop back down to its original pitch. |
Step 5 | Pick the string again and sustain the note at its original pitch. |
When you release the bend, you should be slowing your finger down as you bring it back to its original position. This will help you control the pitch drop and make it sound smoother and more natural.
A good way to incorporate release bends into your playing is to combine them with other bending techniques. For example, you could do a release bend after a pre-bend, or you could blend release bends with half-step bends for a more complex sound.
Remember that release bends are all about expression and emotion, so feel free to experiment with different pitches and durations to create your own unique sound. With practice, you’ll be able to control the pitch drop and turn release bends into an essential part of your playing style.
Slow Bends
When it comes to bending techniques, slow bends can really make your guitar playing stand out. With slow bends, the technique is as important as the note you’re targeting. Here are some key elements to keep in mind when executing slow bends:
- Be Patient – Slow bending takes time, but it’s well worth the effort. Make sure you’re not in a hurry when practicing slow bends.
- Apply Even Pressure – Unlike whole or half-step bends, where you’re aiming for a specific note, when performing a slow bend you’re focusing on creating a smooth and even note transition. So, ensure that you’re applying an even and gradual bending pressure rather than a sharp or sudden one.
- Check Your Tuning – Slow bends can sometimes throw your guitar out of tune, so be sure your guitar is in tune before attempting this technique.
- Use Vibrato – Slow bends and vibrato go hand-in-hand. Once you reach your desired pitch, hold it for a moment before adding some light vibrato to give it more soul and expression.
By practicing slow bends, you can add a unique dimension to your guitar playing, creating a sound that is both playful and emotional. So, take your time, be patient, and let your ear guide you as you explore the world of slow bends!
Combining Bending Techniques
Bringing in a variety of techniques is a sure-fire way to create a unique sound on your guitar. When it comes to bending, the possibilities for experimentation are endless. By combining bending techniques, you can sculpt a sound that is both dynamic and intriguing. Let’s dive deeper into some ways you can layer bending techniques to unlock new sonic possibilities.
Blend Whole-Step and Half-Step Bends
One way to create a unique sound on the guitar is by blending whole-step and half-step bends together. This technique involves bending a whole step up and then releasing that bend to a half-step bend before resolving back to the original note or moving to a different note. Here are the steps to blend whole-step and half-step bends:
- Step 1: Choose a Note to Bend – Start by selecting a note to bend on the fretboard, preferably one in a scale or riff you are playing.
- Step 2: Bend up a Whole Step – Use your bending hand to bend the note up a whole step while plucking the string with your picking hand.
- Step 3: Release the Bend to a Half Step – Release the bend slightly to make it a half-step bend, then pluck the string again.
- Step 4: Resolve Back to the Original Note or Move to a Different Note – After the half-step bend, you can either resolve back to the original note or move to a different note to continue your riff or solo.
By blending whole-step and half-step bends, you can add depth and emotion to your playing. This technique can be used in any style of music, from blues to rock to country. It’s important to experiment with the timing and speed of your bends to find a sound that works for you. Don’t be afraid to combine this technique with other bending techniques for even more unique sounds.
Add Unison Bends to Chord Progressions
One way to create a unique sound through bending techniques is to incorporate unison bends into your chord progressions. Unison bends involve bending two strings at the same time so that they produce the same pitch, creating a fuller and more resonant sound. Here are some steps to help you add unison bends to your chord progressions:
- Select the right chords: Choose chords that work well with unison bends, such as major or minor triads.
- Identify the strings to bend: Figure out which two strings you want to bend in unison. It’s usually best to choose adjacent strings so that you can use one finger to bend them both.
- Practice the bend: Before you add the unison bend to your chord progression, practice bending the two strings together until they produce the desired pitch. It may take some practice to get the bend just right.
- Add the unison bend to the chord progression: Once you’ve mastered the bend, add it to your chord progression by playing the chord and then bending the two strings in unison. For example, you could play a G major chord and then add a unison bend on the third and fourth strings.
- Experiment with different rhythms: Try using different rhythms when playing the chord progression with the unison bend. You could try playing the bend on the first beat of each measure or on the offbeat for a more syncopated feel.
Adding unison bends to your chord progressions can add depth and complexity to your playing. It’s a technique that’s commonly used by country guitarists like Keith Urban, Brad Paisley, and Brent Mason. Give it a try and see how it can take your playing to the next level.
Combine Pre-Bends with Release Bends
One way to create a unique sound on the guitar is to combine pre-bends with release bends. A pre-bend involves bending a note up to the desired pitch before playing it, while a release bend is the opposite, where the note is played first and then bent up to the desired pitch. Combining these techniques can add depth and emotion to your playing.
To start, you can practice pre-bending a note up a whole-step, then striking the note and releasing the bend. This creates a subtle, sliding effect that can add a lot of character to a simple melody. You can also experiment with over-bending, where you pre-bend the string slightly higher than the desired pitch, then release it down to the pitch when played. This can add a dramatic, bluesy feel to your playing.
Another way to combine pre-bends with release bends is to use them in your lead playing. For example, you could pre-bend a note up a half-step, then release the bend before playing the next note on the same string. This can create a smooth, flowing sound that can be used to make a solo really stand out.
To really make the most of pre-bends and release bends, you can try double-stops, which involve playing two notes at once. For example, you could pre-bend the G string up a whole-step, then play the B string at the same time. Then, release the bend on the G string while maintaining the pitch of the B string. This can add a unique, complex sound to your playing.
As with any new technique, it’s important to practice slowly and build up speed and accuracy over time. Start with simple pre-bends and release bends, then gradually incorporate them into your playing. Remember to use them tactfully, as they can easily become overused and lose their impact.
Pros | Cons |
---|---|
Pre-bends and release bends add depth and emotion to playing. | Overusing the technique can diminish its impact. |
Combining pre-bends with release bends can create a unique sound. | It can be difficult to master the techniques at first. |
Pre-bends and release bends can be used to make solos stand out. | It takes time to build up speed and accuracy. |
Double-stops can add a complex sound to playing. | Using the techniques inappropriately can result in sloppy playing. |
Slow Bends with Fret Slides
One technique that can add a lot of expression to your guitar playing is slow bends with fret slides. This technique involves bending a note up to pitch and then sliding your finger up or down the fretboard while maintaining the bend. It creates a smooth and gradual shift in pitch that can add a lot of character to your playing.
To execute a slow bend with a fret slide, start by playing the note you want to bend. Then, use your bending finger to push the string up towards the ceiling, gradually increasing the tension until you reach the desired pitch. Once you’re holding the bend, keep your finger in place and use another finger to slide up or down the fretboard. This will create a smooth transition in pitch that can sound very musical and expressive.
Here’s an example of a slow bend with a fret slide:
You can use slow bends with fret slides in a variety of musical contexts. For example, you could incorporate them into a slow and expressive ballad, or use them to add texture to a solo. Experiment with different rhythms and note choices to see what sounds best.
It’s worth noting that slow bends with fret slides can be challenging to execute correctly. You’ll need to have good control over your bending finger and be able to maintain a steady pitch. Additionally, you’ll need to be careful not to slide your finger too far and accidentally lose the pitch of the bend.
Though, slow bends with fret slides can be a great way to add depth and expression to your guitar playing. Try practicing them slowly and gradually increasing the speed to build up your proficiency with the technique.
Discover Top 3 Electric Guitar Bestsellers
No products found.
Advanced Techniques
When it comes to playing the guitar, there’s always another level to aspire to. As you master the basics of bending, it’s time to delve into the world of advanced techniques. These techniques require skill and practice, but they can take your sound to the next level. In this section, we’ll explore some of the more challenging and impressive bending techniques. From bending behind the nut to using double stop bends and fingerpicking, these techniques will give you the tools to create a sound that’s truly unique.
Bending Behind the Nut
Bending behind the nut is an advanced bending technique that requires a bit of manual dexterity and a willingness to experiment. Essentially, when you bend behind the nut, you are bending the string so that it is fretted at a point where no fret actually exists. This creates a unique and interesting sound that can add texture and depth to your playing. Here are some steps to follow to master this technique:
Step 1: Tune your guitar. Make sure it’s in tune before experimenting with any advanced techniques.
Step 2: Place your left hand fingers on the fretboard to fret the note you want to bend.
Step 3: With your right hand (assuming you’re right-handed), pluck the string and then quickly place your right thumb behind the nut.
Step 4: Use your right hand to push the string down toward the fretboard.
Step 5: Experiment with different bending angles and pressures to find the right sound.
It’s important to note that not all guitars are conducive to bending behind the nut. If your guitar has a locking nut or a floating bridge, it may not be possible to do this technique. Additionally, not all strings will respond well to this type of bending, so you may need to experiment with different gauges and brands to find what works best for you.
Tip: In addition to bending behind the nut, you can also try other variations of this technique, such as bending between the nut and the tuning pegs or even between the tuning pegs themselves. The possibilities are endless, so have fun and explore!
Pros | Cons |
---|---|
Creates a unique and interesting sound | Not all guitars are conducive to this technique |
Can add texture and depth to your playing | Not all strings will respond well to this type of bending |
Can be used in combination with other techniques for even more variety in your playing | Requires a bit of manual dexterity and experimentation to master |
Bending behind the nut is an advanced technique that can add a lot of interest and variety to your playing. While it requires a bit of experimentation and patience to master, it is definitely worth the effort for the unique and interesting sounds it can create.
Use Double Stop Bends and Fingerpicking
Double stop bends are a great way to create a unique sound on the guitar. Essentially, double stop bends are when you bend two notes at once rather than just one. This technique is commonly used in blues and country music, and can add an extra layer of depth and complexity to your playing.
To execute a double stop bend, you’ll need to place your fingers on two adjacent strings and bend them both simultaneously. This can be a bit tricky at first, but with enough practice, it will become second nature. One tip to keep in mind is to make sure both strings are ringing out clearly before you attempt the bend.
Fingerpicking is another technique that can be combined with double stop bends. This involves plucking the strings with your fingers rather than using a pick. Fingerpicking can add a more intricate, nuanced feel to your playing, and is especially well-suited to acoustic guitar.
To incorporate double stop bends and fingerpicking, try playing a simple chord progression and then adding a double stop bend on the final chord. For example, you could play a G chord progression (G – C – G – D) and then add a double stop bend on the final D chord. This creates a unique, interesting sound that can really make your playing stand out.
Table: Tips for using Double Stop Bends and Fingerpicking
Tip | Description |
---|---|
Practice slowly and accurately | Double stop bends and fingerpicking can be challenging, so take your time and make sure you’re hitting the notes accurately. |
Use the right fingerpicking pattern | Experiment with different fingerpicking patterns to find one that works for you and complements the double stop bends. |
Listen carefully | Pay attention to the sound you’re creating and make adjustments as necessary to get the desired effect. |
Combine with other techniques | Don’t be afraid to combine double stop bends and fingerpicking with other techniques like hammer-ons, pull-offs, and slides. |
By incorporating double stop bends and fingerpicking into your playing, you can create a sound that is both unique and compelling. Experiment with different techniques and see what works best for you. Remember to practice regularly and be patient – these techniques can take time to master, but the effort is well worth it in the end.
Tone Tips
Crafting a perfect guitar tone is an art form that requires attention to detail and a keen ear. From the type of guitar you use to the way you grip the strings, every decision you make affects the final sound that emanates from your amplifier. Achieving a unique sound through bending techniques is no exception, and there are several tone tips to keep in mind. These tips will help you fine-tune your technique and ensure that your bends sound clean, expressive, and professional. Let’s dive into some practical advice on how to enhance your tone and take your bending skills to the next level.
Adjusting Attack and Release Time
When it comes to creating a unique sound through combining bending techniques, adjusting the attack and release time of your guitar tone can make a significant difference. By manipulating these parameters, you can create a more expressive and dynamic sound that emphasizes the nuances of your bends. Here are some tips for adjusting the attack and release time:
- Experiment with your picking technique: The way you attack the strings with your pick can affect the attack time of your tone. Try picking more aggressively or lightly to change the amount of attack in your sound.
- Adjust your guitar’s volume and tone controls: By rolling off some of the high frequencies with your tone control or reducing the volume, you can create a slower attack and more mellow sound.
- Use a compressor pedal: A compressor pedal can help smooth out the attack of your notes and create a more even sustain. This can be especially useful when playing faster, more intricate passages.
- Experiment with different sustain pedals: Some sustain pedals allow you to adjust the release time of your notes, giving you more control over the decay of the sound. This can be useful for creating a more gradual and natural-sounding release on your bends.
- Use delay and reverb effects: By adding a bit of delay or reverb to your tone, you can create a more spacious and atmospheric sound that emphasizes the sustain of your notes.
By playing around with these different techniques, you can find new ways to express yourself on the guitar and create a more unique sonic signature. Don’t be afraid to experiment and try new things, as adjusting the attack and release time of your notes can have a significant impact on your overall sound.
Effects Pedals for Enhancing Bends
One way to take your bending technique to the next level is by using effects pedals to enhance your sound. There are several pedals that can be used to add color and depth to your bends. Below are some of the most popular effects pedals for enhancing bends.
Effects Pedal | Description |
Wah-Wah Pedal | The Wah-Wah pedal is commonly used to add a unique sound to guitar notes. It works well with bending techniques and can add a vocal-like quality to your bends. |
Delay Pedal | A Delay pedal adds an echo effect to your bends, creating a fuller and more atmospheric sound. It can be adjusted to different time settings to achieve the desired effect. |
Reverb Pedal | A Reverb pedal is used to add space and depth to your bends. It creates an ambient effect that gives the impression of being in a larger space, such as a concert hall. |
Distortion Pedal | The Distortion pedal is commonly used in rock music to add a crunchy, overdriven sound to guitar notes. It can be used to enhance the intensity of your bends. |
Fuzz Pedal | The Fuzz pedal is similar to the distortion pedal, but it creates a more aggressive and dirty sound. It can be used to create a powerful and unique sound when combined with bending techniques. |
It’s important to note that the effects pedal you choose will depend on the sound you’re going for and the type of music you’re playing. Experiment with different pedals to find the ones that work best for you and your playing style. Incorporating effects pedals into your bending technique can take your playing to the next level and help you create a truly unique sound.
Using Different Strings for Different Bends
As a guitarist, you may have noticed that different strings respond differently to bending. In fact, some strings are better suited to certain types of bends than others. By being mindful of the strings you use, you can create a more unique and dynamic sound through combining bending techniques.
Here is a breakdown of how different strings respond to bending:
String | Bend Type | Response |
---|---|---|
4th (D) string | Whole-Step Bends | Respond well to whole-step bends, producing a rich and full sound. |
3rd (G) string | Unison Bends | Perfect for unison bends, as the thicker string can handle the pressure and produce a higher pitched sound. |
2nd (B) string | Half-Step Bends | Best suited for half-step bends, as the string is thinner and easier to bend. However, be mindful not to over-bend as it can result in a sharp or flat note. |
1st (E) string | Release Bends | Works well for release bends, as the thinner string allows for a quick release and a smooth transition between notes. |
By understanding which strings are best suited to each type of bend, you can tailor your playing to create a more distinct and colorful sound. Experiment with different combinations of strings and bending techniques to find what works best for you and your style of playing. Remember to always be mindful of your technique and avoid over-bending, as it can result in a poor and out-of-tune sound.
Guitarist Spotlights
As we delve deeper into the art of creating a unique sound through combining bending techniques, it’s always helpful to draw inspiration from those who have mastered the craft. Let’s take a moment to shine the spotlight on some of the most talented guitarists out there who have mastered the art of bending to create truly distinctive tones. From mainstream country music to bluesy grooves, these artists have proven that there is no limit to what can be achieved with bending. So, let’s immerse ourselves in their awe-inspiring skills and see what lessons we can learn from these guitar gods.
Keith Urban
Acclaimed country guitarist Keith Urban is one of the most recognizable names in the world of music. Known for his signature sound, Urban has mastered the art of combining different bending techniques to create a unique style that sets him apart from other guitarists.
Some of the bending techniques that Keith Urban employs in his music include whole-step bends, half-step bends, pre-bends, and release bends. To further enhance his sound, Urban also uses effects pedals to add a touch of reverb, delay and distortion.
Urban’s use of slow bends, in particular, is what makes his playing stand out. By incorporating slow bends and vibrato, Urban is able to add depth and emotion to his playing. Additionally, he often combines pre-bends with release bends, twisting the strings just enough to create a subtle yet dynamic effect.
Urban’s guitar solos often feature a blend of whole-step and half-step bends, creating a fluid and dynamic sound. He is known to add unison bends to chord progressions, enhancing the harmonic richness of his playing.
To replicate Urban’s sound, it’s important to pay special attention to the tone and attack of each note. By adjusting the attack and release time, as well as using different strings for different bends, guitarists can achieve a sound similar to Urban’s.
Keith Urban is a master of bending techniques and an inspiration to guitarists worldwide. By combining different bending techniques and developing a signature sound, he has become a leader in the country music scene.
Brad Paisley
Brad Paisley is a renowned guitarist who has masterfully combined various bending techniques to create his unique sound. He is known to use a combination of whole-step and half-step bends with release bends to create a distinct sound. Paisley also utilizes unison bends to add a layer of complexity to his chord progressions.
Paisley is skilled in the use of effects pedals to enhance his bending techniques. He has been known to use the Boss DD-3 delay pedal to add depth to his bends and the MXR Carbon Copy Analog Delay to create a vintage sound.
One of Paisley’s notable techniques is his use of behind-the-nut bending, which involves bending the string behind the nut to create a unique sound. This technique is not commonly used, but Paisley has made it a signature part of his playing style.
Paisley’s tone is also influenced by his choice of strings, as he prefers lighter gauge strings for quicker and more precise bending. He also emphasizes the importance of adjusting the attack and release time when playing with bends to ensure a consistent sound.
Brad Paisley’s combination of different bending techniques, effects pedals, and unique approaches to tone have made him one of the most influential guitarists of our time. His approach to playing can serve as an inspiration to guitarists looking to create their own unique sound through bending techniques.
Brent Mason
Brent Mason is a legendary guitarist known for his innovative use of bending techniques to create a unique sound in country music. He has played on countless albums, helped to popularize the use of the B-bender guitar, and won numerous awards for his contributions to the genre.
Here are a few of the bending techniques that Brent Mason uses to craft his signature sound:
- Wide bends: Mason is known for his use of wide, dramatic bends that add emotion and depth to his playing. He often combines whole-step bends with half-step bends to create a unique sound that is both melodic and expressive.
- Pre-bends: Like many great guitarists, Brent Mason is a master of the pre-bend. He uses this technique to add tension and release to his playing, often combining it with other bending techniques to create complex and intricate lines.
- Vibrato: Mason’s vibrato is another key element of his sound. He uses a wide, expressive vibrato that adds warmth and depth to his playing, giving his notes a singing quality that is instantly recognizable.
- Unusual bending combinations: Mason is known for experimenting with different combinations of bending techniques to create unique sounds that stand out from the crowd. He often incorporates unison bends, release bends, and other techniques into his playing to create unexpected twists and turns.
By combining these bending techniques with his impeccable technique and keen sense of melody, Brent Mason has revolutionized the way that country guitar is played. Whether he is playing a ballad or a barn-burner, his use of bending techniques adds emotion and excitement to every note he plays.
Conclusion
As we wrap up this article on creating a unique sound through combining bending techniques, it’s clear that bending is an essential skill for any guitarist looking to stand out from the crowd. Each bending technique has its own unique sound and character, and by combining them, you can create an endless variety of tones and moods.
Remember to start with the basics of whole-step and half-step bends, and practice until you can hit the notes accurately and with confidence. Once you have those down, try adding unison bends or pre-bends to your chord progressions to add some extra flavor. Experiment with release bends and slow bends, and try combining them with fret slides for a truly dynamic sound.
Advanced techniques like bending behind the nut or using double stop bends and fingerpicking can take your playing to the next level, but don’t forget about the importance of tone. Adjusting attack and release time, using effects pedals, and even trying out different strings can all help you achieve the perfect sound.
Looking to the pros, Keith Urban, Brad Paisley, and Brent Mason all use bending techniques to great effect in their playing. Take inspiration from their styles and incorporate their techniques into your own playing.
Ultimately, the key to creating a unique sound through bending is to experiment and find what works best for you. So grab your guitar, start practicing those bends, and let your creativity run wild.
Frequently Asked Questions
What are bending techniques?
Bending techniques are used to create unique sounds on the guitar by slightly altering the pitch of a note while it is being played.
What is a whole-step bend?
A whole-step bend is when a note is bent up two frets, representing a whole step up in pitch.
What is a half-step bend?
A half-step bend is when a note is bent up one fret, representing a half step up in pitch.
What is an unison bend?
An unison bend is when two or more strings are played simultaneously, then one string is bent up to match the same pitch as another string.
What is a pre-bend?
A pre-bend is when a string is bent up to a desired pitch before it is even played, and then the note is played while keeping the string bent.
What is a release bend?
A release bend is when a string is first bent up to a desired pitch and then released back to its original pitch while being played.
What are slow bends?
Slow bends are when a string is bent gradually over a longer period of time in order to create a more subtle pitch change.
What technique can I use to create a unique sound?
Combining bending techniques is a great way to create a unique sound on the guitar.
What is double stop bending?
Double stop bending is when two strings are played simultaneously and one of the strings is bent to achieve a specific pitch.
How can I enhance the sound of my bends?
Using effects pedals, adjusting attack and release time, and using different strings for different bends can all help enhance the sound of your bends.