Playing the electric guitar is a thrilling and rewarding experience, but mastering techniques like tapping can take your skills to the next level. Proper hand placement is crucial when it comes to tapping on the electric guitar, as it can greatly impact your sound and overall performance. In this article, we will delve into the importance of proper hand placement while tapping on the electric guitar and provide tips to help you improve your technique.
Understanding Tapping on Electric Guitar
Tapping is a technique where you use your picking hand to hammer onto the fretboard to produce notes, instead of using a pick. This technique is commonly associated with rock and metal genres and is popularized by guitar virtuosos like Eddie Van Halen and Steve Vai. Tapping allows for rapid and intricate note patterns that can add flair and complexity to your playing.
The Role of Hand Placement
Hand placement is crucial when it comes to tapping on the electric guitar. The positioning of your tapping hand can affect your reach, speed, and accuracy. Placing your hand in the right position can make tapping feel more natural and fluid, allowing you to execute complex phrases with ease.
Proper Hand Placement Techniques
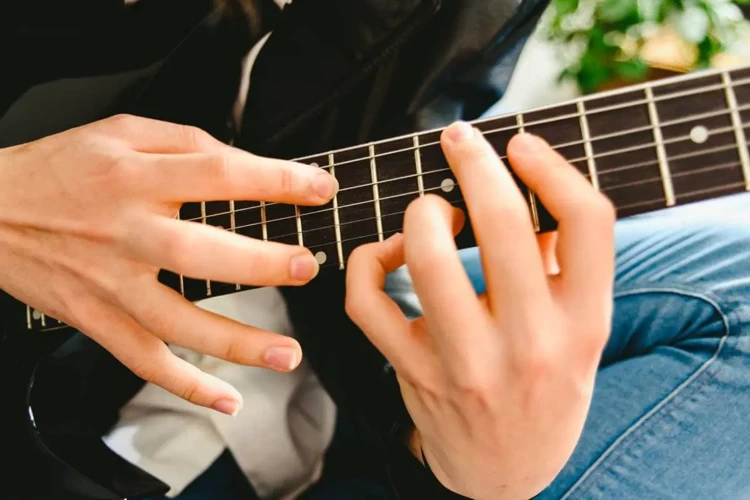
1. **Finger Positioning:** When tapping on the electric guitar, use your index, middle, or ring finger of your picking hand to hammer onto the fretboard. Your finger should strike the fret directly above the one you are holding down with your fretting hand. This ensures a clean and clear note.
2. **Thumb Placement:** Your thumb should be positioned behind the neck for support and stability. Avoid gripping the neck too tightly, as this can restrict your finger movement and cause fatigue.
3. **Angle of Attack:** Experiment with the angle at which you approach the strings. A slight angle can help you produce a stronger and clearer sound. Find the angle that feels most comfortable and allows you to tap with precision.
4. **Distance from the Fretboard:** Maintain a consistent distance between your tapping hand and the fretboard. Being too far away can make it challenging to produce a strong sound, while being too close can result in unintentional string muting.
Exercises to Improve Hand Placement
1. **Fretboard Visualization:** Practice visualizing the fretboard and the notes you want to tap. This can help you position your hand more accurately and efficiently.
2. **Slow and Steady:** Start with simple tapping exercises at a slow tempo. Focus on maintaining proper hand placement and building muscle memory before increasing speed.
3. **Metronome Practice:** Use a metronome to practice tapping exercises and focus on syncing your tapping hand with the beat. This can improve your timing and precision.
4. **String Skipping:** Incorporate string skipping exercises into your practice routine to improve your hand coordination and accuracy. This will also help you navigate the fretboard more effectively.
Common Mistakes to Avoid
Overreliance on One Finger
Using only one finger for tapping can limit your speed and dexterity. Experiment with different fingers and combinations to enhance your technique and expand your playing capabilities.
Incorrect Thumb Position
Placing your thumb too high on the neck or wrapping it around can hinder your reach and mobility. Keep your thumb anchored behind the neck for better support and control.
Inconsistent Hand Placement
Changing hand positions frequently while tapping can lead to inconsistent sound and technique. Focus on maintaining a steady hand placement to ensure a smooth and fluid performance.
Benefits of Proper Hand Placement
Improved Technique
Proper hand placement can enhance your tapping technique, allowing you to play with greater speed, accuracy, and control. It can also help reduce tension in your hand and wrist, preventing strain and potential injuries.
Cleaner Sound
By positioning your hand correctly, you can produce cleaner and more articulate notes while tapping. This clarity and precision in your playing can elevate your performance and make your music more enjoyable to listen to.
Enhanced Musical Expression
When your hand placement is on point, you can express yourself more effectively through your playing. The right hand positioning allows you to execute intricate melodies, dynamic phrases, and expressive techniques with finesse.
Looking to improve your electric guitar skills? Check out our articles on tapping electric guitar basics, common effects pedals for country electric guitar playing, country electric guitar string bending tips, why pedal order matters for guitar pedals, and tuners vs tuning apps for acoustic guitar for valuable insights and techniques to enhance your playing!
Conclusion
Mastering proper hand placement while tapping on the electric guitar is essential for improving your technique and overall performance. By focusing on finger positioning, thumb placement, angle of attack, and distance from the fretboard, you can enhance your tapping skills and unlock new possibilities in your playing. Remember to practice consistently, avoid common mistakes, and experiment with different exercises to refine your hand placement and take your electric guitar playing to new heights.