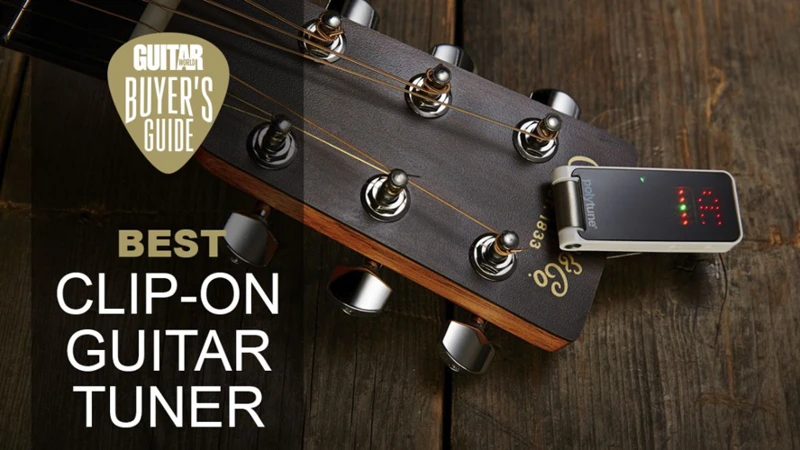
As a guitar player, you know that tuning your guitar is one of the most important things you can do before playing. But, with so many different types of tuners out there, it can be overwhelming to choose which one is best for you. Have you considered using a clip-on tuner for your acoustic guitar? Not only are they convenient and portable, but they also offer many benefits that other tuning methods simply can’t match. In this article, we will explore the advantages of using a clip-on tuner, how to use one properly, compare it to other tuning methods, provide tips for usage, and guide you in selecting the right clip-on tuner suitable for you. Let’s dive in and discover how a clip-on tuner can take your guitar playing to the next level.
Advantages of Using a Clip-On Tuner
As a guitar player, one of the essential tools for achieving optimal sound quality and improving your performance is a tuner. While there are different types of tuners for acoustic guitars available, one of the most convenient, accurate, and portable is the clip-on tuner. Using a clip-on tuner has many advantages, from achieving greater accuracy and precision to improving your guitar playing skills. In this section, we’ll explore the benefits of using a clip-on tuner for your acoustic guitar, and why it might be a better option for you compared to other tuning methods. To learn more about tuning your guitar for country music, check out our article on tuning your guitar for country music.
1. Accuracy and Precision
Clip-on tuners are becoming increasingly popular as a reliable and precise way to tune acoustic guitars. Using a clip-on tuner can ensure that your guitar is tuned accurately and with great precision. Clip-on tuners work by picking up on the vibrations in the guitar’s soundboard, making them more accurate than other tuning methods which rely on external factors such as noise in the environment or the quality of a guitar’s built-in tuner.
Here are some reasons why accuracy and precision are important when tuning your guitar:
| Reasons | Explanation |
|---|---|
| Prevents Sounding Flat | Playing out-of-tune notes can make the guitar sound flat; using a clip-on tuner can help you play in tune and avoid this. |
| Avoid Dissonance | Poor tuning can also result in unwanted dissonances, making your music sound unpleasant to the ear. |
| Improves Playing | Playing with a guitar that is in tune is not only important for sounding good but also helps players to develop better tone and technique. |
| Helps You Play With Others | Playing in tune is especially important when playing with others, as it ensures that you are all playing in the same key. |
Using a clip-on tuner can help you avoid all of these common pitfalls that come with other tuning methods. The ability to tune with accuracy and precision is crucial for producing high-quality musical sounds. By using a clip-on tuner, you can enhance your playing experience and ensure that your guitar sounds the way you want it to.
To learn more about different tuning methods for acoustic guitars, check out our article on different tuners for acoustic guitars or our tips on how to tune your guitar with an electronic tuner. For those who prefer tuning by ear, our tips on how to tune your guitar by ear may also be helpful. Finally, to ensure that your guitar sounds its best, it’s important to have the right setup, including properly functioning tuners – learn more at our article on guitar setup and tuners for the perfect sound.
2. Convenience and Portability
Clip-On tuners for acoustic guitars are also advantageous in terms of convenience and portability. They are small and lightweight, making them easy to carry around wherever you go. You can easily slip it in your pocket or guitar case and bring it along with you to music lessons, gigs, or performances.
Clip-on tuners are also easy to attach to your guitar headstock, and you can leave it there while playing without being disturbed. Unlike other tuning options like pedal tuners or smartphone apps, you don’t have to keep turning on and off the device just to check your tuning. Plus, it eliminates the need for plugging your guitar into an amp or external device just to tune.
The design of many clip-on tuners helps in optimizing battery life. They usually have a power-saving mode that turns off the device automatically when not in use, and they are built to last for many hours of usage. You don’t have to worry about your tuner dying during long playing sessions or performances.
To sum up, the convenience and portability offered by clip-on tuners make them a popular choice for guitar players. They are perfect for musicians who are always on-the-go and want an easy-to-use but reliable tuning option for their acoustic guitar. Next, we will discuss how to effectively use a clip-on tuner for your guitar in the section below.
| Advantages of Clip-On Tuners for Acoustic Guitar |
|---|
| Accurate and Precise Tuning |
| Convenient and Portable |
| Improves Playing and Performance |
| Easy to Use |
| Compatible with Different Environments and Settings |
3. Improves Your Playing and Performance
Using a clip-on tuner for your acoustic guitar can greatly improve your playing and performance. When your guitar is in tune, it makes it easier to play and ensures that the notes and chords you play are in harmony. In this way, you become a better musician.
Improved Sound Quality: When your guitar is in tune, you’ll notice a significant improvement in its sound quality. The notes will sound cleaner and more precise, and the chords will be in perfect harmony. This will also improve your confidence when playing in front of others.
Enhanced Learning Experience: If you’re just starting to learn how to play the guitar, using a clip-on tuner can help you better understand the concept of tuning. This is because clip-on tuners are easy to use and understand, and they provide immediate feedback on the pitch of the strings. It can also help you spot common tuning challenges such as being able to differentiate between E and A or B and G. An internal link to common-tuning-challenges can help you learn more about tuning challenges an acoustic artist may face.
Better Playing Technique: When your guitar is in tune, you’ll find it easier to play the different chords and melodies. This is because the notes will be more distinct and clear, allowing you to hear any mistakes and fix them accordingly. Over time, using a clip-on tuner can help you develop better playing technique, which can lead to improved performance.
Stress-Free Performance: With a properly tuned guitar, you can perform with greater confidence without constantly worrying about hitting the wrong note or chord. This allows you to be more expressive and creative in your playing, which can lead to a more captivating performance.
Using a clip-on tuner for your acoustic guitar is one of the easiest and most efficient ways to enhance your playing and improve your overall performance. To learn more about what to look for when choosing a clip-on tuner, check out our guide to the best-tuner-for-acoustic-guitar. Alternatively, check out our comparison between tuners and tuning apps for an acoustic guitar tuners-vs-tuning-apps-acoustic-guitar.
How to Use a Clip-On Tuner
Using a clip-on tuner may seem intimidating at first, but it’s actually a simple and efficient process. By following a few basic steps, you can achieve perfect guitar tuning in no time. In this section, we will guide you through the process of using a clip-on tuner to help you get the most out of your acoustic guitar. Whether you’re a beginner or an experienced player, these tips will help you optimize your tuning experience and improve your overall performance. Get ready to enhance your musical journey with the help of a clip-on tuner!
1. Attach the Tuner
Attaching the Tuner
Before you can begin using your clip-on tuner, you need to secure it to your guitar. Follow these simple steps to attach the tuner:
- Step 1: Locate the clip on the tuner. It is usually located on the back of the tuner and is used to secure the tuner to the headstock of your guitar.
- Step 2: Open the clip and position it over the headstock of your guitar. Make sure the tuner is facing the right way.
- Step 3: Tighten the clip by squeezing it until it is secure. Be careful not to squeeze too hard, as this could damage the headstock or the tuner.
It’s important to note that not all clip-on tuners are compatible with all types of guitars. Make sure the tuner you choose is suitable for use with your specific guitar model. If you’re unsure which tuner to choose, consult with an expert at your local music store.
Attaching your clip-on tuner is a quick and easy process. With a little practice, you’ll be able to clip on your tuner effortlessly and start tuning your guitar in no time.
2. Select the Correct Mode
When using a clip-on tuner, it is important to select the correct mode for your instrument. Most clip-on tuners feature different modes for various instruments, such as guitar, bass, violin, and more. Here are some steps to select the correct mode for your acoustic guitar:
| Step | Instructions |
|---|---|
| Step 1 | Turn on the tuner by pressing the power button. |
| Step 2 | Check the tuner’s display for the available modes. They are usually indicated by letters or icons. Look for the one that represents the acoustic guitar mode. |
| Step 3 | Select the acoustic guitar mode by pressing the mode button until you reach the correct setting. |
| Step 4 | Ensure that the tuner is properly attached to your guitar and ready to use. |
Selecting the correct mode is crucial because it ensures that the tuner is accurately measuring the pitch of the correct notes for your instrument. Using the wrong mode can lead to inaccurate tuning, which can affect the sound and playability of your guitar. It is important to make sure that you have selected the correct mode before proceeding with tuning your acoustic guitar.
3. Tune Your Guitar
Now that you have attached the clip-on tuner to your guitar and selected the correct mode, it’s time to tune your guitar using the following steps:
| Step | Action |
|---|---|
| 1 | Pluck the string that you want to tune. Make sure to hold the string down firmly against the frets with one hand while plucking it with the other to produce a clear and distinct sound. |
| 2 | Look at the display of the clip-on tuner to see the note that the tuner is registering. Adjust the tuning peg of the string you are tuning up or down until the display shows the note that matches the string you are playing. |
| 3 | Repeat the process for each string on your guitar, starting from the thickest string and moving towards the thinnest. Use the tuner to help you achieve the correct pitch for each string. |
It’s important to note that the clip-on tuner will give you a visual indication of how close or far away from correct pitch you are, usually through the use of a needle or line that moves towards the center of the display as you get closer to the correct note. It’s important to fine-tune your guitar so that the needle is as close to centered as possible, indicating that you are playing in tune.
As you tune your guitar, you may find that some strings are easier to tune than others. This is because of the varying thicknesses of the strings, which can affect the responsiveness of the clip-on tuner. If you are struggling to get an accurate reading, try plucking the string harder or softer, or adjusting the tuner’s sensitivity to help bring the needle closer to center.
By following these steps and using a clip-on tuner, you can ensure that your guitar is always in tune and ready to play. This will not only improve the sound of your playing but also help you to develop your ear for music and become a better musician over time.
4. Check Your Tuning Regularly
Maintaining proper tuning is essential to producing clear and accurate music on your acoustic guitar. While using a clip-on tuner makes tuning an easy and convenient process, it’s important to regularly check your tuning as you play. Here are some tips to help you check your tuning regularly and enjoy an uninterrupted playing experience:
- Listen to the Sound: One simple way to check your tuning is by listening to the sound of your guitar. If it sounds off, then it’s time for a quick tune-up. However, if you’re a beginner, rely on your clip-on tuner to identify any discrepancies in your tuning.
- Look at the Display: Always keep an eye on the display of the tuner as you play. If you notice any deviations from the standard pitch, then it’s time to retune your strings. Inconsistencies in pitch can occur due to changes in humidity and temperature, so it’s essential to keep checking your tuning periodically.
- Check String Tension: The tension on your strings can affect your tuning, so make sure to check your string tension regularly. If you notice that your strings feel looser than usual, then it’s time to tune them up. On the other hand, if they feel tighter, then you may need to loosen them up a bit.
- Practice Regularly: Lastly, the more you play your guitar, the more accustomed you’ll be to its sound and tuning. Practicing regularly not only helps you enjoy and refine your playing skills, but it also helps you identify any changes in your guitar’s tuning that you may have missed otherwise.
By following these tips and consistently checking your tuning, you can ensure that your acoustic guitar always sounds its best and that you’re able to produce the clear and accurate music you desire.
Clip-On Tuner vs Other Tuning Methods
When it comes to tuning your acoustic guitar, there are several methods available to choose from. Each approach has its strengths and drawbacks, making it important to consider the context in which each is likely to be most effective. Two of the most popular options are clip-on tuners and phone apps, and while both have their merits, they have some key differences that could impact your choice. Additionally, you may be wondering how built-in tuners, pitch pipes, and forks stack up against clip-on tuners. Before you make a decision on which method to use, it’s important to weigh the pros and cons of each.
1. Clip-On Tuner vs Phone Apps
When it comes to tuning your guitar, you have a variety of options to choose from including clip-on tuners and phone apps. While phone apps may seem like a convenient option, they do have some limitations compared to clip-on tuners. Let’s take a closer look at the differences between the two options.
Clip-On Tuner | Phone App
— | —
– Provides more accurate and precise tuning. | – May not be as accurate as clip-on tuners.
– Offers better visibility in poorly lit environments. | -Can be difficult to see in bright sunlight or low light situations.
– Has a longer battery life than phone apps. | – Can quickly drain your phone’s battery.
– Offers more portability and convenience. Can be easily transported and used in any setting. | – May require an internet connection or access to your phone’s microphone.
– Usually has a wider tuning range than phone apps. | – Tuning range may be limited.
While phone apps are free and readily available, they do have some drawbacks when it comes to tuning your guitar. A clip-on tuner is a more reliable option, providing better accuracy, visibility, and portability. Additionally, clip-on tuners offer a wider range of tuning options and have a longer battery life, making them a better investment in the long run.
2. Clip-On Tuner vs Built-In Tuners
When it comes to tuning your acoustic guitar, you have a few options to choose from. One of the most common options is to use the built-in tuner that comes with many guitars. However, there are some distinct advantages to using a clip-on tuner instead. Let’s examine the differences between clip-on tuners and built-in tuners.
Accuracy and Precision: When it comes to accuracy and precision, clip-on tuners tend to win out over built-in tuners. Clip-on tuners rely on vibrations from your guitar to determine whether your strings are in tune. Built-in tuners, on the other hand, can be affected by background noise and other factors that may throw off their accuracy.
Convenience and Portability: Clip-on tuners are much more convenient and portable than built-in tuners. Built-in tuners require you to be near an amplifier or other electronic device in order to use them. Clip-on tuners, on the other hand, can be used anywhere, at any time. They’re small and easy to carry around, so you can keep one in your guitar case or pocket.
Improves Your Playing and Performance: Using a clip-on tuner can actually improve your playing and performance. Because clip-on tuners provide real-time feedback, you’ll be able to adjust your tuning on the fly. This means you’ll always be in tune, which can improve the sound of your guitar and make it easier to play.
Now, let’s break down the differences between clip-on tuners and built-in tuners in an easy-to-read table:
| Clip-On Tuners | Built-In Tuners |
|---|---|
| Accurate and precise | Can be affected by background noise |
| Convenient and portable | Require you to be near an amplifier or other device |
| Provide real-time feedback and can improve your playing and performance | May not offer real-time feedback |
While built-in tuners have their advantages, clip-on tuners tend to be more accurate, convenient, and beneficial for improving your playing and performance.
3. Clip-On Tuner vs Pitch Pipes and Forks
When it comes to tuning your acoustic guitar, there are various methods that you can use. Pitch pipes and tuning forks are some of the traditional devices that have been used for this purpose. However, compared to clip-on tuners, they have some significant drawbacks.
Here’s a comparison of clip-on tuners and pitch pipes/tuning forks:
- Accuracy: While pitch pipes and forks can be accurate when they are in tune, they are not always reliable, especially if they are old or damaged. On the other hand, clip-on tuners use advanced technology to accurately detect the frequency of each string, ensuring that your guitar is perfectly tuned.
- Convenience: While pitch pipes and tuning forks may be small and portable, they require a little bit of practice to get the hang of using them. They also require you to hear the pitch and then match it to the corresponding string, which can be time-consuming and frustrating. Clip-on tuners, on the other hand, are much more intuitive and user-friendly. They simply clip onto your headstock and give you real-time feedback on the pitch of each string.
- Flexibility: Pitch pipes and tuning forks are typically designed to tune your guitar to a standard pitch, such as A440. While this may work for most applications, it may not be suitable for all situations. For example, if you are playing with a capo or tuning down to an alternate tuning, you will need to use a different reference pitch. A clip-on tuner allows you to tune to any pitch that you need, making it much more versatile.
- Affordability: Pitch pipes and tuning forks are generally inexpensive and can be found for under $10. Clip-on tuners, on the other hand, can range from $10 to $50 or more. However, the extra cost is worth it for the benefits that they offer, such as accuracy, convenience, and flexibility.
While traditional methods like pitch pipes and tuning forks have some benefits, they are not as reliable, flexible, or convenient as clip-on tuners. If you want to ensure that your guitar is always perfectly in tune, a clip-on tuner is the way to go.
Choosing the Right Clip-On Tuner
When it comes to selecting the ideal clip-on tuner for your acoustic guitar, the vast array of options available can make the decision making process quite overwhelming. However, with the right guidance and knowledge of what to look for, you can easily narrow down your choices to find the clip-on tuner that meets your specific requirements. In this section of the article, we will explore the crucial factors to consider when selecting the best clip-on tuner for your acoustic guitar. So sit tight, take notes, and let’s dive right in!
1. Budget
When choosing a clip-on tuner for your acoustic guitar, budget is a crucial factor to consider. It’s important to set a budget range that you’re comfortable with, as prices for clip-on tuners can vary greatly depending on the features they offer. Here are some tips to help you choose the right clip-on tuner based on your budget:
- Low-Budget Clip-On Tuners ($10-$20)
- Mid-Range Clip-On Tuners ($20-$50)
- High-End Clip-On Tuners ($50 or more)
Cheap tuners may help you get close to the correct pitch, but they often lack the precision and accuracy of higher-end devices. They can also be more challenging to read, especially in low-light environments. However, if you’re just starting out or need a tuner to take on the go, a low-budget tuner can be a good option.
Mid-range clip-on tuners offer better accuracy and stability than low-budget models, making them a good choice for intermediate players. These tuners often have a wider calibration range, as well as more advanced features, such as metronomes and pitch calibration settings.
High-end clip-on tuners are often used by professional musicians, as they offer unparalleled accuracy, speed, and user-friendly features. Some can even be calibrated to different tuning systems, such as temperaments or alternate tunings. Although they can be pricier than other models, the benefits they offer can be worth the investment.
Remember that the price point of a clip-on tuner does not always correlate with its quality. Don’t forget to pay attention to other features, such as display type, calibration range, and battery life, to get the best tuner for your money.
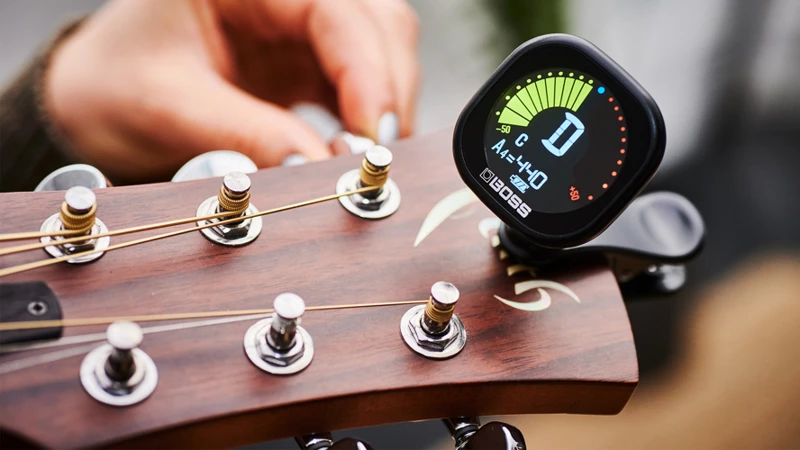
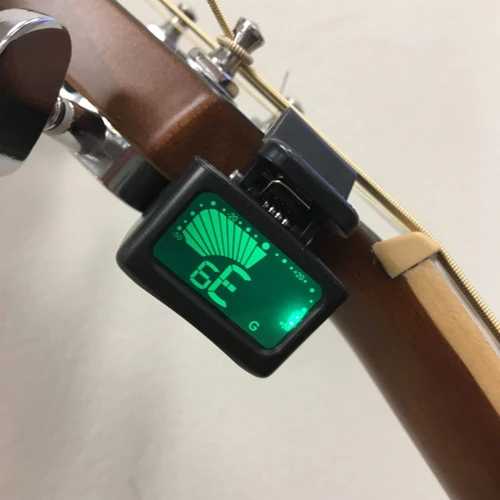
2. Display Type
When choosing the right clip-on tuner for your acoustic guitar, display type is an important factor to consider. The display type of a clip-on tuner refers to the type of screen or interface it has for displaying the tuning information.
Here are some display types to consider:
- Needle Display: This type of display shows a needle that moves back and forth, indicating whether your string is too sharp or too flat. It’s a classic design and is easy to read in most lighting conditions.
- LCD Display: LCD displays show the note you are tuning to as well as whether it’s sharp or flat. Some also have a needle display in addition to the LCD screen. This type of display is easy to read and provides accurate tuning information.
- LED Display: LED displays are a bit more visually appealing than LCD displays as they use colored lights to indicate whether a note is in tune, sharp, or flat. They are also easy to read, although they can be affected by bright lighting conditions.
- Color Display: This type of display is becoming more common on clip-on tuners. It uses a full-color screen to display tuning information in a more visually appealing way. They are generally easy to read and accurate, although they can be more expensive.
It’s important to choose a display type that you find easy to read and understand. Different people may have different preferences when it comes to display type, so it’s worth trying out a few different types to see which one you prefer. Another factor to consider is the size of the display, as this can also affect readability. A larger display may be easier to read in low light conditions, while a smaller display can be more portable.
3. Calibration Range
When it comes to choosing the right clip-on tuner for your acoustic guitar, the calibration range is an important factor to consider. The calibration range refers to the range of pitch that the tuner can detect and display accurately. A wider calibration range means that the tuner can cover a wider range of pitches, including alternative tunings.
Why is the Calibration Range Important?
The calibration range is important because guitars are often tuned to pitches that are not standard. For example, a lot of guitarists use drop tunings, which involve lowering the pitch of one or more strings. If your tuner has a narrow calibration range, it may not be able to accurately detect these altered pitches, which can result in inaccurate tuning.
How to Choose the Right Calibration Range
When choosing a clip-on tuner, it’s important to consider the specific pitches you will be tuning to. If you only ever tune to standard pitch (440 Hz), then a tuner with a narrow calibration range will suffice. However, if you frequently use alternative tunings, it’s worth investing in a tuner with a wider calibration range.
Here is a table that compares the calibration ranges of three popular clip-on tuners:
| Tuner | Calibration Range |
|---|---|
| KLIQ UberTuner | 430-450 Hz |
| D’Addario NS Micro Tuner | 410-480 Hz |
| Snark SN-5X | 415-466 Hz |
As you can see, these tuners have slightly different calibration ranges. The KLIQ UberTuner has a narrower range, while the D’Addario NS Micro Tuner has a wider range. The Snark SN-5X falls somewhere in between.
Conclusion
When choosing a clip-on tuner for your acoustic guitar, it’s important to consider the calibration range. A wider range will be more versatile and versatile, allowing you to accurately tune to alternative pitches. However, if you only ever tune to standard pitch, a narrower range will be sufficient. Be sure to take this into account when making your purchase.
4. Battery Life
When choosing a clip-on tuner for your acoustic guitar, battery life is an important factor to consider. The last thing you want is for your tuner to die right in the middle of a session or performance.
Some things to keep in mind when it comes to battery life:
| Factor | Importance |
|---|---|
| Battery Type | Consider the type of battery the tuner uses. Some models use coin or button cell batteries, while others use AAA, AA, or rechargeable batteries. Rechargeable batteries are more environmentally friendly and cost-effective in the long run, but they may not last as long per charge as disposable batteries. |
| Battery Life | Look for tuners that have a long battery life. Some models can last up to 100 hours on a single charge or battery, while others may only last a few hours. Consider how frequently you’ll be using your tuner and how often you’ll need to replace or recharge the battery. |
| Auto-Off Feature | Check if the clip-on tuner has an auto-off feature. This feature will turn off the tuner after a certain amount of inactivity to save battery life. While a helpful feature, it can also be frustrating if the tuner turns off too quickly while you’re in the middle of tuning. |
By carefully considering the battery life of the clip-on tuner you choose for your acoustic guitar, you can ensure that you always have a reliable and functional tool at your disposal. It’s important to keep the battery life in mind and make sure you always have extra batteries or a charging cable on hand, just in case.
Tips for Using a Clip-On Tuner
Now that you know the advantages of using a clip-on tuner for your acoustic guitar and how to use it, it’s time to explore some valuable tips that can help you optimize your experience with this tool. Whether you’re a beginner or an experienced player, these tips will help you improve your tuning skills, save time, and enhance your overall playing experience. So, let’s dive into these essential tips for using a clip-on tuner effectively.
1. Tune Up Before Every Playing Session
Keeping your guitar in tune is the foundation of any great performance. Before starting a new playing session, it’s important to make sure your guitar is properly tuned. This not only ensures that your guitar sounds great, but it also helps to prevent damage to your instrument. Here are some tips for tuning your guitar before every playing session:
- Set aside time for tuning: Tuning your guitar can take a few minutes, but it’s important to ensure you have enough time for it before you start playing.
- Use a clip-on tuner: As we mentioned earlier, one of the biggest advantages of using a clip-on tuner is its accuracy and precision. This makes tuning your guitar a breeze.
- Start with the low E string: This is the thickest string on your guitar and should be tuned to E2.
- Tune each string one at a time: Work your way from the low E string to the high E string, using your clip-on tuner to make sure each string is in tune.
- Tune up to pitch: When tuning your guitar, it’s important to tune up to pitch, rather than down. This helps to put less tension on your guitar’s neck.
- Check your tuning regularly: Even if you’ve tuned your guitar at the start of your playing session, it’s important to check your tuning regularly. This is especially important if you’re playing for an extended period of time, as the temperature and humidity in the room can affect your guitar’s tuning.
By following these tips, you can ensure that your guitar sounds great and is protected from unnecessary damage. Remember to take the time to properly tune your guitar before every playing session and check your tuning regularly throughout your performance.
2. Keep Your Tuner Close By
One of the most important tips for using a clip-on tuner is to keep it close by. This means having it easily accessible whenever you pick up your acoustic guitar to play. Here are some ways to make sure your tuner is always within reach:
- Attach it to your guitar: Most clip-on tuners can be attached directly to the headstock of your guitar. This means you can tune up quickly and easily without having to search for your tuner.
- Keep it in your guitar case: If you travel with your guitar or store it in a case, make sure to keep your tuner in the case as well. This way, you’ll always know where it is and can tune up whenever you need to.
- Use a keychain tuner: If you don’t want to attach your tuner to your guitar, consider getting a small keychain tuner that you can keep on your keys or in your pocket.
- Have a spare: It’s always a good idea to have a spare clip-on tuner in case you misplace or break your main one. Keep a spare in your guitar case or in a separate location where you know it will be easy to find.
By keeping your clip-on tuner close by, you’ll be more likely to tune up regularly and make sure your acoustic guitar sounds its best. Don’t underestimate the importance of having a reliable and accurate tuner on hand – it can make all the difference in your playing and performance.
3. Learn to Tune by Ear
Tuning your acoustic guitar by ear can be a challenging skill to develop, but it’s certainly not impossible. While using a clip-on tuner is the most precise and efficient method, there are times when you may not have access to one. Learning to tune by ear can also improve your overall musicianship and ear training abilities. Here are some steps and tips to help you tune your acoustic guitar by ear:
Step 1: Start by tuning your low E string. You can use a reference pitch from a piano or digital tuner, or even a tuning fork to get started. Pluck the open E string and listen to the pitch. Adjust the tuning key until the note matches your reference pitch or sounds in tune to your ear.
Step 2: Once you have your low E string in tune, you can use it as a reference pitch for the A string. Play the fifth fret on the low E string and match that pitch to the open A string.
Step 3: To tune the D string, play the fifth fret on the A string and match it to the open D string.
Step 4: To tune the G string, play the fifth fret on the D string and match it to the open G string.
Step 5: To tune the B string, play the fourth fret on the G string and match it to the open B string.
Step 6: Finally, to tune the high E string, play the fifth fret on the B string and match it to the open high E string.
Tip 1: It’s important to train your ear to recognize when two notes are in tune with each other. Practice playing two strings or notes simultaneously and adjust the tuning until you hear the most pleasing and harmonious sound.
Tip 2: In addition to using a reference pitch or tuning fork, you can also tune by comparing the pitches to other sounds in your environment such as birdsong, sirens or even the sound of your refrigerator hum.
Tip 3: Don’t be discouraged if you don’t get it perfect on your first try. Tuning by ear can take time and practice to develop, but it’s a valuable skill to have as a musician.
| String Name | Tuning Method |
|---|---|
| Low E | Reference pitch from piano, tuner or tuning fork |
| A | Match fifth fret on low E string |
| D | Match fifth fret on A string |
| G | Match fifth fret on D string |
| B | Match fourth fret on G string |
| High E | Match fifth fret on B string |
While using a clip-on tuner is the most accurate and efficient method of tuning your acoustic guitar, learning to tune by ear can be a valuable skill to develop. With patience and practice, you can improve your ear training abilities and develop a more musical ear. Remember to take your time and enjoy the process of tuning your guitar to sound just the way you want it.
Conclusion
In conclusion, using a clip-on tuner for your acoustic guitar can have numerous benefits that improve your overall playing experience. By providing accuracy and precision, convenience and portability, and even improving your playing and performance, a clip-on tuner is a must-have for any guitarist. Plus, with the ease of use and affordability of clip-on tuners, it’s a no-brainer investment for any serious or casual musician.
When using a clip-on tuner, it’s important to follow the proper steps and techniques to ensure the most accurate tuning possible. Always attach the tuner securely, select the correct mode, and tune your guitar slowly and carefully. Checking your tuning regularly is also crucial for maintaining the best sound quality possible.
Compared to other tuning methods such as phone apps, built-in tuners, and pitch pipes and forks, clip-on tuners stand out as the most reliable and efficient option. When choosing the right clip-on tuner, budget, display type, calibration range, and battery life are all important factors to consider.
By incorporating a clip-on tuner into your playing routine, you can not only improve your tuning accuracy but also your overall musicianship. Whether you’re a beginner or a seasoned professional, a clip-on tuner is an essential tool for any guitarist.
Remember to tune up before every playing session, keep your tuner close by, and even learn to tune by ear for added versatility. With the benefits and versatility of a clip-on tuner, there’s no reason not to invest in this crucial tool for your acoustic guitar.
Frequently Asked Questions
1. Can a clip-on tuner be used for electric guitars?
Yes! Clip-on tuners work for both acoustic and electric guitars.
2. Do clip-on tuners work for bass guitars?
Yes, clip-on tuners can work for bass guitars as well.
3. Can a clip-on tuner be attached to any part of the guitar?
Clip-on tuners should be attached to the headstock of the guitar for the most accurate tuning.
4. Can a clip-on tuner work in a noisy environment?
Yes, clip-on tuners are designed to pick up the vibrations of the strings, even in noisy environments.
5. Do clip-on tuners require any special skills to use?
No, clip-on tuners are very easy to use and require no special skills or knowledge.
6. Can clip-on tuners be used for other stringed instruments like ukuleles or violins?
Yes, clip-on tuners can be used for a variety of stringed instruments, including ukuleles and violins.
7. How long do clip-on tuner batteries last?
Battery life can vary depending on the model, but most clip-on tuners have a battery life of several months or even up to a year.
8. Are clip-on tuners more accurate than other tuning methods?
Clip-on tuners are generally very accurate and precise, especially compared to older methods like pitch pipes or forks.
9. Can clip-on tuners help improve your guitar playing?
Yes, using a clip-on tuner can help improve your playing by ensuring that your instrument is always in tune, leading to better overall sound and performance.
10. What should I look for when choosing a clip-on tuner?
When choosing a clip-on tuner, consider factors like your budget, the type of display, the calibration range, and battery life to find the right model for your needs.