Introduction
As a musician, you spend countless hours perfecting your craft and mastering your instrument. So, it only makes sense that you want your beloved acoustic guitar to shine just as brightly as your musical talent. But where do you start? How can you ensure that your guitar not only looks stunning, but also maintains its structural integrity? Well, fear not, because in this comprehensive guide, we’ll be walking you through the step-by-step process of polishing your acoustic guitar to perfection. From cleaning and restringing to polishing the body, hardware, and neck, we’ve got you covered. So, grab your guitar and let’s get started with the ultimate guide to polishing your acoustic guitar.
Why Polish Your Guitar?
Polishing your acoustic guitar not only gives it a shiny look but also helps to protect it from damage in the long run. It is a crucial step in the process of maintaining your guitar’s finish and preserving its value over time. Regular polishing can help remove tiny scratches and marks that accumulate on the surface with use, giving your guitar a renewed appearance. Polishing helps to protect the guitar’s finish by sealing it from the environmental elements such as humidity, dust, and dirt, which can cause long-term damage to the guitar’s finish.
Additionally, polishing your guitar can improve the sound quality of your instrument. A clean and polished guitar will resonate better and produce a clearer and brighter sound. The guitar’s hardware will also function more smoothly, enhancing your playing experience.
Whether you are a professional musician or simply a guitar enthusiast, keeping your instrument polished and well-maintained is essential. Not only will it keep your guitar looking new and beautiful, but it will also extend its lifespan and optimize its sound quality.
To make the polishing process as efficient and effective as possible, choosing the right polish is vital. However, before polishing your guitar, there is a list of steps to follow, such as cleaning your guitar, restringing it, and conditioning the fretboard. You can find more details about these steps and tips in other articles, such as “5 Cleaning Techniques for Your Acoustic Guitar”, “How Humidity and Temperature Affect Your Acoustic Guitar”, “The Best Guitar Cleaner and Conditioner for Your Acoustic Guitar”, “Restringing Your Acoustic Guitar: Step-by-Step Guide”, and “How to Clean and Condition Your Acoustic Guitar”.
Choosing the Right Polish
When it comes to polishing your acoustic guitar, choosing the right polish is crucial. Using the wrong type of polish can damage the wood and finish of your guitar, leaving you with an undesirable result. Let’s take a look at some key points to consider when selecting the correct polish for your guitar:
Type of Polish | Description |
Carnauba Wax | This natural wax provides a deep shine and protection for your guitar. It’s great for creating a glossy finish on wood. |
Polymer-based Polish | This type of polish will fill in small scratches and imperfections, creating a smoother and shinier appearance. |
Silicone-based Polish | While convenient and easy to use, silicone-based polishes can actually harm the finish of your guitar over time. Avoid using these types of polishes. |
Lemon Oil | Lemon oil is great for conditioning and moisturizing your guitar’s fretboard, but should not be used on the body or finish of your guitar. |
Before choosing your polish, it’s important to consider the materials used in the construction of your guitar. For example, guitars with nitrocellulose finishes require specific types of polish that won’t damage the delicate finish. Additionally, you want to ensure that the polish is safe to use on any hardware parts of your guitar, such as the tuning pegs or bridge.
Ultimately, choosing the right polish for your acoustic guitar depends on the finish and materials of your specific instrument. Do some research, and if you are unsure, consult with a professional at your local music store. By using the appropriate polish, you can achieve a beautiful and long-lasting shine for your beloved guitar.
Cleaning Your Guitar Before Polishing
Before diving into the polishing process, it’s essential to prepare your guitar by cleaning it thoroughly. Neglecting the cleaning stage can lead to further damage to your guitar’s finish, and the results of the polishing won’t be as noticeable. Dust, dirt, and other residues can accumulate on your guitar’s surface, creating a barrier that hinders the polishing effect. To ensure that your guitar looks as good as new, take some time to clean it before polishing. Let’s explore some effective ways to get your instrument nice and clean.
Removing Dust and Dirt
Before you start polishing your acoustic guitar, it’s vital to clean it thoroughly. This step ensures that the polish won’t stick to any dirt or dust, which could cause scratches on your guitar’s finish. Follow these steps to remove the dust and dirt from your guitar:
- Step 1: Remove the strings – Removing the strings from your guitar will make it easier for you to access and clean all its parts. Loosen the strings and unwind them from the tuning pegs. Don’t cut them off; you’ll need to restring the guitar later.
- Step 2: Use a soft cloth – Use a soft cloth to remove the dust and dirt gently. If you don’t have a special cloth made for guitars, you can use a microfiber cloth or an old cotton T-shirt. Don’t use a rough or abrasive material that could scratch your guitar’s surface.
- Step 3: Clean the surface – Spray a small amount of guitar cleaner or furniture polish on the cloth. Be careful not to spray the polish directly onto the guitar’s finish. Then, gently wipe the surface of your guitar, paying special attention to the areas around the strings and hardware.
- Step 4: Clean the soundhole – To clean the soundhole, use a clean cloth or a soft-bristled toothbrush. Gently scrub away any dirt, dust, or grime that may have accumulated inside.
- Step 5: Clean the rest of the hardware – Use a cloth and some cleaner to remove any dirt and dust from the tuning pegs and bridge. Take your time and make sure you clean every small crevice.
Once you have removed all the dirt and dust from your guitar, you can start polishing it. Just remember that the cleaning process is crucial to the success of the polishing process. Take your time and be gentle, as scratches can damage the guitar’s finish.
Cleaning the Fretboard
One important step in polishing your acoustic guitar is cleaning the fretboard. Over time, the buildup of dirt, sweat, and oils from your hands can cause the fretboard to become grimy and dull. Here’s a step-by-step process for cleaning your guitar’s fretboard:
Step 1: | Remove the strings from your guitar. This will give you better access to the fretboard. |
Step 2: | Choose a specialized fretboard cleaner or create your own solution by mixing equal parts of water and vinegar. |
Step 3: | Apply the cleaner to a soft cloth, not directly to the fretboard, to avoid saturation. |
Step 4: | Gently rub the cloth along the fretboard, taking care not to scrub the frets. Use a toothbrush to reach areas behind the frets and inlays. |
Step 5: | Wipe the fretboard clean using a dry cloth. |
Step 6: | Condition the fretboard with specialized oil or lemon oil that hydrates the wood and prevents it from drying out. Apply the oil to another soft cloth and gently rub it along the fretboard, wiping off any excess liquid with a dry cloth. |
By cleaning and conditioning the fretboard of your acoustic guitar, you’ll not only improve its appearance, but you’ll also prolong its life and prevent damage to the wood. Regular maintenance of your guitar, including cleaning and polishing, will keep it looking and sounding great for decades to come.
Restringing Your Guitar
Replacing the strings on your guitar is an important step in the polishing process. Not only do old strings sound dull, but they can also accumulate dirt and oil over time, which can negatively affect the sound of your guitar. Here’s a step-by-step guide on how to restring your guitar:
Step 1: | Loosen the old strings by turning the tuning pegs until the tension is released. Use wire cutters to snip the strings at the bridge. |
Step 2: | Clean the bridge and fretboard using a soft cloth and fretboard cleaner to get rid of any dirt and grime. |
Step 3: | Take the new string and thread it through the appropriate hole in the bridge. Pull the string until there is only a small amount of slack left. |
Step 4: | Thread the string through the appropriate hole in the tuning peg and turn the peg until the string is tight. Make sure the string winds around the peg neatly and evenly. |
Step 5: | Repeat steps 3 and 4 for the remaining strings, making sure to tune the strings to the correct pitch using a tuner. |
Step 6: | Stretch out the strings by pulling gently on each string, which will help them settle and stay in tune more quickly. |
Step 7: | Cut off any excess string with wire cutters, but be careful not to cut too close to the peg, as this can cause the string to slip out of the peg and go out of tune. |
Remember: It’s important to regularly change your guitar strings to maintain the sound quality and playability of your instrument. Restringing your guitar can also be a great opportunity to give it a thorough cleaning and polish, so don’t skip this important step!
Discover Top 3 Acoustic Guitar Bestsellers
- Two pickup systems: Fender Acoustasonic Noiseless; Fishman Under-Saddle Transducer
- Acoustic Engine delivers a new and unique set of acoustic and electric voices
- Blend Knob selects and blends voices
- Patented Stringed Instrument Resonance System (SIRS)
- Integrated forearm and back contour, and mahogany neck
- The Squier SA-150 is a full-size steel-string acoustic that offers big sound at a small price.
- It's strong enough to stand up to the everyday use (and abuse) that beginning players might throw its way thanks to its all-laminate construction with lindenwood top and mahogany back and sides.
- This guitar also features scalloped "X"-bracing, mahogany neck and a durable dark-stained maple fingerboard to give you an instrument that looks as good as it sounds.
- With its slim, easy-to-play neck and full-bodied dreadnought tone, the SA-150 is an ideal choice for all rookie strummers.
- EVERYTHING YOU NEED IN ONE BOX: A gig bag is included so you can keep your instrument safe when you're on the go. The included clip-on tuner is easy to use and delivers reliable performance. Included in this bundle is a guitar strap, extra strings, string winder and picks so you can start playing your instrument immediately. Our exclusive Austin Bazaar instructional DVD provides the guidance you need as you learn your new instrument.
- Antique white binding Aging toner Forward shifting non-scalloped X bracing Dovetail neck joint Style 28 mother-of-pearl fingerboard inlays Solid headstock with square taper and diamond inlay. SP Acoustic 92/8 Phosphor Bronze Medium (MSP4200) strings Multi-stripe top and back inlays
- Sometimes innovation is in the details and this is certainly true with Martin’s re-imagined 2017 D-28
- After nearly a century at the helm, and as the quintessential workhorse of music legends like Hank Williams, The Beatles, Johnny Cash, Neil Young, Bob Dylan, and so many more, Martin's legendary D-28 has been lovingly and artfully enhanced
- “The post WWII D-28 had a slightly different look than its predecessor and became the centerpiece of the folk and folk rock movements at their pinnacle in the 1950s and 1960s
- " says Chris Martin, Chairman and CEO of Martin Guitar, "We have extracted the finest features from the D-28 of both my grandfather’s and my father’s respective eras
Polishing the Body of Your Guitar
When it comes to maintaining the beauty of your acoustic guitar, one of the most important steps is to polish the body. Not only does this give your guitar a stunning shine, but it also helps to protect the wood from wear and tear. The body of your guitar is what catches the eye of the audience, so it’s important to ensure it’s looking its best. In this section, we’ll guide you through the step-by-step process of polishing the body of your guitar, from choosing the right products to removing unsightly scratches. Let’s dive in and explore how to achieve a flawless finish that will leave your acoustic guitar looking brand new.
Using a Soft Cloth
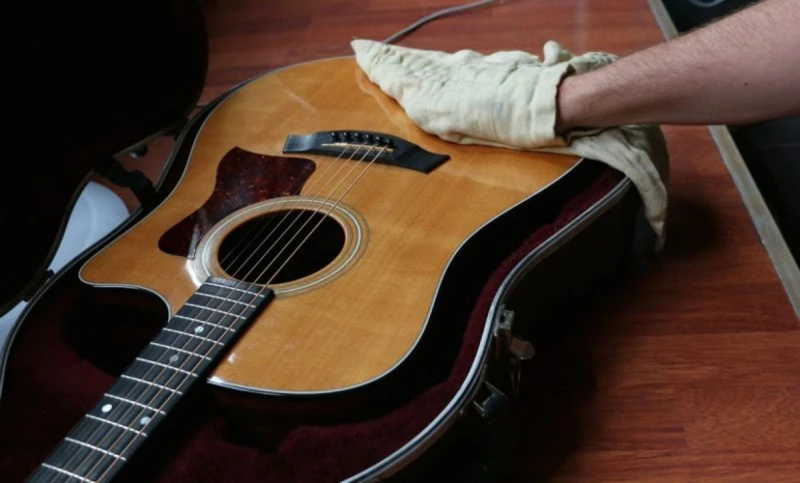
When it comes to polishing the body of your acoustic guitar, it’s important to use a soft cloth to avoid scratching or damaging the finish. Here are some tips for using a soft cloth to polish your guitar:
- Choose the right cloth: Microfiber cloths or cotton cloths are great choices for polishing your guitar. Avoid using rough or abrasive materials like paper towels, as these can scratch the finish of your guitar.
- Dampen the cloth: Before you start polishing your guitar, dampen your cloth slightly with water. This will allow the polish or wax to spread more evenly across the surface of your guitar.
- Apply the polish: Apply a small amount of guitar polish or wax to the cloth, then gently rub it onto the surface of your guitar in small circular motions. Be sure to cover all areas of the body, including hard-to-reach places like the neck joint and cutaway.
- Do not use too much polish: Using too much polish can lead to a build-up of product on your guitar, which can affect its sound quality. Use a minimal amount of polish and apply more if needed.
- Buff the surface: Once you have applied the polish to the surface of your guitar, use a clean, dry cloth to buff the surface in the same circular motions. This will remove any excess polish and provide a smooth, shiny finish.
Remember to use a soft cloth and gentle pressure when polishing your guitar. If you notice any scratches or damage to the finish, avoid using the guitar polish and bring it to a professional for repair. With proper care and maintenance, your acoustic guitar will look and sound great for years to come.
Using Polish or Wax
When it comes to polishing the body of your acoustic guitar, using the right polish or wax can make all the difference. Polishing your guitar with the wrong product can leave behind a hazy residue or even damage the finish of your instrument, so it’s important to choose the right polish for your guitar’s specific type of finish.
Below, we’ve put together a table of popular guitar polish and wax products, along with their recommended uses and key features:
Product | Recommended Use | Key Features |
---|---|---|
Dunlop 65 | Gloss or satin finishes | Non-abrasive formula, removes dirt and grime, creates a protective barrier |
MusicNomad MN105 | All finishes, including matte | Premium carnauba wax, removes fingerprints, UV protection |
Fender Speed Wax | Gloss finishes | Quick-drying formula, removes minor scratches, creates a protective coating |
Gibson Pump Polish | Gibson nitrocellulose finishes | Non-abrasive formula, removes dirt and fingerprints, restores luster |
Planet Waves Restore Deep Cleaning Cream Polish | Gloss or satin finishes | Two-in-one formula cleans and polishes, removes oxidation, protects against sweat and corrosion |
Regardless of which product you choose, it’s important to apply polish and wax sparingly and with a soft cloth. Rubbing too aggressively or using too much product can lead to buildup and damage over time. Instead, apply a small amount of polish or wax to a clean cloth, and work it into the guitar’s finish in circular motions. Then, use a separate clean cloth to buff away any excess product and reveal a beautiful, shiny finish.
Removing Scratches
After cleaning and preparing the body of your guitar for polishing, you may notice some scratches that you’d like to remove. Here are some steps to help you get rid of them:
Step 1: Evaluate the scratches on your guitar. If you can feel them with your fingernail, then they are likely too deep to remove with polish alone. In that case, you may need to consult with a guitar technician.
Step 2: For minor scratches, you can use a polishing compound to buff them out. Apply a small amount of the compound onto a soft cloth and gently rub the surface of the scratch in a circular motion.
Step 3: If the scratch is still visible, you can try using a scratch removal product specifically designed for guitars. Apply a small amount of the product onto a soft cloth and gently rub it over the scratch.
Step 4: If the scratch is still noticeable, you can use a fine grit sandpaper to sand down the area around the scratch. Be very careful not to sand too deeply or too aggressively. Use a piece of tape as a guide to avoid scratching other areas of your guitar.
Step 5: Once you have sanded the area, use a polishing compound again to bring back the shine. Apply the polishing compound onto a soft cloth and gently rub it over the area in a circular motion.
Step 6: If you still notice the scratch, repeat steps 4 and 5 until you are satisfied with the result.
It’s important to be careful when removing scratches from your guitar in order to avoid damaging the finish. With some patience and a gentle touch, you can restore your guitar’s shiny appearance and make it look like new again.
Polishing the Hardware of Your Guitar
As any musician knows, a guitar is not just a musical instrument, it’s also an investment. To keep it in pristine condition, you need to pay attention to the hardware as well as the body and neck. The hardware of a guitar includes the tuning pegs, bridge, frets, nut, and saddle, all of which can accumulate dirt, grime, and tarnish over time. To make your guitar shine like new, you need to get down to the nitty-gritty and give the hardware some well-deserved attention. Let’s dive into the process of cleaning and polishing the hardware of your guitar.
Cleaning the Tuning Pegs
When it comes to polishing your acoustic guitar, not only should you focus on the body and hardware, but you should also pay attention to the smaller components like the tuning pegs. These pegs are responsible for fine-tuning the strings and can accumulate dirt, dust, and grime over time. Cleaning them ensures that they perform optimally and maintain their shine.
To clean your tuning pegs, you’ll need some basic supplies: a soft cloth, rubbing alcohol, and a small brush like a toothbrush. Follow these steps to clean your tuning pegs properly:
Step 1: | Remove the strings from the tuning pegs. This will give you easier access to the pegs themselves. |
Step 2: | Dab a small amount of rubbing alcohol onto your cloth. Make sure it’s not too wet, as excess liquid can damage the pegs. |
Step 3: | Using the cloth and a small brush, lightly scrub the surface of the tuning pegs to remove any accumulated dirt and grime. |
Step 4: | Pay special attention to any hard-to-reach areas. Use the brush bristles to get into crevices or tight spaces. |
Step 5: | Finally, wipe the tuning pegs clean with a dry cloth. Make sure that you’ve removed all of the dirt and alcohol, as any remaining moisture can damage the pegs. |
Cleaning your tuning pegs doesn’t take much time, but it can make a significant difference in the way your guitar performs. With clean pegs, you’ll have an easier time tuning your strings, and your guitar will look and sound better overall.
Polishing the Bridge
When polishing your acoustic guitar, it’s essential to give attention to every part, including the bridge. The bridge is the small wooden or plastic structure that keeps the strings anchored to the body of the guitar. Here are some steps to help you polish the bridge:
- Remove the strings from the guitar: Before you start polishing the bridge, it is essential to remove the strings. Removing the strings will give you access to the bridge and make the polishing process much easier.
- Clean the bridge: Once you’ve removed the strings, take a soft cloth and remove any dust and dirt from the bridge. You can also use a small amount of guitar cleaner if the dirt is stubborn.
- Apply polish: Once the bridge is clean, take a small amount of guitar polish and apply it to the bridge. Make sure that you use a polishing compound that is safe for your type of bridge material. For example, if your bridge is made of plastic, you will need to use a plastic-safe polish.
- Polish the bridge: Using a clean, soft cloth, gently polish the bridge in circular motions. Make sure that you apply enough pressure to remove any dirt or grime, but not too much that you risk damaging the bridge. Be careful around any moving parts, like the saddle or pins.
- Remove excess polish: Once you’ve finished polishing the bridge, take a clean cloth and wipe away any excess polish. Doing this will prevent the polish from hardening and damaging the bridge.
- Replace the strings: When you’ve completed polishing the bridge, replace the strings, and tune the guitar.
Polishing the bridge of your acoustic guitar may seem like a minor detail, but it can make a big difference in the overall appearance of your instrument. A clean and polished bridge adds to your guitar’s aesthetics, while also preventing dirt and debris from building up and causing damage. Regular cleaning and polishing can help maintain the life and longevity of your guitar.
Polishing the Frets
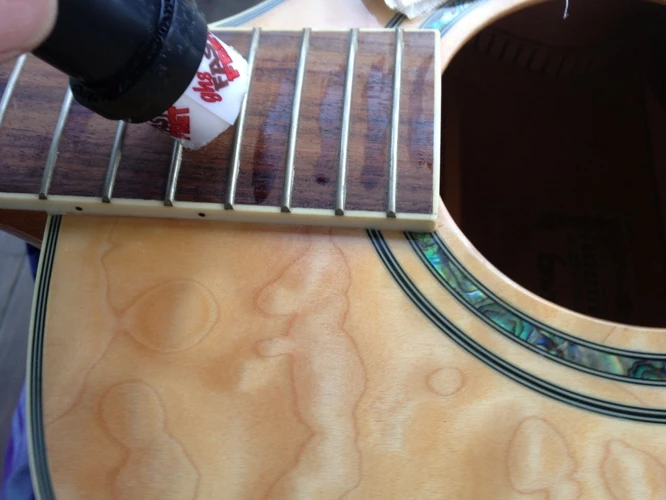
One important aspect of polishing your guitar is polishing the frets. Over time, the metal frets can become tarnished or dirty, affecting the playability of your guitar. Here are some steps to follow when polishing your frets:
- Gather materials: To polish your frets, you will need some steel wool (preferably 0000 grade), a small piece of cloth or an old t-shirt, and some fretboard oil.
- Clean the fretboard: Before polishing your frets, you want to make sure your fretboard is clean. You can use a dry cloth to wipe down the fretboard or use a guitar cleaning solution.
- Protect the fretboard: To protect the fretboard while polishing, wrap it in a cloth or masking tape. This will prevent any scratches or damage to the wood while you work on the frets.
- Polish the frets: Take the steel wool and rub it gently against each fret, moving back and forth. This action will remove any dirt or grime that has built up on the frets over time. Be careful not to apply too much pressure or you could scratch the frets.
- Clean the frets: Next, take a clean piece of cloth and wipe down each fret to remove any remaining steel wool fibers.
- Condition the fretboard: Once you have finished polishing the frets, it’s essential to condition your fretboard with oil to prevent any dryness or cracking. Apply a few drops of fretboard oil to a clean cloth and rub it gently into the fretboard.
Polishing the frets is not only beneficial for the longevity of your guitar, but it can also improve the playing experience. By following these steps, you can ensure that your frets are clean and polished, giving your guitar a sleek and professional look.
Polishing the Nut and Saddle
After polishing the hardware of your guitar, it’s time to focus on the nut and saddle. These small components may seem insignificant, but they play a crucial role in the overall sound and playability of your guitar. Here are the steps to polishing them to a shine:
- Remove strings: Start by removing the strings from your guitar to easily access the nut and saddle.
- Clean: Use a soft cloth or toothbrush to remove any dirt or debris from the nut and saddle. Take care not to apply too much pressure, as you don’t want to damage these delicate parts.
- Polish: Once you’ve cleaned the nut and saddle, apply a small amount of specialized polish to a clean cloth. Be sure to use polish that is safe for use on guitar parts. Gently rub the polish into the nut and saddle, using a circular motion.
- Buff: After applying the polish, use a separate clean cloth to buff the nut and saddle to a high shine. Take your time and make sure you’ve removed all excess polish.
- Replace strings: Finally, replace the strings back onto the guitar, making any necessary adjustments to the nut and saddle height as needed.
Polishing the nut and saddle may seem like a small detail, but it can make a big difference in the overall look and sound of your guitar. By taking the time to properly clean and polish these components, you’ll keep your guitar playing smoothly and looking its best for years to come.
Polishing Your Guitar’s Neck
As a guitar player, maintaining the quality of your instrument is essential to producing the best sound possible. While polishing the body and hardware of your acoustic guitar can help it look shiny and new, it is equally important to pay attention to the neck of your guitar. The neck of your guitar is the foundation of your music, and it requires proper cleaning and maintenance just as much as any other part of your guitar. In this section, we will guide you through the step-by-step process of cleaning and polishing your guitar’s neck and fretboard, ensuring that your playing experience is always smooth, enjoyable and looking its best. So, grab your guitar, and let’s get started with improving its tone and shine!
Cleaning and Polishing the Neck
When it comes to polishing your acoustic guitar’s neck, it is important to approach it with caution to avoid damaging the instrument. Here are some steps to follow:
Step | Description |
---|---|
1 | Clean the neck with a soft cloth: To begin, wipe down the neck with a clean, dry cloth to remove any dust or dirt. If necessary, dampen the cloth slightly with water or a small amount of guitar polish. |
2 | Apply guitar polish: Apply a small amount of guitar polish onto another soft cloth, then gently rub it into the wood in circular motions. Be careful not to apply too much pressure to avoid damaging the neck’s finish. |
3 | Buff the neck: After applying the polish, use a clean, dry cloth to buff the neck, again using circular motions. This will help to remove any excess polish and bring out a shine in the wood. |
When conditioning the fretboard, it is important to choose the right product for the job. Look for a high-quality fretboard conditioner that is specifically designed for use on acoustic guitars. Apply a small amount of the conditioner onto a soft cloth and gently rub it into the wood. Be sure to avoid getting the conditioner on the frets or the guitar’s body.
By taking the time to properly clean and polish your guitar’s neck, you can help to maintain its playability and overall appearance. However, it’s important to proceed with caution and to use the right products and techniques to avoid damaging the instrument.
Conditioning the Fretboard
After polishing the body and hardware of your acoustic guitar, it’s time to move on to the fretboard. This is an essential step in maintaining the condition of your guitar and making sure it stays in top playing shape. But how do you condition the fretboard?
The first step is to choose the right conditioner. There are plenty of options available, but it’s important to choose one that is specifically designed for use on fretboards. It’s best to avoid using regular glass or furniture cleaners, as they may cause damage to your guitar’s delicate frets.
Fretboard Conditioner is the best option as it is specifically designed to nourish and hydrate the fretboard, preventing it from drying out and cracking over time.
To condition the fretboard, you’ll need:
Materials: | Tools: |
---|---|
Fretboard conditioner | Clean cloth |
Once you have the materials and tools ready, follow these steps:
- Apply a small amount of fretboard conditioner to a clean cloth.
- Gently rub the conditioner into the fretboard, using circular motions.
- Let the conditioner sit on the fretboard for a few minutes to allow it to penetrate the wood.
- Using a clean cloth, wipe off any excess conditioner.
It’s important not to overdo it with the conditioner. Using too much can be just as harmful as not using enough, and can leave your fretboard feeling greasy and slippery.
By conditioning your fretboard regularly, you’ll not only keep it looking and feeling great, but you’ll also help to extend the life of your guitar. With just a little bit of care and attention, your acoustic guitar will continue to shine and play beautifully for years to come.
Conclusion
As we near the end of our ultimate guide to polishing your acoustic guitar, it’s important to reflect on the significance of maintaining your instrument’s shine. The process may seem daunting at first, but with the right tools and techniques, you can achieve a polished finish that will make your guitar shine like new. In this final section, we’ll summarize the key takeaways and tips for maintaining your guitar’s shine, and discuss the broader benefits that come with proper guitar maintenance. So let’s dive in and see how you can keep your acoustic guitar looking and sounding its best!
Maintaining Your Guitar’s Shine
As a guitar owner, you want your instrument to shine and look as good as new for as long as possible. Maintaining your guitar’s shine is just as important as polishing it. Here are some tips for keeping your guitar looking great:
- Wipe down your guitar after each use: This will help remove any sweat, grime, or oil that may accumulate on the guitar’s body, neck, and fretboard. A microfiber cloth is an excellent option for cleaning and drying your guitar.
- Store your guitar properly: When you’re not playing, store your guitar in a cool, dry place away from direct sunlight, heat, and moisture. Humidity levels can affect the condition of your guitar, so consider purchasing a hygrometer to monitor the humidity in the room where you store your guitar.
- Keep your guitar case clean: If you use a case to store your guitar, make sure it’s free from debris and dust. A dirty case can transfer grime onto your shiny guitar, which is not what you want.
- Maintain your guitar strings: Regularly changing your guitar strings will not only improve the sound of your instrument, but it will also prevent dirt and grime from building up on the fretboard and strings.
- Avoid contact with chemicals: When handling your guitar, avoid contact with any chemicals. This includes cleaners, solvents, and oils, as they can damage your guitar’s finish and hardware.
Taking care of your instrument is a great way to ensure that it continues to look and sound great for years to come. By following these maintenance tips in addition to polishing your guitar, you can maintain its shine and quality.
The Benefits of Polishing
Polishing your acoustic guitar has several benefits that are worth noting. Here’s a list of the top advantages of regularly polishing your guitar:
- Longevity: Regular polishing of your guitar will help to protect it from wear and tear, ultimately extending its overall lifespan.
- Appearance: A freshly polished guitar looks visually appealing. It adds a shine and luster to your guitar, making it stand out when you’re performing on stage or even just admiring it at home.
- Hygiene: Polishing your guitar helps to remove dirt, dust and grime that can accumulate over time. This is important for the health of both you and your guitar.
- Value: If you plan on selling your guitar in the future, a well-maintained instrument can fetch a higher price than one that is damaged and dirty.
- Playing Comfort: A polished guitar is more comfortable to play as it eliminates any rough spots on the guitar’s surface that can cause discomfort on your skin or clothing.
- Tone Quality: While it may seem surprising, polishing your guitar can also have a positive impact on the tone quality. Removing any buildup of dirt or oils from the fretboard and strings can allow for a clearer and brighter sound.
Considering all of these benefits, it’s clear that polishing your acoustic guitar should be a routine part of your guitar maintenance. Incorporating regular polishing into your guitar care routine will ensure that your instrument remains in excellent condition and can be enjoyed for many years to come.
Frequently Asked Questions
1. Can any type of polish be used on an acoustic guitar?
No, only polishes formulated specifically for musical instruments should be used to prevent damage to the finish or wood.
2. How often should I polish my acoustic guitar?
It’s recommended to polish your guitar every few months or as needed to maintain its shine and protect the finish.
3. Can I polish my guitar if it has a satin finish?
Yes, but use caution and test the polish on a small, inconspicuous area first to make sure it doesn’t alter the satin finish.
4. Should I remove the strings before polishing my guitar?
It’s not necessary but can make it easier to access all areas of the guitar for cleaning and polishing.
5. Is it safe to polish the fretboard?
Yes, but be careful not to get polish on the frets or inlays. Use a separate cloth specifically for the fretboard.
6. Can scratches be removed during the polishing process?
Light scratches may be able to be removed with a special guitar scratch remover or polish, but deeper scratches may require professional repair.
7. Should I polish the inside of my guitar?
No, polishing the inside of the guitar could alter its tone or cause damage. The inside should be left untouched.
8. Can I use a power buffer to polish my guitar?
It’s not recommended, as power buffers can damage the finish if used improperly. Stick to hand-polishing with a soft cloth.
9. Is it necessary to condition the fretboard after polishing?
Yes, it’s recommended to condition the fretboard with a guitar-specific fretboard oil or conditioner to prevent drying and cracking.
10. Can I polish my guitar if it has a matte finish?
Yes, but only use a polish specifically designed for matte finishes to avoid altering the texture or appearance of the finish.