Playing the acoustic guitar is a pastime that many people enjoy. However, over time, the strings on your guitar can become worn out or damaged, which can affect the sound and playability of your instrument. Restringing an acoustic guitar is a relatively simple process that you can do yourself, and it can make a big difference in the sound of your guitar. In this blog post, we will walk you through the steps of how to restring an acoustic guitar.
Gathering Your Materials
Before you begin, you will need to gather a few materials. You will need:
* A new set of acoustic guitar strings
* Wire cutters
* A string winder (optional)
* A bridge pin puller (optional)
You can find these materials at your local music store or online.
Removing the Old Strings

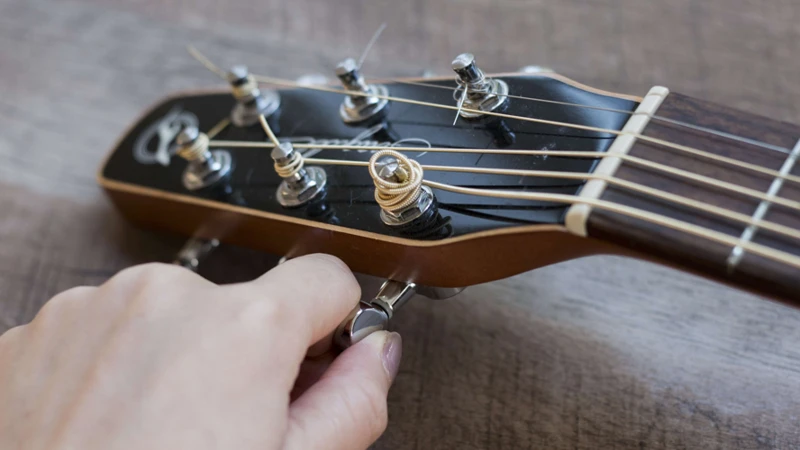
The first step in restringing your acoustic guitar is to remove the old strings. Start by loosening the tuning pegs on the head of the guitar until the strings are completely slack. Then, unwind the strings from the tuning pegs and remove them from the guitar.
Next, you will need to remove the bridge pins that hold the strings in place at the bridge of the guitar. You can do this by gently pulling on the pins with your fingers or by using a bridge pin puller. Once the pins are removed, you can slide the strings out of the bridge.
Installing the New Strings

Now it’s time to install the new strings. Start by threading the new strings through the holes in the bridge of the guitar. Make sure that the strings are in the correct order and that the ball end of the string is on the bottom.
Next, thread the strings through the tuning pegs on the head of the guitar. Again, make sure that the strings are in the correct order and that the string is threaded through the peg in the correct direction.
Once the strings are in place, you can begin to tighten them. Start by turning the tuning pegs a few times to get the strings started. Then, use the string winder (if you have one) to tighten the strings the rest of the way. Be sure to tighten the strings evenly and to stop tightening when the string is in tune.
Stretching the Strings

After you have installed the new strings, you will need to stretch them to help them stay in tune. To do this, simply pull on the strings gently, starting at the bridge and moving towards the tuning pegs. Then, tune the strings again. Repeat this process a few times until the strings stay in tune.
Trimming the Excess String

Once the strings are stretched and in tune, you can trim the excess string. Use the wire cutters to cut the string as close to the tuning peg as possible. Be careful not to cut the string too short, as this can make it difficult to tune the string later on.
Tips and Tricks
Here are a few tips and tricks to help you restring your acoustic guitar:
* Use a string winder to make the process go faster.
* Use a bridge pin puller to make it easier to remove the bridge pins.
* Make sure that the strings are in the correct order before installing them.
* Stretch the strings slowly and evenly to avoid damaging the guitar.
* Take your time and don’t rush the process.
Looking to maintain your acoustic guitar? Explore our articles on strumming techniques, cleaning tips, using a clip-on tuner, and proper capo placement for the acoustic guitar. Upgrade your skills and knowledge to keep your instrument in top shape!
Conclusion
Restringing an acoustic guitar is a simple process that you can do yourself. By following the steps outlined in this blog post, you can give your guitar a new lease on life and improve its sound and playability. So, gather your materials, take your time, and enjoy the process. Happy playing!