If you’re a mandolin player, you know how important it is to have a well-strung instrument. And if you’re looking to string your mandolin tailpiece, you’ve come to the right place! In this article, I’ll give you a step-by-step guide on how to string a mandolin tailpiece. With the right supplies, knowledge, and a bit of patience, you’ll be well on your way to having a perfectly strung mandolin. So let’s get started!
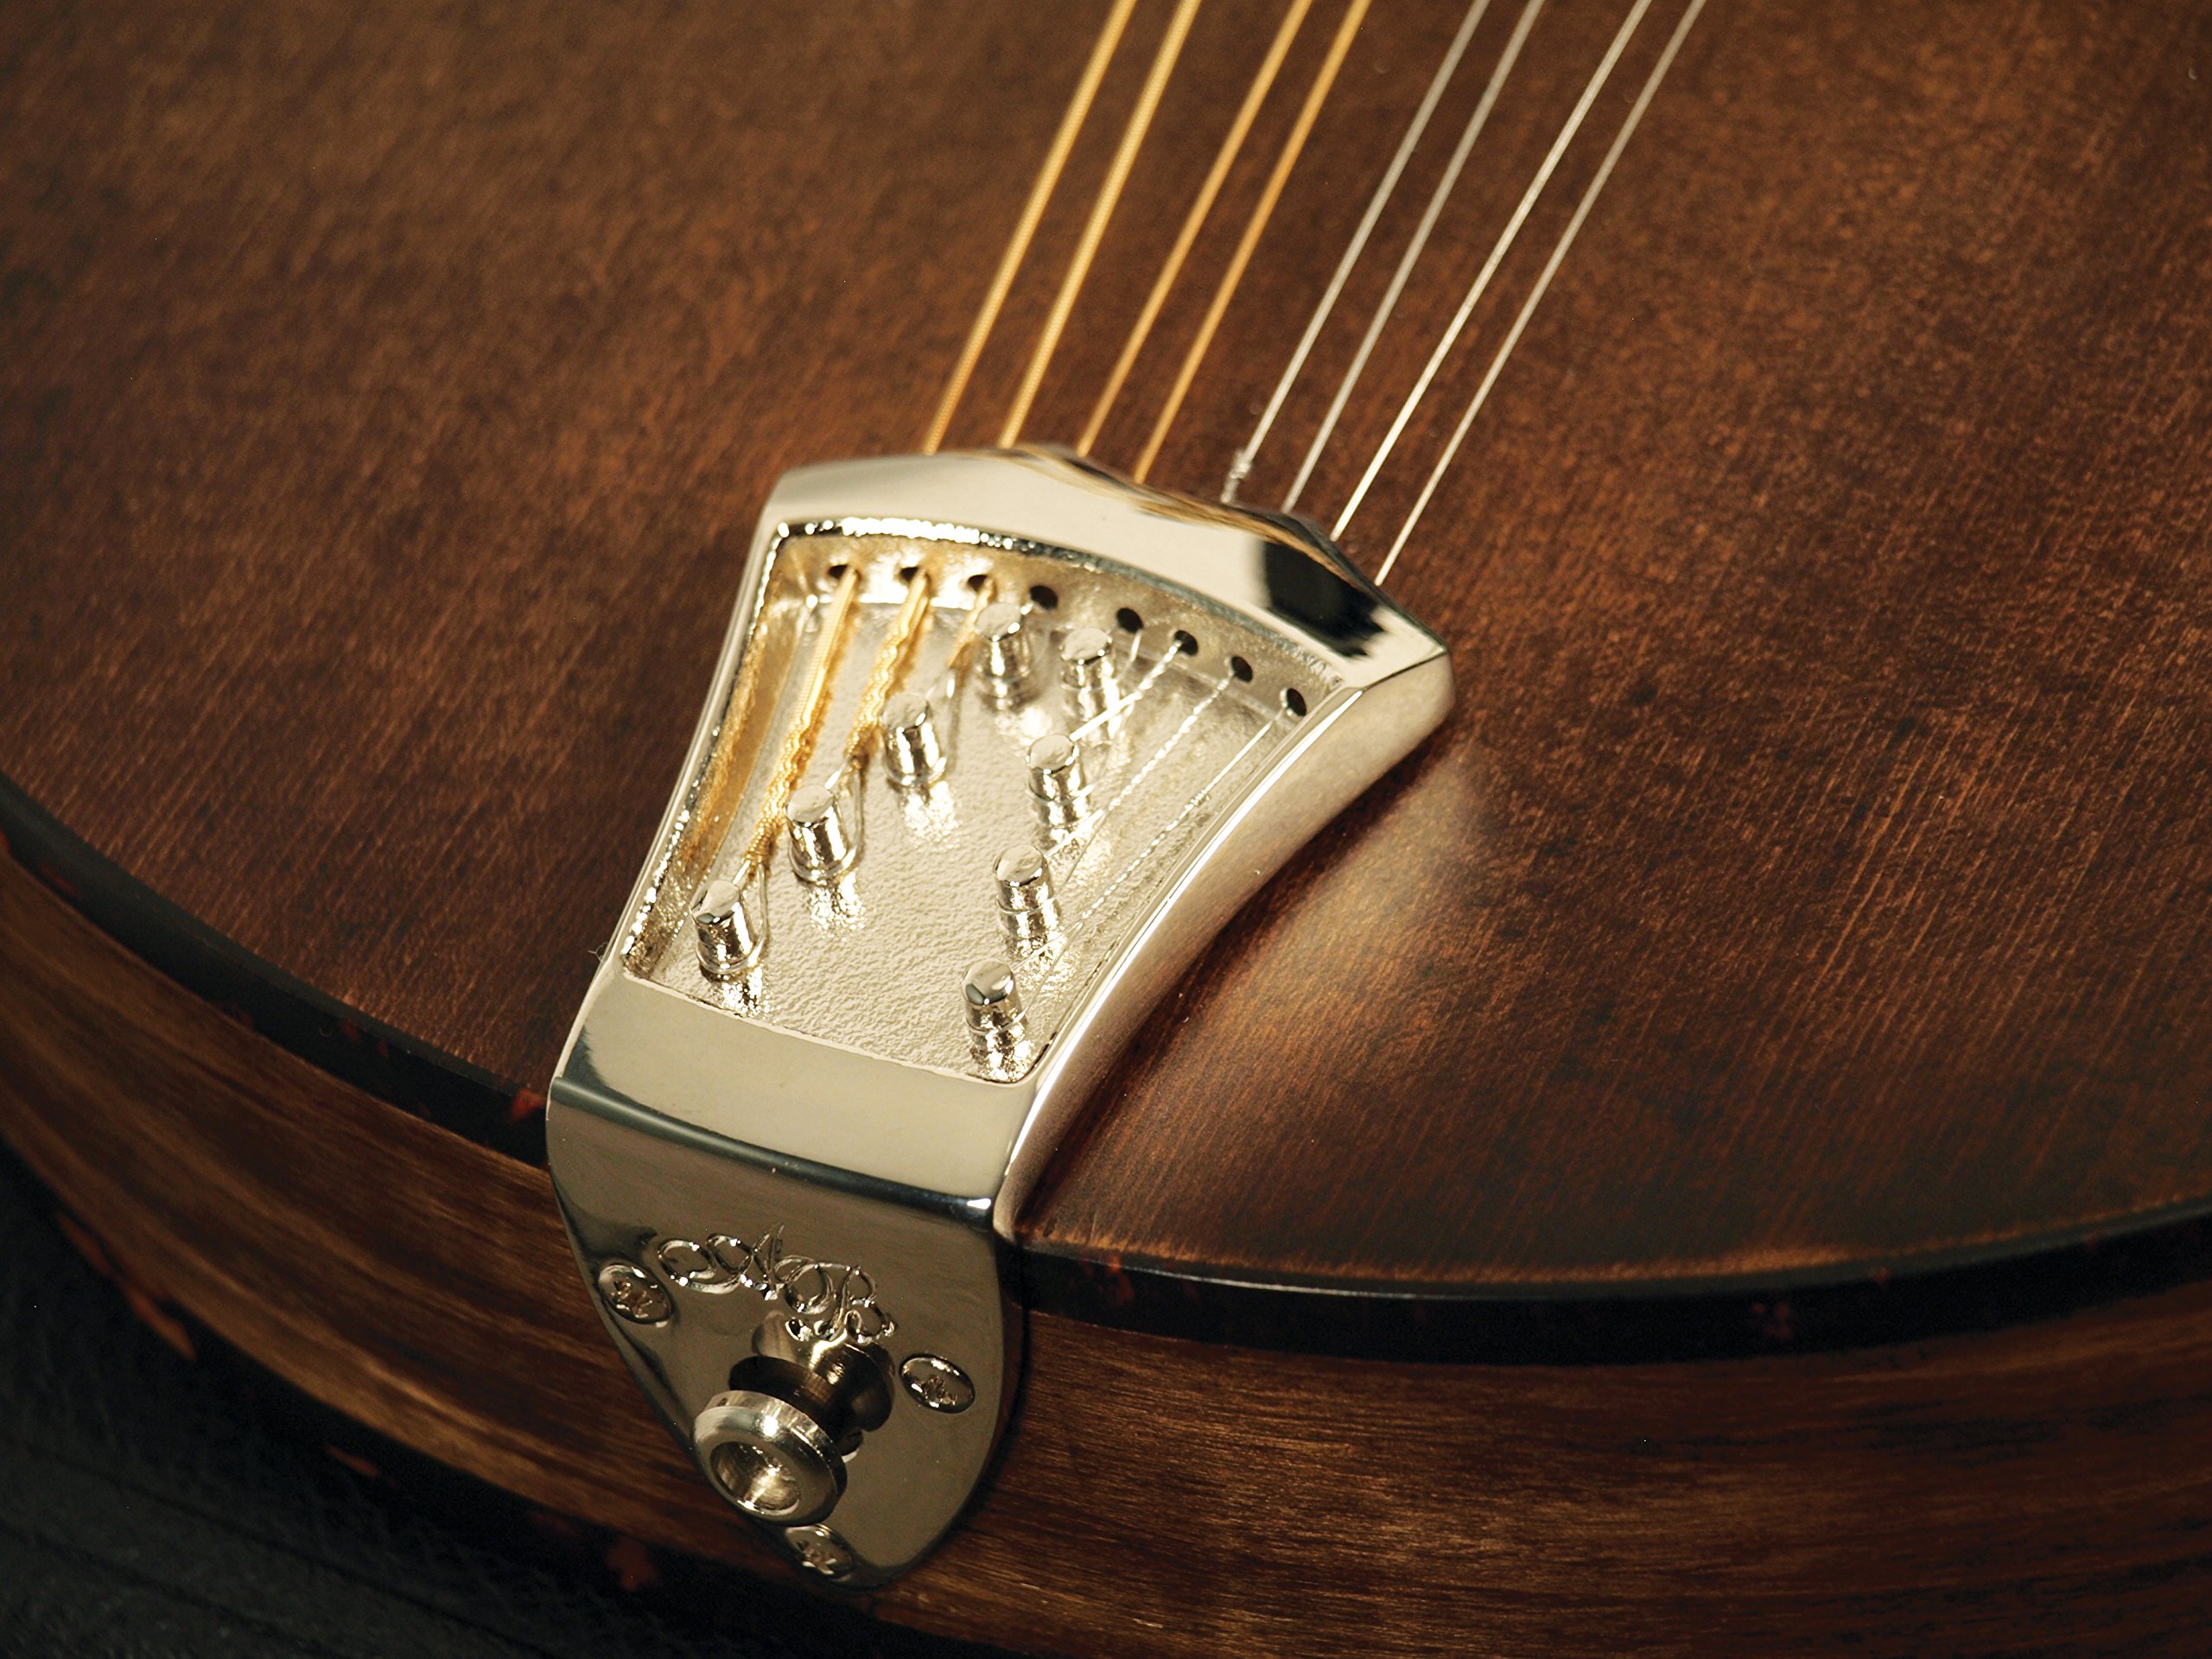
Parts of a Mandolin Tailpiece
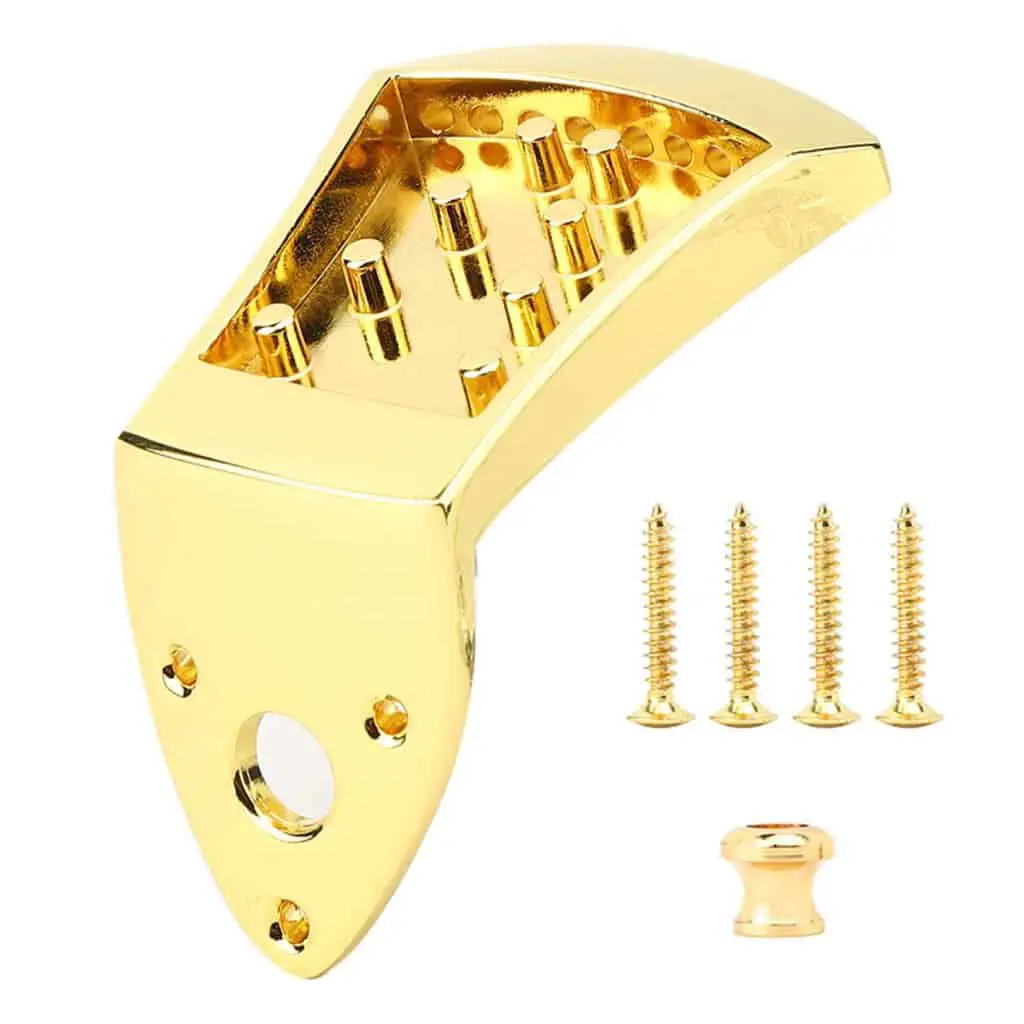
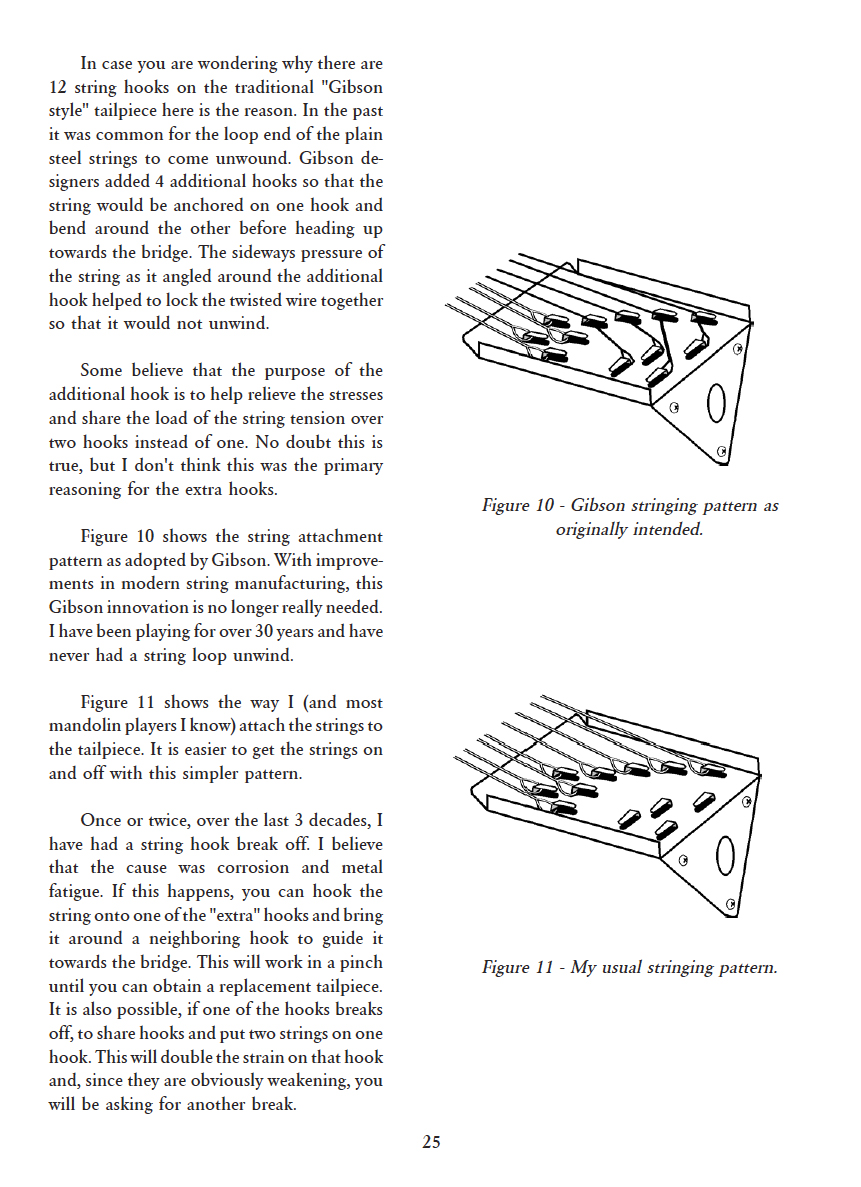
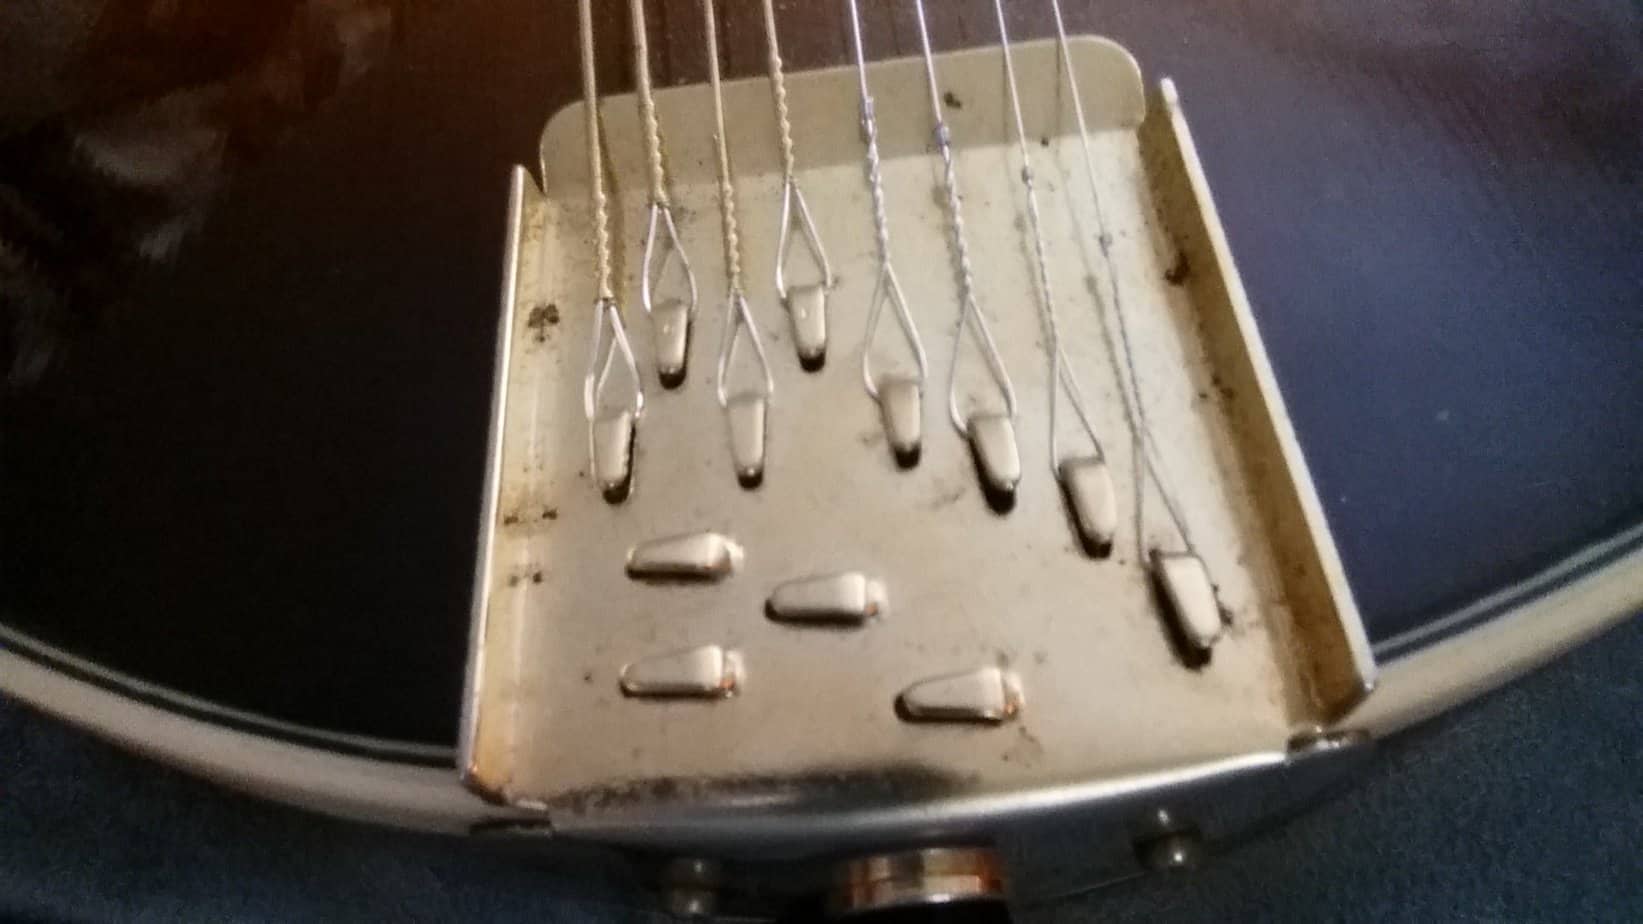
The mandolin tailpiece is made up of four main parts: the tailpiece, the tailpiece bracket, the tailpiece screws, and the tailpiece wire. The tailpiece is the main component of the tailpiece; it is the piece that holds the strings in place. The tailpiece bracket is a metal piece that attaches the tailpiece to the body of the mandolin. The tailpiece screws are used to secure the tailpiece bracket to the body of the mandolin. The tailpiece wire is a small, thin wire that runs through the tailpiece and attaches the strings to the tailpiece.
Preparing the Mandolin
Remove the strings from the mandolin’s tailpiece. Loosen the tailpiece’s screws with a screwdriver. Carefully remove the tailpiece from the mandolin body. Make sure to keep the screws in a safe place. If the tailpiece is held in place by clips, remove them gently. Place the tailpiece away from the mandolin. Wipe down the mandolin’s fretboard, neck and body with a clean, dry cloth. This will remove any dirt or debris.
Attaching the Strings
- Connect each string to its respective tuning peg by looping the string through the hole in the peg.
- Wind the string around the tuning peg in the same direction, making sure to keep the string tight and secure.
- Once the string is wound around the peg, use the bridge pins to secure the strings in place. Insert the bridge pins into the bridge holes, then loop the strings over the pins.
- Finally, use a pair of pliers to tighten the bridge pins and ensure that the strings are securely in place.
Tuning the Mandolin
- Tighten the strings at the tuners, using the tuning pegs, until the string is in tune.
- Check the tuning by plucking the string and listening for the correct pitch.
- Adjust the tuning peg to raise or lower the pitch until the string is in tune.
- Repeat the steps for all four strings.
- Once all strings are in tune, use a chromatic tuner to make sure they are all in tune with one another.
- If a string is out of tune, adjust the tuning peg accordingly.
- Continue to adjust the tuning pegs to make sure all strings are in tune with one another.
Adjusting the Tailpiece
- Check the bridge and tailpiece to make sure they are properly aligned
- Tighten the tailpiece screws to the body of the mandolin
- Adjust the height of the strings on the tailpiece using the screws
- Ensure the strings are at a consistent height and are parallel to the neck of the instrument
- Set the string spacing on the tailpiece to match the bridge
- Tighten the tailpiece screws securely
Aligning the Bridge
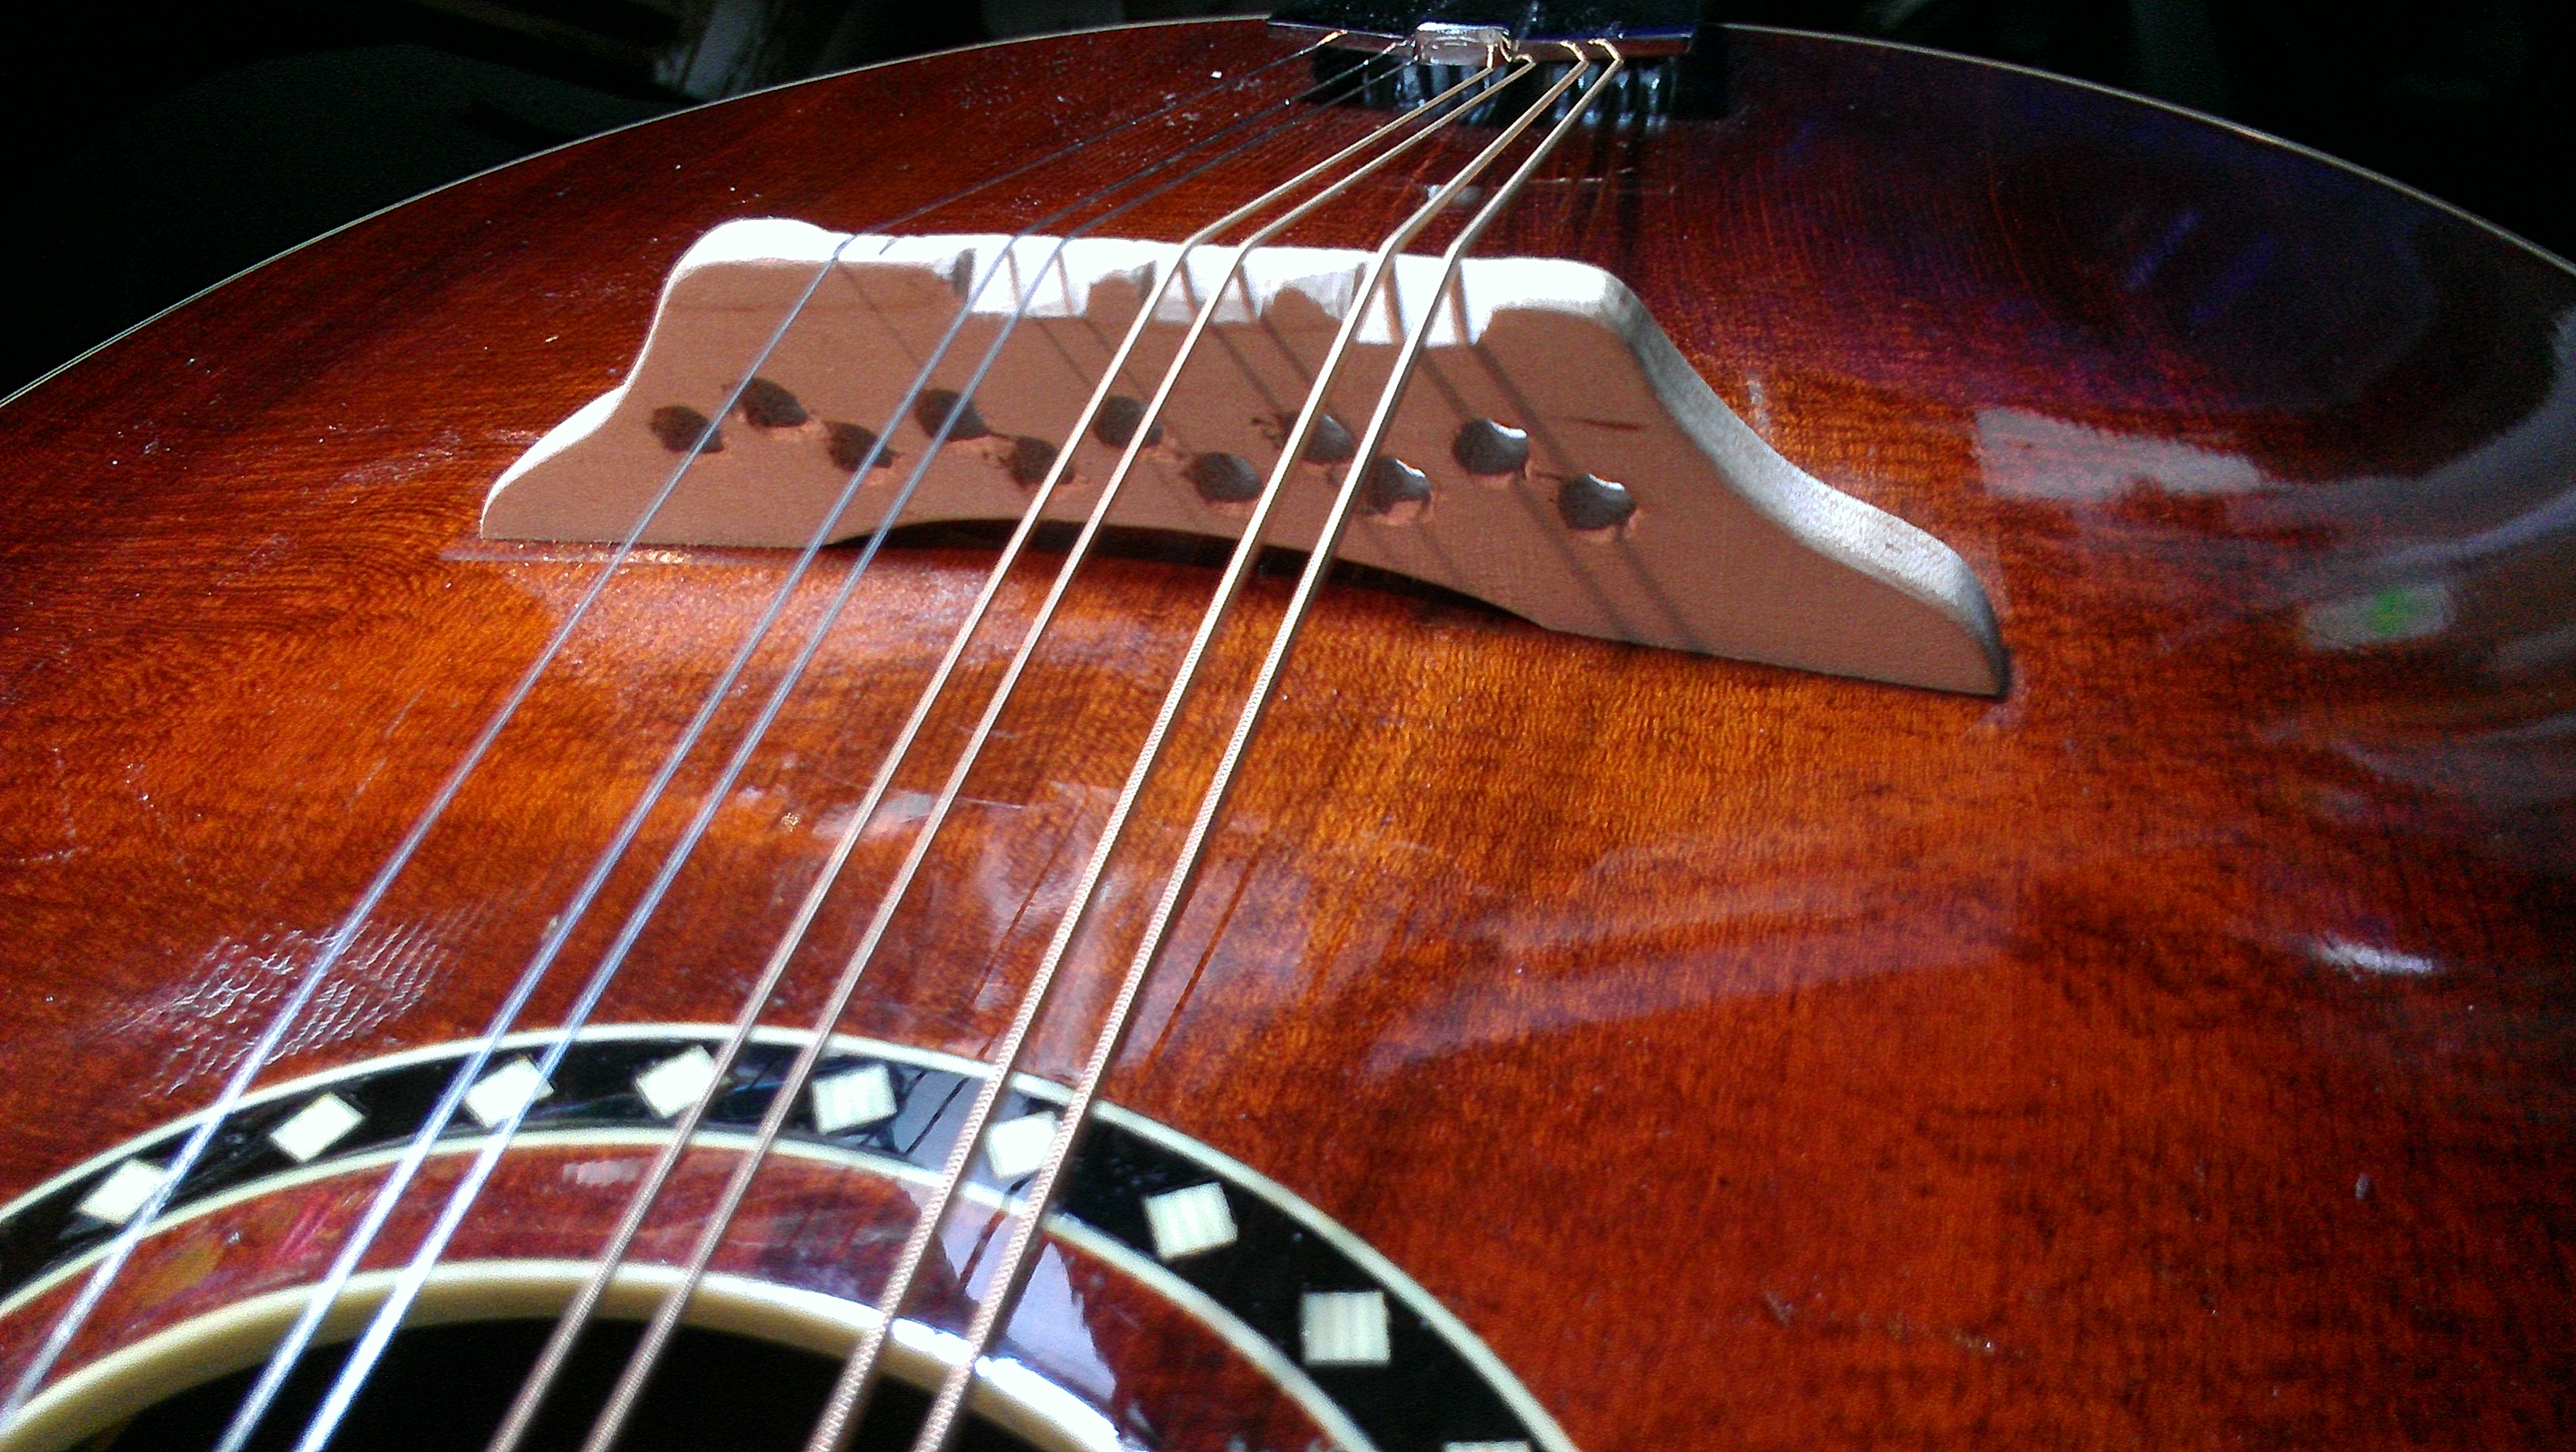
- Position the bridge on the mandolin so that the strings pass over the bridge at the desired angle.
- Tighten the bridge’s feet screws until the bridge is secure.
- Adjust the angle of the bridge by loosening the feet screws and sliding the bridge until the angle is correct.
- Tighten the feet screws once the bridge is in the desired position.
- Tune the strings to the desired pitch.
- Check the intonation of each string by playing a harmonic at the 12th fret and comparing it to the fretted 12th fret note.
- If the intonation is off, adjust the bridge slightly until the intonation is correct.
Replacing the Strings
- Unwind the string from the peg.
- Pull the string out of the tailpiece.
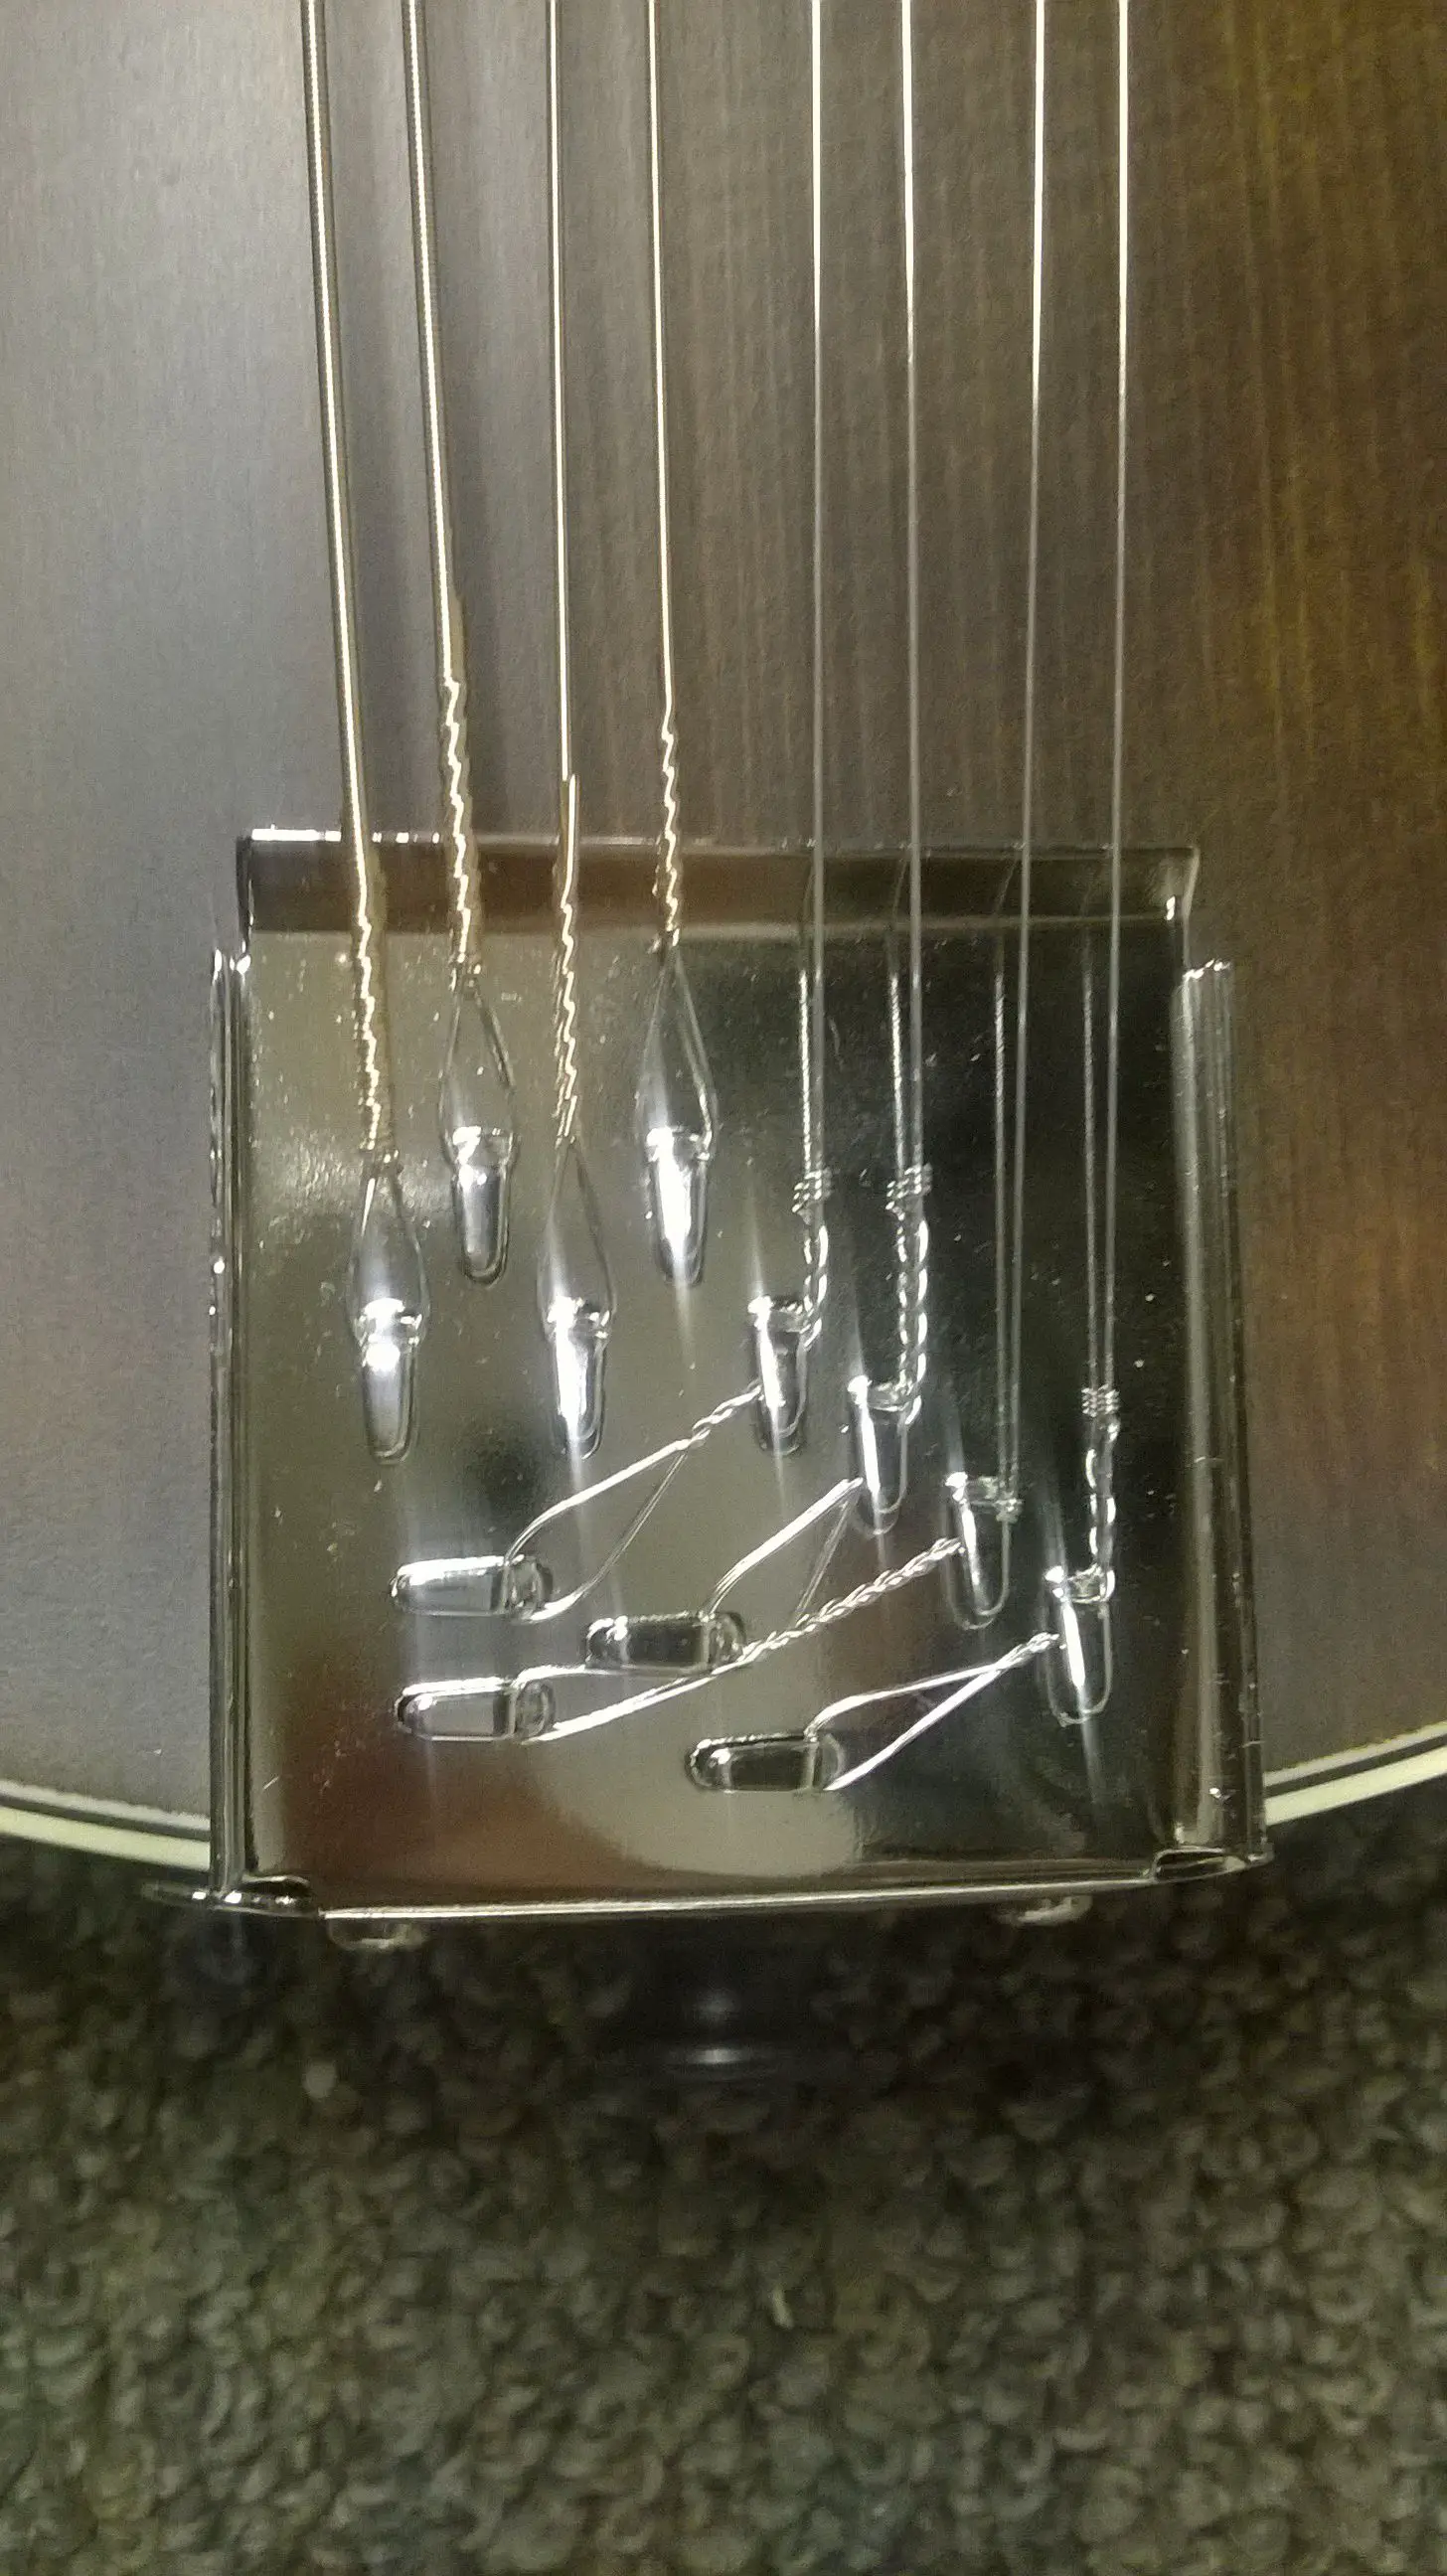
- Secure the ball-end of the string in the tailpiece slot.
- Wind the string around the peg.
- Tighten the string and check the tuning.
- Repeat the same steps for the other strings.
Maintaining the Tailpiece
| Task | Procedure |
|---|---|
| Cleaning | Use a clean cloth dampened with water to wipe down the tailpiece. |
| Tightening | Tighten the screws of the tailpiece with a Phillips head screwdriver. |
| Oil | Apply a light coat of oil to the tailpiece to prevent rust. |
Check the tailpiece periodically for any loose screws and for any signs of rust. If rust is present, use fine-grit sandpaper to gently remove it and then apply a light coat of oil.
Frequently Asked Questions
What are the Steps for Stringing a Mandolin Tailpiece?
1. Position the tailpiece at the end of the mandolin.
2. Thread the string through the tailpiece, looping it around the tailpiece post.
3. Tie a knot at the end of the string.
4. Pull the string up and thread it through the tuning peg hole, pulling it through to the back.
5. Wrap the string around the tuning peg, making sure to keep the string taut so it will not slip.
6. Turn the tuning peg to tighten the string.
7. Repeat steps 2-6 for each string.
8. Tune the strings to the desired pitch.
How do I align the strings on the tailpiece?
The strings should be aligned to the bridge of the mandolin, starting with the G-string at the top. Adjust the string height of the tailpiece to ensure that the strings are at the correct height. The strings should be parallel with the fretboard and should not cross over each other. Once the strings are aligned and the tailpiece height is adjusted, the strings should be securely fastened.
How do I make sure the strings are properly secured?
Once the strings are in place, use a pair of needle-nose pliers to tighten the string ends at the tailpiece. Pull the strings tight and pinch the ends with the pliers. This will secure the strings in place and keep them from slipping off.
What type of bridge should I use for stringing a mandolin tailpiece?
A mandolin bridge should be used when stringing a mandolin tailpiece. It is an adjustable bridge made of hardwood and is designed to hold the strings in place. The bridge should be positioned so that the strings are evenly spaced over the bridge and the fingerboard. The bridge should also be set at the correct height and angle for optimal playing.
What type of knot should I use for tying the strings to the bridge?
A Double Overhand knot is the most commonly used knot to secure strings to the bridge of a mandolin. To tie a Double Overhand knot, simply tie an overhand knot, then tie a second overhand knot on top of the first, pulling the second knot tight. This knot is secure and easy to tie and adjust when needed.
Conclusion
Stringing a mandolin tailpiece is a simple process and is easy to accomplish with a few basic tools. After the strings have been attached to the tailpiece, the bridge can be adjusted to the desired height and the strings can be tuned. With this step-by-step guide, you should have no problem learning how to string a mandolin tailpiece and keeping your instrument in tune.